Introduction
In this guide, I’ll show you how you can place your Webdock servers in a VLAN-like environment using Tailscale.
Prerequisites
- At least 2 Webdock servers running any of the Linux distros Webdock supports (using 2 Ubuntu servers in our case)
- SSH access to your VPS
- A Tailscale account (a free account is sufficient)
Installing Tailscale
Installing Tailscale on your VPS is fairly simple. Switch to root user and run the one-line command to install.
$ sudo su
# curl -fsSL https://tailscale.com/install.sh | sh
Once the installation finishes run:
# tailscale up --accept-dns=false
The –accepts-dns flag makes sure that you’re connected to the Tailscale network but your server uses the DNS it is configured with but not Tailscale DNS.
Once you run the above command you’ll see a link. Something like this one.
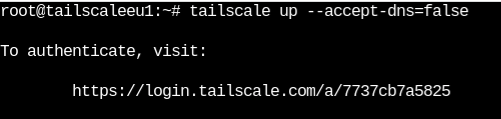
Browse to that link and log into your Tailscale account to authenticate.
Do this for all the machines you want to connect to Tailscale. You’ll see the connected machines in the Tailscale console.
Note: Tailscale, by default, sets the key expiry to 180 days. So after that period you need to re-authenticate the device. To disable this for a particular machine you can click on the three-dots (as you see in the image below) and hit “Disable Key Expiry”
In my case, I connected two machines to Tailscale and I see them in the Tailscale console.
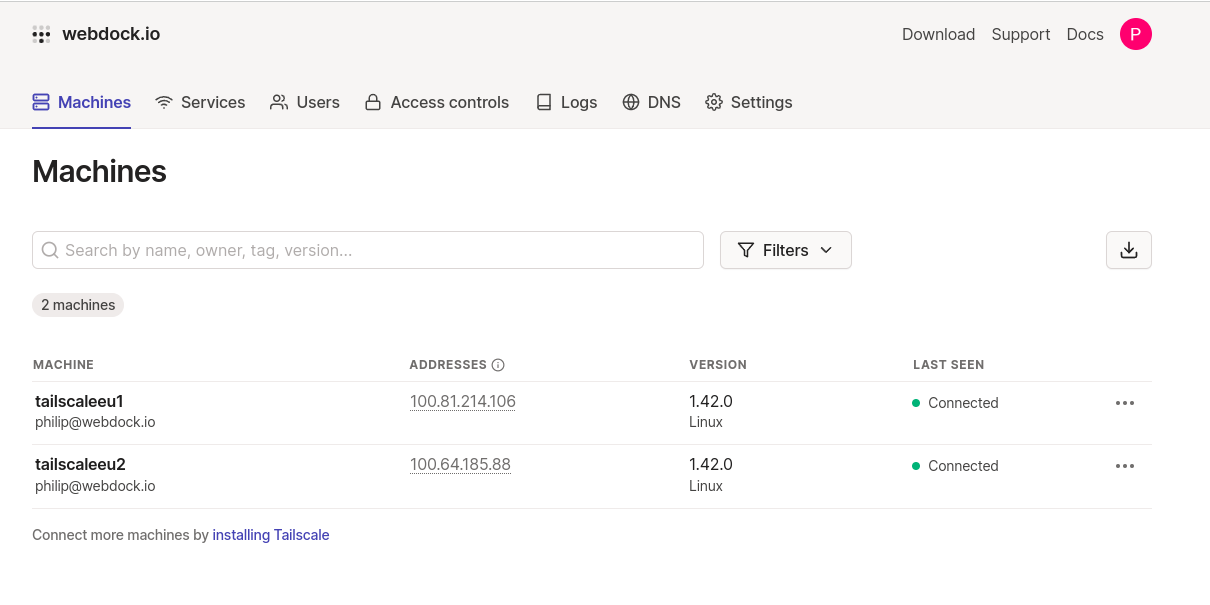
As you can see, there are two machines in my account and each machine has a dedicated Tailscale IP. Using this IP your servers can communicate over an end-to-end encrypted channel.
An Example
In order to demonstrate how communication can happen between two machines connected to Tailscale, I’ll bind the MariaDB database running on my second machine (tailscaleeu2) to Tailscale IP and then remotely connect to the database from my first machine (tailscaleeu1).
So here’s how I did it.
To bind my MariaDB server to tailscale IP, I edited the conf file located at “/etc/mysql/mariadb.conf.d/50-server.cnf” and changed the bind address to the machine’s Tailscale IP.

Then restarted MariaDB using:
$ sudo systemctl restart mariadb
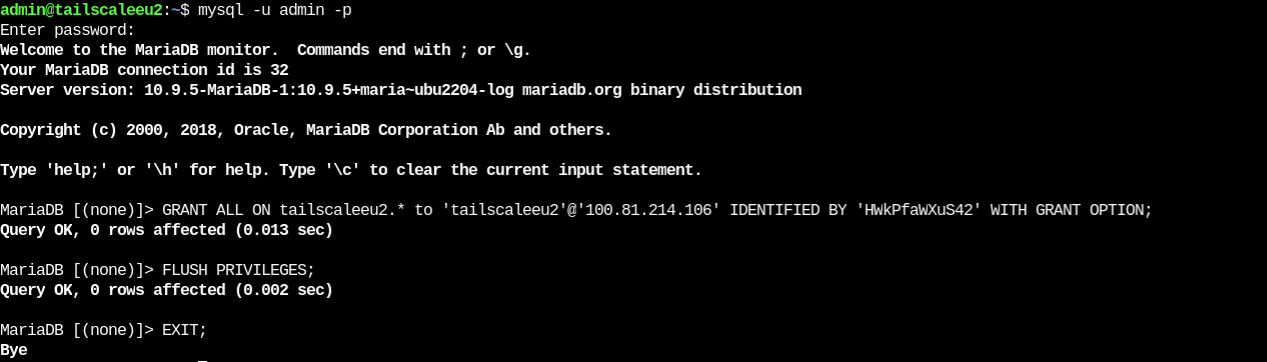
I then enabled remote access to my database on my second machine (tailscaleeu2) as you can see in the image using our guide.
Remote access to the DB is only allowed to Tailscale IP 100.81.214.106, the IP of my first machine (tailscaleeu1).
Since I have a firewall installed, I allowed incoming traffic to port 3306
$ sudo ufw allow 3306
From the first machine, I then accessed the DB running on the second machine using the MySQL CLI.
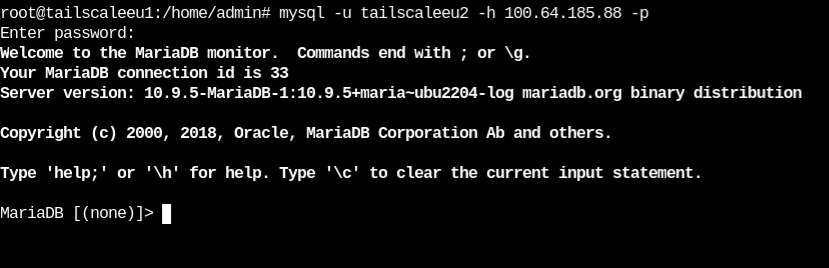
There it is! I accessed the DB running on the second machine from my first machine!
Conclusion
There are many other things you could do with Tailscale. The network is as secure as a local LAN network. The machines whichever are in the same Tailscale network (no matter where theyare physically located) can communicate just like how machines that are under local LAN can communcate.
That’s it. This guide showed how you can install and connect your machines to the Tailscale network and have shown an example of how I accessed a DB running on another machine within the Tailscale network.
