Introduction
This guide explains the step by step migration process of a website from CPanel to the webdock server. CPanel is a linux based web hosting control panel used to manage websites using a nice GUI. Following instructions will work on both LEMP and LAMP webdock instances.
Prerequisites
- A fresh Webdock cloud Ubuntu instance.
- You have shell (SSH) access to your VPS.
- Linux based web hosting Control Panel Account
Download your Website from CPanel
Depending upon which CPanel service you use, they might differ a little but their main functionality and features are the same such as dashboard, website tools etc. will be the same.
Log into the CPanel account and open the management dashboard.

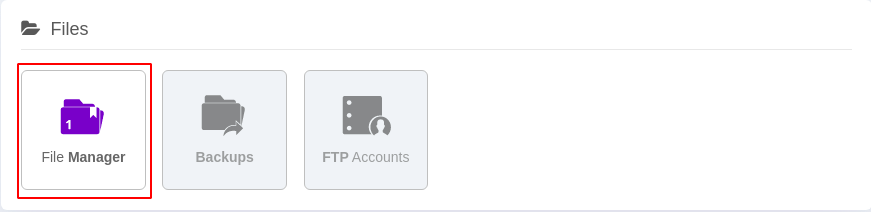
Go to the ‘Files’ section and click on ‘File Manager’.
Click on the ‘Upload Files’ button to open the File Manager.

This will open a File Manager on your browser.

Go to the ‘public_html’ directory and select the files you want to download.

Download these selected files.

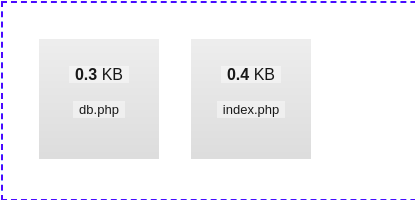
Go to ‘Downloads’ directory and list the downloaded files.
# cd ~/Downloads
# ls -lam
db.php,    .htaccess,        index.php
Update MySQL Connection Parameters
Now you need to update the database configuration file which is used to connect your website to the database. For example, in case of a WordPress website, open ‘wp-config.php’ file. This file contains configuration for MySQL settings, Secret Keys, Database table prefix and ABSPATH. Change the necessary MySQL connection parameters only such as highlighted below.
... snip ...
define( 'DB_NAME', 'database' );
define( 'DB_USER', 'db_username' );
define( 'DB_PASSWORD', 'db_password' );
define( 'DB_HOST', 'localhost' );

define( 'AUTH_KEY','' );
... snip ...
Take Backup of MySQL Database from CPanel
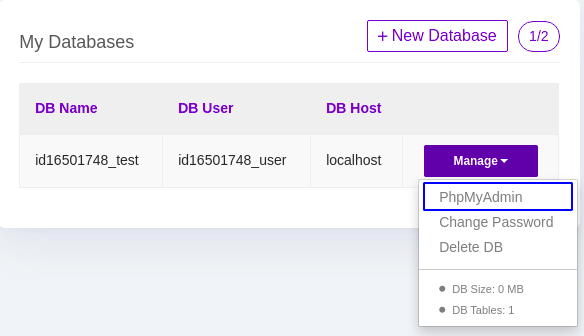
From the management dashboard of the CPanel, go to the ‘Databases’ section and click on ‘phpMyAdmin’.

It will display the database connection parameters. Click on ‘Manage’ and select the ‘phpMyAdmin’.
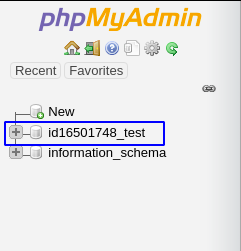
It will open the ‘phpMyAdmin’. From the side panel, click on the database.
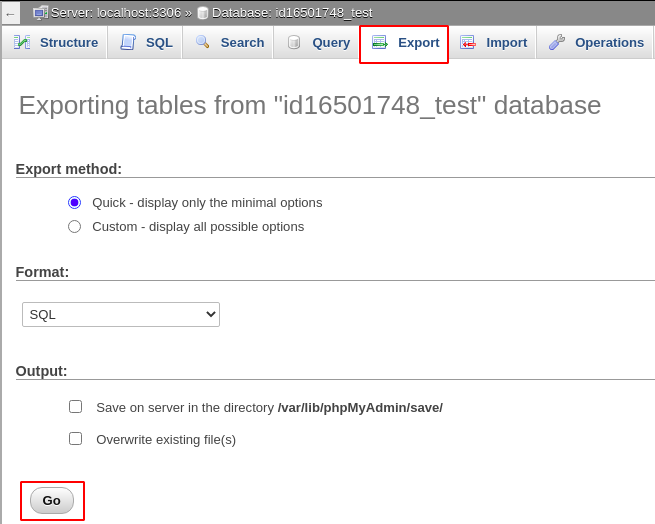
It will open the selected database. Select the ‘Export’ tab from top and click on ‘Go’ to download the database backup.
It will download a ‘.sql’ file on your system. Go to Downloads directory and list the downloaded database backup file.
# cd ~/Downloads
# ls
id16501748_test.sql
Upload Website to Webdock Instance
There are three different ways to upload your files to the server.
- Using File Manager
- Using FTP Server
- Using the scp Command
Using File Manager
Click on ‘Manage FTP’ in the server menu.

It will open the FTP Management window. Click on ‘Deploy File Manager’.
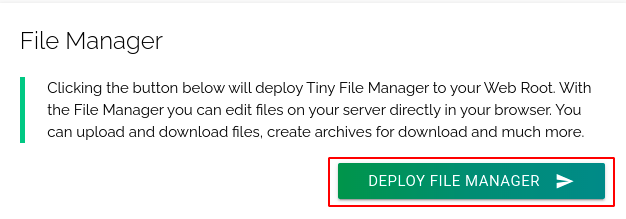
It will deploy a password protected file manager to the web root. Login to the file manager and Click on the ‘Upload’ button.
![]()
Upload the files from your system to the Webdock server.
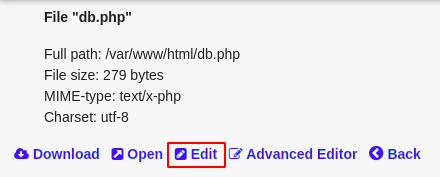
Files on the Webdock server can be edited using the File Manager. Just click on the file you want to edit and then click on the ‘Edit’ button to edit the file. You can for example edit your database config file for your application (wp-config example was shown above) using the File Manager.
Using FTP Server
Open filezilla or any other FTP client application on your local system. Enter the public IP of your Webdock server as host and provide username and password to connect to the FTP server on Webdock.

Upload files from your system to the Webdock instance over FTP.
Using the scp Command
Before uploading your files to the server using the scp command, zip the project directory.
# cd ~/Downloads
# mkdir site
# mv index.php db.php site/
# zip -r site.zip site
Use the scp command as follows to move files on the server.
# scp -i ~/.ssh/id_rsa site.zip [user]@[IPAddress]:~/ #using SSH keys
OR
$ scp site.zip [user]@[IPAddress]:~/ #using password
This will upload the zip file to the home directory of the Webdock instance. SSH into your Webdock instance and unzip the files.
$ ssh [user]@[IPAddress]
$ unzip site.zip #unzip the files
Move the files to the ‘/var/www/html’ directory on the Webdock instance and set permissions.
$ sudo mv site/* /var/www/html/
$ sudo $ chown -R www-data:www-data /var/www/html
Upload Database Backup to MySQL Server on Webdock Instance
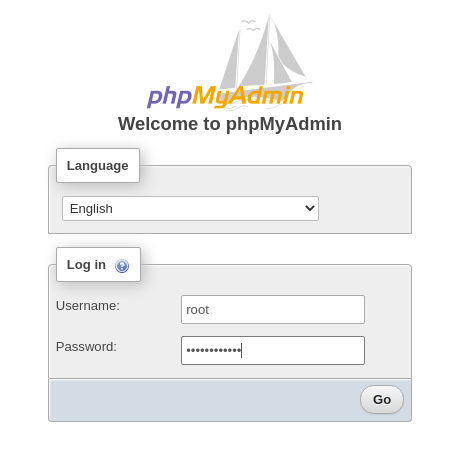
Open phpMyAdmin on the browser. Log into the phpMyAdmin as root user.
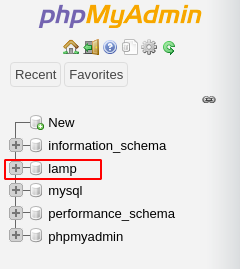
Select the database.
Select the ‘Import’ tab and click on ‘Choose File’ to select the sql dump.
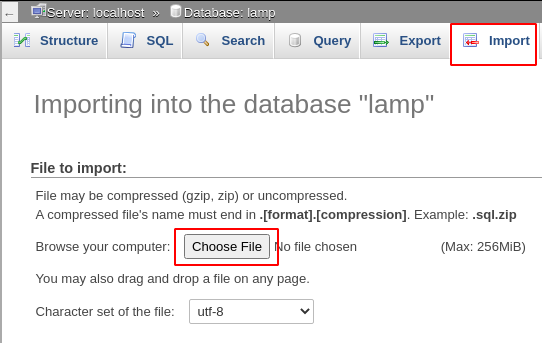
Upload sql dump and click on ‘Go’ at bottom right corner

It will import the database to your Webdock instance.
Conclusion
In this article we learnt how we can migrate a website from CPanel to Ubuntu LEMP or LAMP Webdock instance. You can read more about Webdock Perfect Server stacks here.
