Introduction
Webdock Teams allows you to invite users to your account and assign granular permissions for managing servers, API access, infrastructure operations, and view billing.
A Look at Teams
The ‘Teams’ interface displays existing team members and provides controls to invite new users, assign permissions, and manage access to servers and account features.
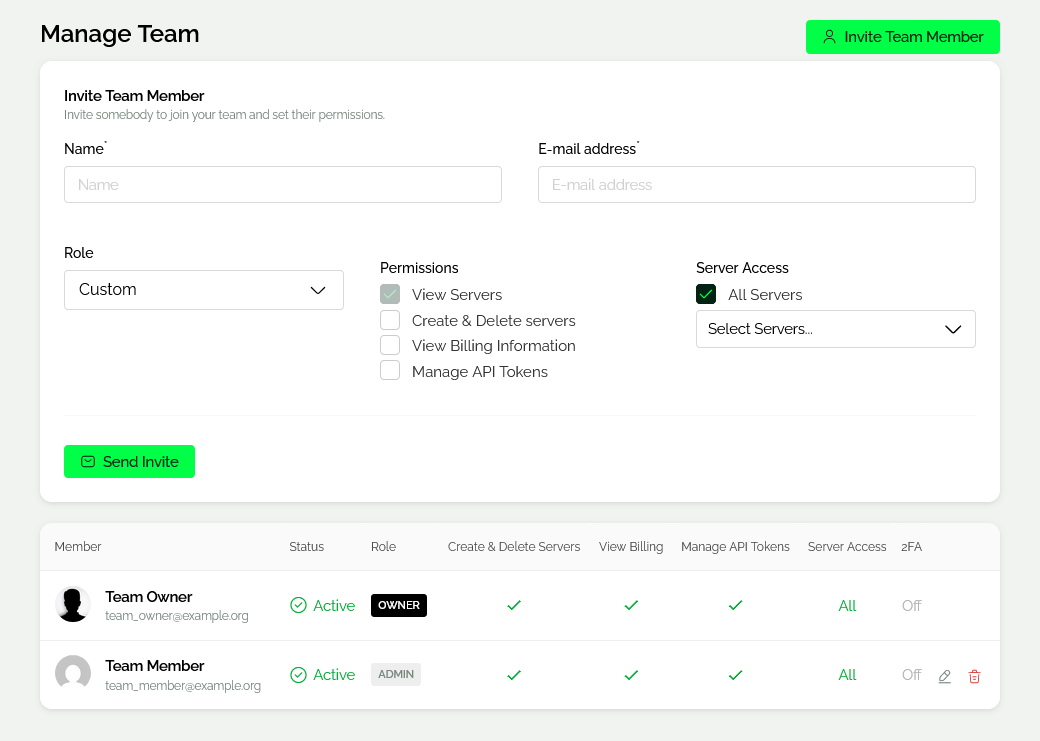
To invite a new member, open the invitation form by clicking ‘Invite Team Member’ and enter the user’s name, email address and permissions in the invitation form. The system sends an invite link, which the recipient must use to create a new Webdock account. No payment details are required for team member accounts.
Permissions
Create & Delete Servers
This permission allows the user to provision new servers and delete existing servers within your account.
View Billing Information
This permission grants access to view account billing information and invoices.
Manage API tokens
This permission grants access to API tokens, allowing the user to create, manage, and delete API keys. These keys grant external applications access to perform changes on the account. You can learn more about our API here.
Server Access
In the ‘Server Access’ section, the ‘All Servers’ option grants the user access to every server in the account, including visibility of IP addresses and the ability to connect via WebSSH.
To restrict access, disable the ‘All Servers’ option and use the ‘Select Servers’ dropdown to assign access to specific servers only.
Editing access
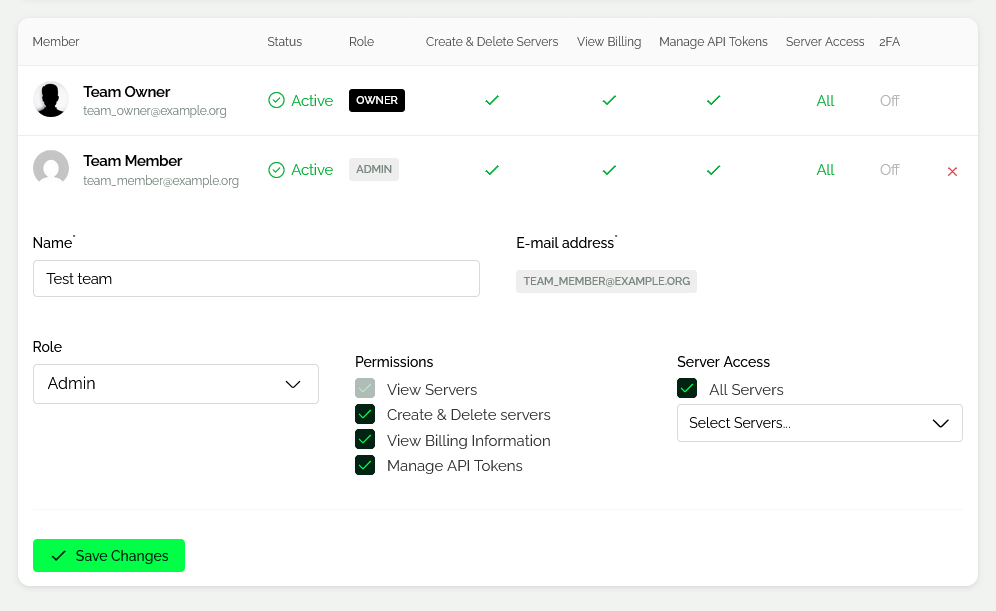
Existing team members are listed showing their status, role, assigned permissions, server access scope, and 2FA status. To modify a member, locate the user in the table, click the ‘Edit’ (pencil) icon, update their role, permissions, or server access in the dialog, and click ‘Save Changes’ to apply the changes.
Conclusion
Webdock Teams enables controlled collaboration by allowing you to grant precise access to infrastructure, ensuring team members can manage resources securely without exposing full account control.
