Introduction
NGINX is a widely used web server and reverse proxy highly regarded for its outstanding performance and scalability. However, ensuring security has become a paramount concern in today’s digital landscape, given the escalating number of cyber threats and data breaches.
In this article, I will delve into two fundamental approaches to bolstering NGINX security: IP filtering and password protection. These techniques thwart unauthorized access and guarantee the safety of your web server.
I will elucidate how these methods operate and provide practical suggestions for their implementation, empowering you to fortify your NGINX server and shield your website from potential risks. Let’s delve right in!
Prerequisites
- An NGINX server with sudo access
- HTTPS enabled on your server
Restricting Access Based on IP
NGINX offers directives (allow and deny) that enable you to allow or block client access based on their IP addresses. However, before using these directives, you must determine your IP address.
There are various methods available for doing so, including visiting websites like KeyCDN IP locator or WhatIsMyIP.net or conducting a simple internet search.
I’ll be using 7.1.1.0 as an example IP Address for this tutorial.
By a Specific IP Address
Begin by opening your NGINX configuration file as a sudo user:
$ sudo nano /etc/nginx/sites-enabled/webdock
This path is applicable for default Webdock stacks. The path might be different, depending on the service provider. Usually, the most common path is /etc/nginx/nginx.conf. However, if you’re not sure, simply run the command to find your NGINX config file:
$ sudo nginx -t
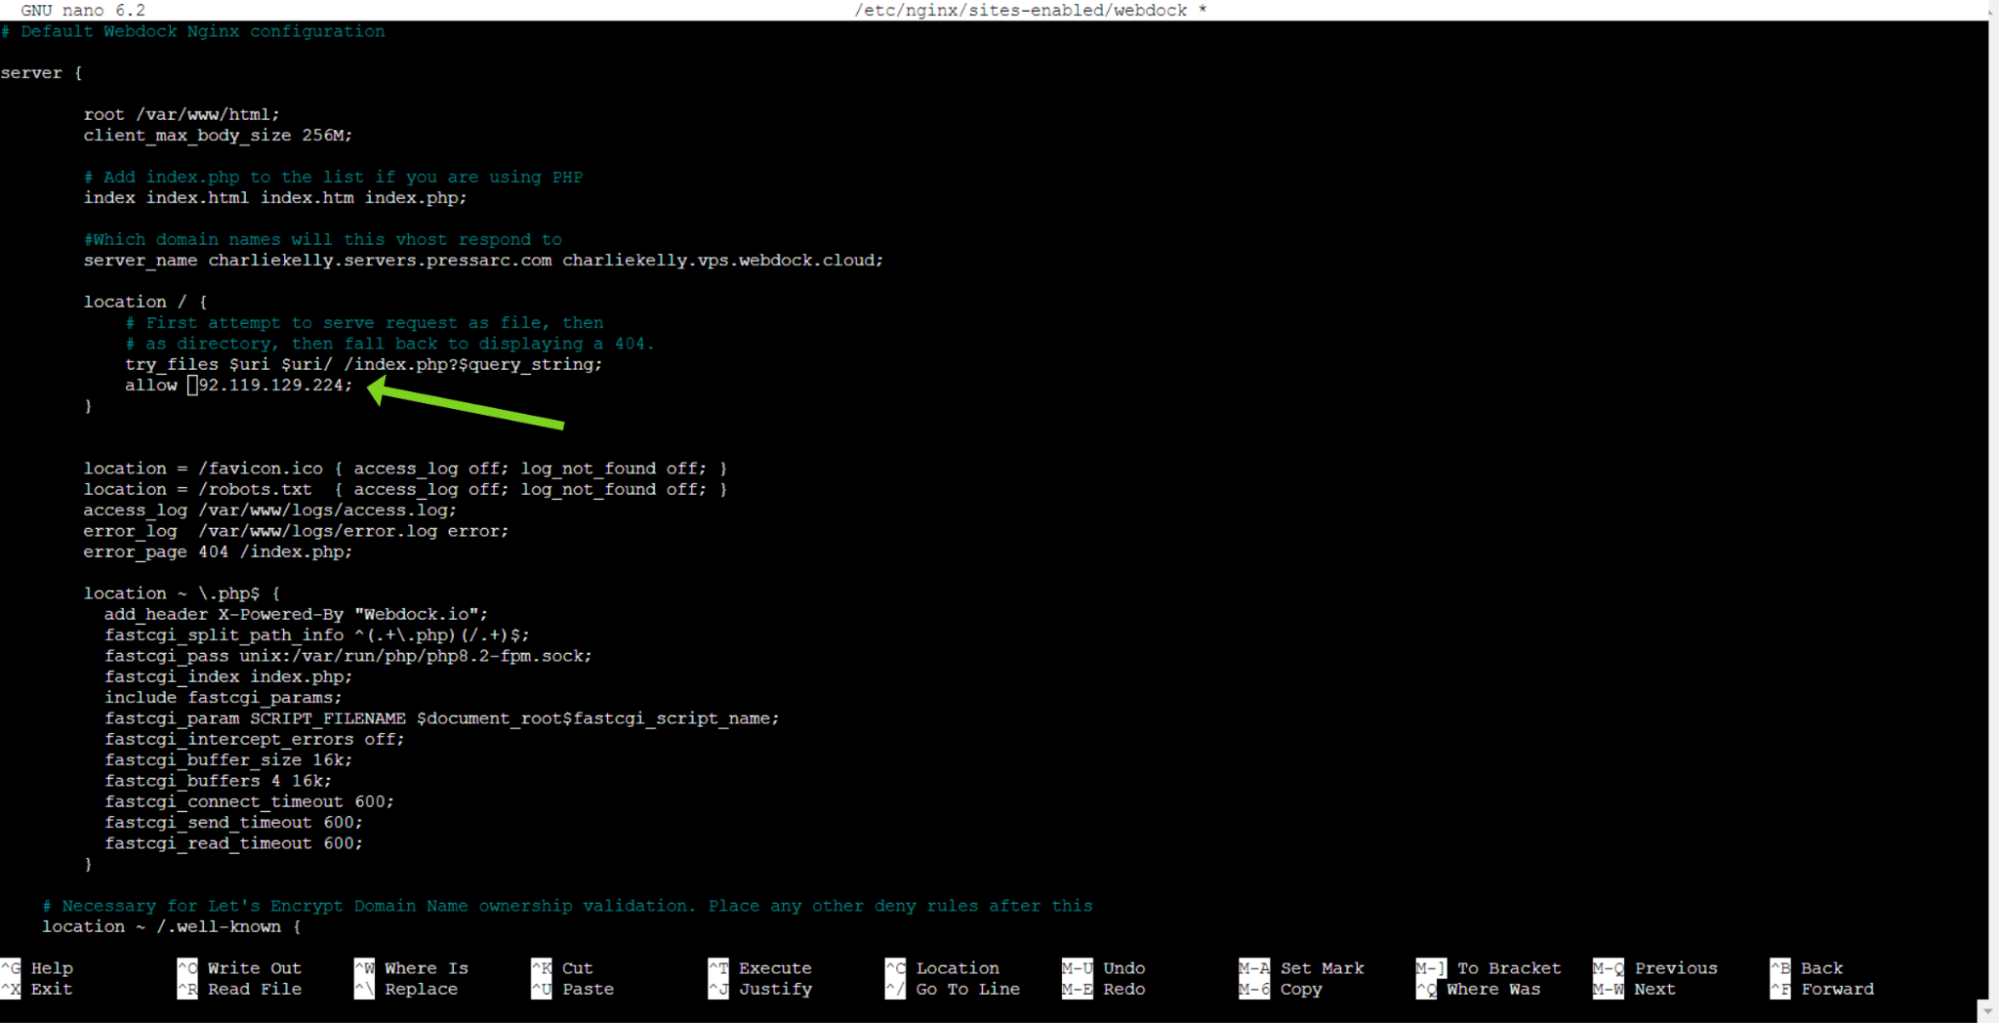
Once you are confident about the location of your NGINX configuration file, open it and locate or create the location block. Insert the following directive within the block:
allow 7.1.1.0;
To implement these changes, refresh the NGINX configuration:
$ sudo systemctl reload nginx
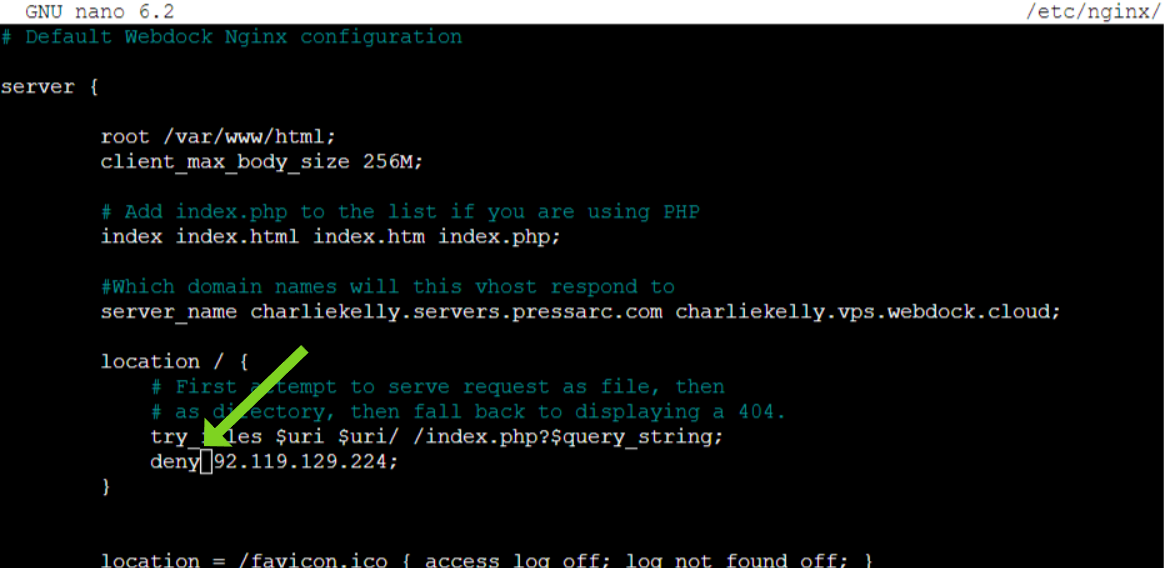
If you prefer blocking an IP address instead of allowing it, simply change the directive to “deny”
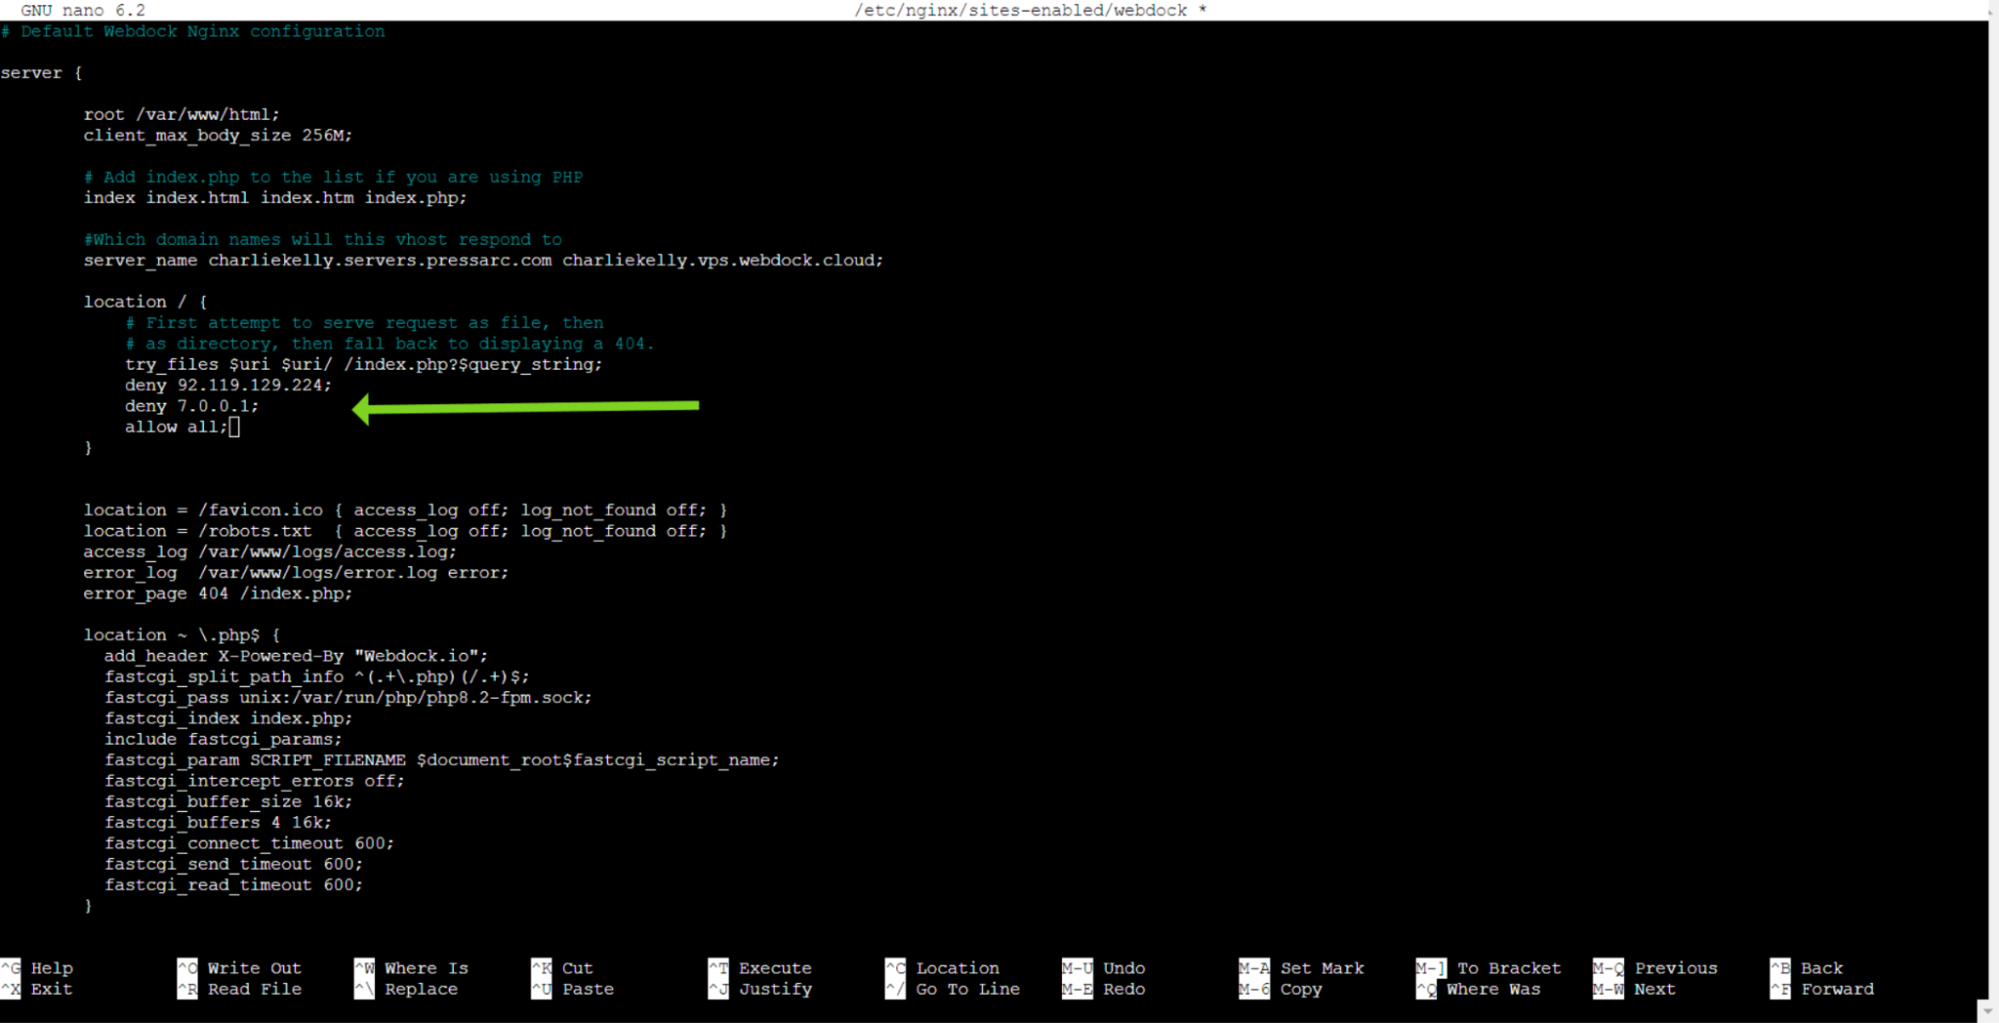
You can even define multiple allow and deny directives. The first directive that meets the conditions will be applied. Ensure to place the two special directives, allow all; and deny all; at the end of the allow/deny list, as they always match.
To enhance compatibility, consider including IPv6 addresses to either allow or deny access. This can prove beneficial in specific scenarios, such as when working with tools like Ansible or Docker.
By a Specific IP Range
In today’s digital landscape, dynamic IP addresses, assigned automatically by a network’s Dynamic Host Configuration Protocol (DHCP) server and subject to periodic changes, are more prevalent than static IP addresses, which are manually configured and remain fixed to provide a consistent identifier for a device on a network.
However, in scenarios where access to an NGINX server is restricted based on a static IP address or an organization employs a designated range of IP addresses for NGINX access, using allow and deny directives enables access restriction based on an IP address range, removing the chances of uncertainty or multiple configurations.
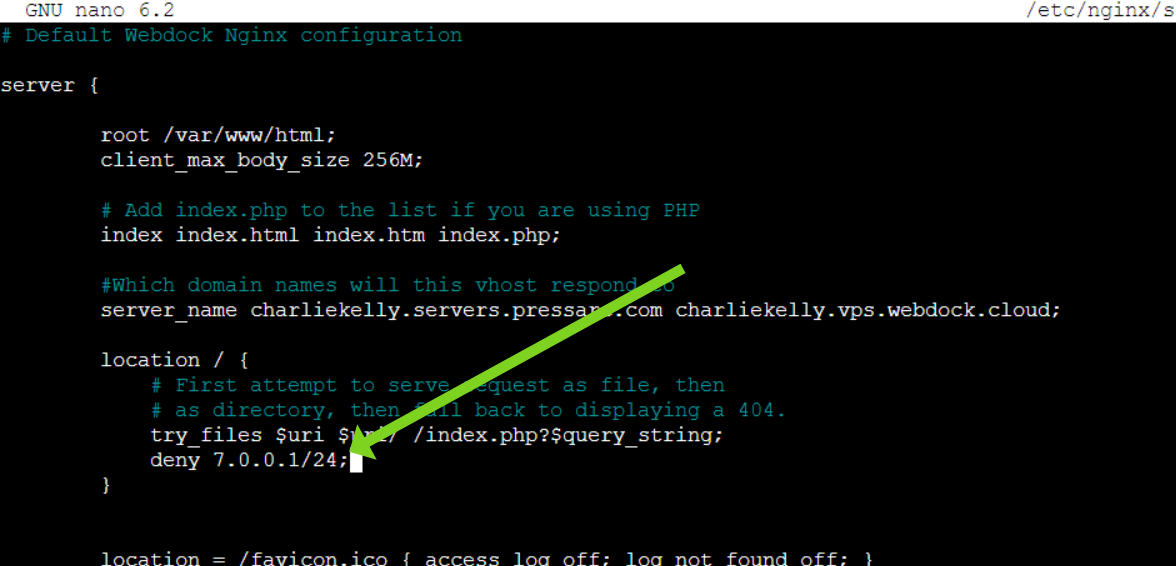
To achieve this, simply add the directive to the location block in the NGINX config file:
allow 7.1.1.0/24;
And follow the same process as outlined for restricting access to a specific IP address.
Testing Our Setup
Now, let’s test if our setup works. I have created a sample VPS to SSH into our server. You can use your computer’s terminal to do this. I chose a VPS to simulate an application and to keep my IP address hidden.
There are many ways you can send ping requests to your server using SSH, but I prefer using the following:
$ curl -4 --head https://your-domain.com
The cURL command is a powerful command-line tool that allows you to transfer data to or from a server using different protocols.
In this particular case, the command curl -4 –head https://your-domain.com is used to send an HTTP HEAD request to the specified URL using the IPv4 protocol (-4).
By using the –head option, cURL only retrieves the response headers without downloading the page’s actual content.
As illustrated, the IP address of this particular VPS is in our deny list. Notice the response:
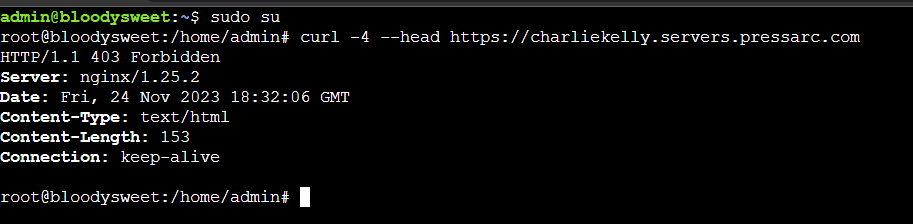 As you can see, the response indicates that the request was forbidden, and the server is denying access to the requested resource due to its IP Address.
However, if we change the directive to allow the IP address, we get the following response:
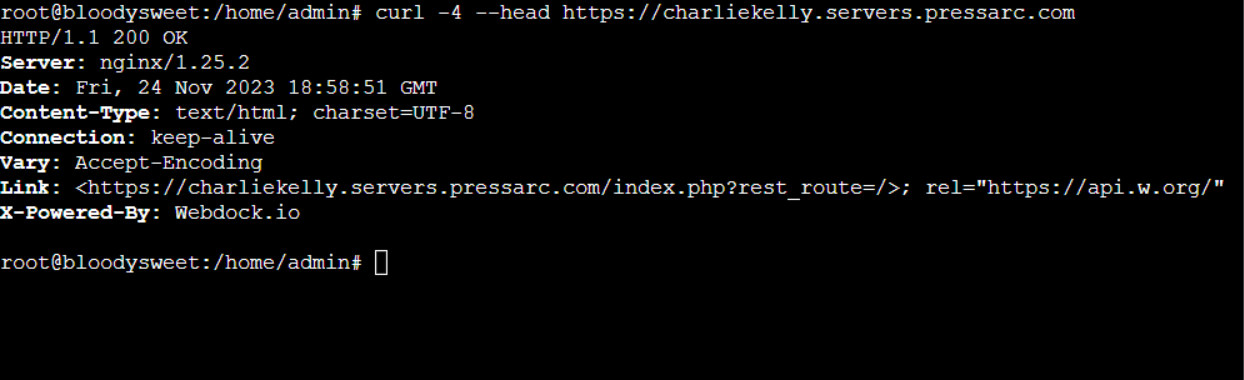
This indicates that the server responded with a status code of 200, which means the request was successful. Congratulations, your setup works well!
Restricting Access with Password
To enhance security further, We’ll set up HTTP Basic authentication to improve access restrictions, which grants access solely to password-protected users.
However, using HTTPS rather than HTTP is strongly advised to safeguard your username and password from being transmitted in plain text.
Thanks to Webdock’s default stacks, you won’t have to configure SSL manually. Consequently, I assume you’ve already enabled HTTPS on your server as we proceed to the next steps.
To start, create a dedicated file to store usernames and passwords:
$ sudo touch /etc/nginx/users
Running this command would create a new file named ‘users’ in the /etc/nginx directory.
Make sure python3 is installed:
$ sudo apt update
$ sudo apt install python3
Once your file is created, run the following:
$ python3 -c 'from subprocess import *; import sys; print("Username: ", end="", file=sys.stderr); user = input(); passwd = run(["openssl", "passwd", "-6"], encoding="utf-8", stdout=PIPE).stdout.strip(); print("A username is neccessary. Try again!", file=sys.stderr) if user == "" or passwd == "" else print(user + ":" + passwd)' | sudo tee -a /etc/nginx/users
This command prompts you to enter your username. It then generates a SHA-512 encrypted version of your password, checks that neither field is left blank, and appends both the generated username and its corresponding hashed password to the “/etc/nginx/users” file.
To include more users in the “/etc/nginx/users” file, execute the same python3 command as previously mentioned.
If you want to remove users, you can manually edit the “/etc/nginx/users” file by deleting the corresponding lines. Make sure that each user is on a separate line in order to maintain proper organization.
Once this particular file is successfully created or updated accordingly, it grants you complete control over your server block configuration.
To further modify and enhance your server configuration, include two directives, auth_basic and auth_basic_user_file, into your existing server setup:
$ sudo nano /etc/nginx/sites-enabled/webdock
Again, for default Webdock stacks, this path is relevant. However, depending on the service provider, the path might vary. Typically, the most frequently used path is /etc/nginx/nginx.conf.
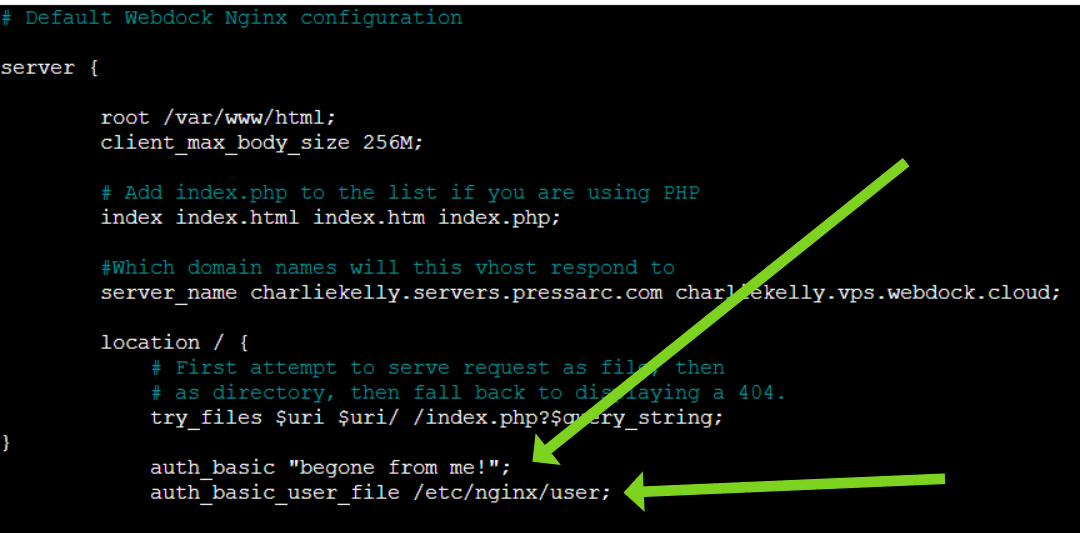
The auth_basic directive is used to enable basic authentication for a specific location or block in your NGINX configuration. It also lets you customize the error message received when trying to log in.
Whereas, auth_basic_user_file specifies the file that contains the username and password information, which in our example is /etc/nginx/users.
Restart NGINX to implement the modifications:
$ sudo systemctl reload nginx
However, the aforementioned directives will cause your entire website to be locked. If you only want to password-protect a specific URL, you will need to add a new location block to your config file and include the auth_basic and auth_basic_user_file directives within this location block. For instance:
location /area-51 {

        auth_basic "off limits to unauthorized personnel";

        auth_basic_user_file /etc/nginx/users;

    }
The location block above will password-protect only the /area-51 URL. This can be useful if you want to protect a specific page on your website, such as /wp-admin on WordPress, from unauthorized access. As usual, test your NGINX config file for syntax errors and restart it.
Testing Your Setup
Let’s test if the authentication actually works. I’ll again send a cURL request using my VPS:
$ curl --verbose https://your-domain.com
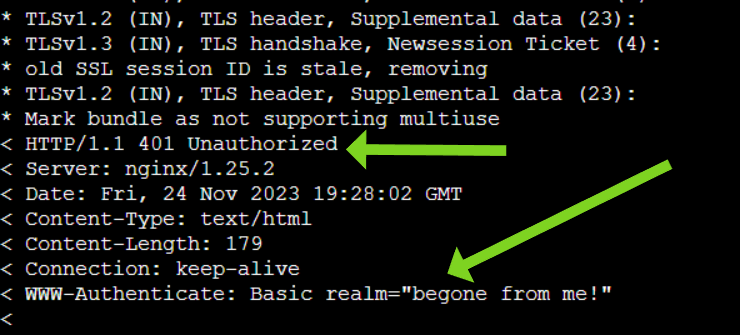
In this case, the command is making a GET request to the specified URL. The –verbose flag is used to display detailed information about the request and response.
You will receive a long response as a result. Look for indications of denied requests towards the end of the response. You will also see the “custom” error message we added.
Now, let’s make a cURL request again, but this time, with our username and password:
$ curl --verbose -u user:password https://your-domain.com
You will receive a lengthy response again. Look for authentication results towards the end. As you can see, we received a 200 OK response, indicating that our request was authenticated and successful.
Curious about what these HTTP response codes mean? Check out my deep dive into this topic here.
Conclusion
By incorporating IP filtering and password protection, you can defend against cyber threats. IP filtering is a gatekeeper, restricting NGINX server access to specific IP addresses for authorized users only. Similarly, password protection requires valid credentials from users to prevent unauthorized access to sensitive information or changes in server configurations.
Updating software regularly and employing firewalls for managing incoming and outgoing traffic is crucial to bolster NGINX security. Additionally, active monitoring of server activities helps promptly detect suspicious behavior, allowing for timely resolution.
When you implement these security measures together, your NGINX server can transform into an impenetrable fortress, ensuring the integrity and privacy of your website’s valuable data.
Meet Aayush Nair, a WordPress website designer with almost a decade of experience who doesn’t only craft visually appealing websites but also has a knack for writing engaging technology blogs. In his spare time, he enjoys illuminating the minds around him.
