Introduction
UFW, short for Uncomplicated Firewall, is a tool you can use on Arch Linux, Debian, or Ubuntu to manage your firewall rules easily. You’ll work with it through the command line, but there are also simple graphical interfaces.
This guide will show how UFW helps boost your VPS’s security by focusing on safe communication with specific IP addresses and ports. This way, you create a customized shield for your server.
Prerequisites
- A Webdock Ubuntu LAMP or LEMP server
- SSH access to your VPS
How to use UFW
Let’s take a look at some basic steps of UFW:
Verify UFW Status
To verify if ufw is enabled, you should execute the following command:
$ sudo ufw status
Allow/Block an IP Address
To block or allow all network connections originating from a specific IP address, execute the following command, substituting the example IP address with the one you wish to block:
$ sudo ufw allow from 123.0.456.0
$ sudo ufw deny from 123.0.456.0
Allow/Block a Subnet
To block or allow a whole subnet, use the subnet address as the ‘from’ parameter in the ufw deny command. This action will block all IP addresses within the specified subnet 123.0.456.0/24.
$ sudo ufw allow from 123.0.456.0/24
$ sudo ufw deny from 123.0.456.0/24
Allow/Block a Specific Port
$ sudo ufw deny port 22
$ sudo ufw allow port 22
Allow/Block a Specific Service
$ sudo ufw allow ssh
$ sudo ufw deny ssh
These were some basic uses for the UFW. You can find additional simple use cases in this article .
In today’s interconnected environments, securing server communications is paramount. Utilizing UFW to restrict connections to specific ports from designated IP addresses is a foundational step in safeguarding services like MySQL and NGINX.
Let's delve into setting up UFW for secure, private server communication:
Securing MySQL with UFW
Let’s first secure a MySQL server by ensuring it accepts connections only from a specific server’s IP address:
$ sudo ufw allow from {IP ADDRESS} to any port 3306
As you can see, I combined two of the specifications together. This command configures UFW to permit connections to port 3306 (MySQL’s default port) only from the IP address mentioned. Remember to replace {IP ADDRESS} with the one you’d like to use.
Then, enable remote access to your MySQL service. You can follow the tutorial here. But, to keep all your MySQL encrypted and secure, you must first enable SSL. Start by logging into your MySQL as a root user:
$ mysql -uroot -p
You will need to enter the root password when prompted. Once you have logged in, enter the following command to check the current status of SSL/TLS:
SHOW VARIABLES LIKE '%ssl%';
The results would be something like this:
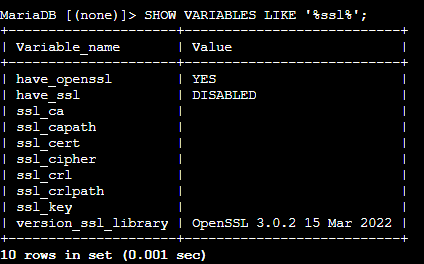
You will notice that have_ssl shows a DISABLED value, indicating that SSL is not enabled in MySQL. Let’s assign it an SSL certificate. Exit the MariaDB console by clicking CTRL + C.
Note that we take MariaDB as an example here. However, the steps are almost the same for MySQL. You must generate SSL/TLS certificates and point the MariaDB server to their locations. I usually use OpenSSL to create MariaDB SSL certificates. Let's start by creating a directory named ssl in /etc/mysql/
First, switch to root user with:
$ sudo su -
Then:
# cd /etc/mysql
# mkdir ssl
# cd ssl
Now, let's create a new Certificate Authority (CA) key. You need to ensure that the Common Name values used for the server and client certificates/keys differ from those used for the CA certificate. This is crucial to prevent any issues that might lead to a failed certification verification error. Therefore, I set them as follows:
- CA Common Name: mariadb_owner
- Server Common Name: mariadb_node
- Client Common Name: mariadb_client
Run the following to create a CA key:
# openssl genrsa 2048 > ca-key.pem
To generate the certificate using the CA key, type the following command:
# openssl req -new -x509 -nodes -days 365000 -key ca-key.pem -out ca-cert.pem
We should now have two files in the directory we created. Check by listing the content of the directory:
# ls /etc/mysql/ssl

We now need to create the SSL for the server:
# openssl req -newkey rsa:2048 -days 365000 -nodes -keyout server-key.pem -out server-req.pem
And process the server the server RSA key:
# openssl rsa -in server-key.pem -out server-key.pem
And sign the certificate:
# openssl x509 -req -in server-req.pem -days 365000 -CA ca-cert.pem -CAkey ca-key.pem -set_serial 01 -out server-cert.pem
You must also have more files in the directory:

You must use the two files mentioned on the MariaDB server and any other nodes. I'll show you how in just a moment. You also need to install the certificates on the MySQL client:
# openssl req -newkey rsa:2048 -days 365000 -nodes -keyout client-key.pem -out client-req.pem
Process again:
# openssl rsa -in client-key.pem -out client-key.pem
To sign the client certificate, run the following command:
# openssl x509 -req -in client-req.pem -days 365000 -CA ca-cert.pem -CAkey ca-key.pem -set_serial 01 -out client-cert.pem
Let's verify if the SSL is working as intended:
# openssl verify -CAfile ca-cert.pem server-cert.pem client-cert.pem

Now, let's enable SSL on the MariaDB server:
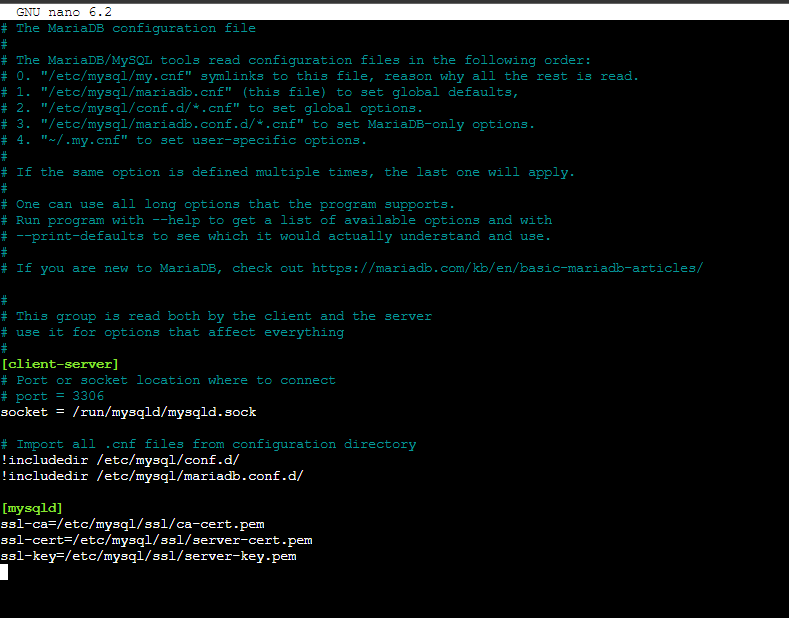
# nano /etc/mysql/mariadb.cnf
And add the following block:
[mysqld]

ssl-ca=/etc/mysql/ssl/ca-cert.pem
ssl-cert=/etc/mysql/ssl/server-cert.pem
ssl-key=/etc/mysql/ssl/server-key.pem
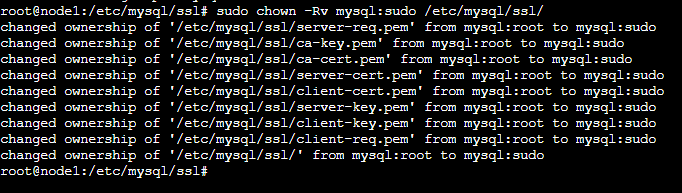
Save and close the file. Ensure that you secure the keys using the chown command:
# chown -Rv mysql:sudo /etc/mysql/ssl/
Then restart the MySQL server:
# systemctl restart mysql
Upon running the SHOW VARIABLES command on the MariaDB console, you should see that the SSL is now assigned and working.

We will also need to enable connections to the port 443, which is the default port for encrypted MySQL connections:
# ufw allow from {IP ADDRESS} to any port 443
Let's test out our connection. Log in to the terminal of the server we just whitelisted. We must copy the SSL files we created on our primary node to this server. First, make the same folders as we made in this server:
$ sudo su -
# cd /etc/mysql
# mkdir ssl
# cd ssl
Then, copy the files from our primary server to the secondary server. We can do so by:
# scp {ADMIN/ROOT USER}@{IP ADDRESS}:/etc/mysql/ssl/client-* /etc/mysql/ssl/
# scp {ADMIN/ROOT USER}@{IP ADDRESS}:/etc/mysql/ssl/ca-cert.pem /etc/mysql/ssl/

And open the MariaDB config file on this secondary server:
# nano /etc/mysql/mariadb.cnf
Add these lines again:
[mysqld]

ssl-ca=/etc/mysql/ssl/ca-cert.pem
ssl-cert=/etc/mysql/ssl/client-cert.pem
ssl-key=/etc/mysql/ssl/client-key.pem
Save and close the file. To ensure everything works properly, change the ownership of the following files or directories to the user ‘mysql’:
# chown mysql /etc/mysql/ssl/
# chown mysql /etc/mysql/ssl/client-key.pem
# chown mysql /etc/mysql/ssl/ca-cert.pem
# chown mysql /etc/mysql/ssl/client-cert.pem
# chown mysql /etc/mysql/ssl/client-req.pem
Then proceed to restart MariaDB:
# systemctl restart mysql
Next, test the configuration by connecting the server using the command provided on your MariaDB client instance:
# mysql -u {MYSQL USERNAME} -h {IP ADDRESS} -p {DATABASE NAME}
And add the password. If you connect successfully, you'll see the following output:
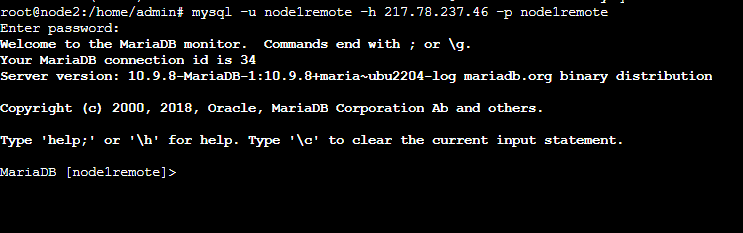
Let's move on to finding out how we can secure NGINX.
Securing NGINX with UFW
Securing NGINX is easier than MySQL. Let's start by allowing connections to be made to NGINX's default port. We'll do this for both SSL and Non-SSL ports:
$ sudo ufw allow from {IP ADDRESS} to any port 443
$ sudo ufw allow from {IP ADDRESS} to any port 80
That's about it. Before moving forward, ensure that SSL is configured, enabled, and is being listened to by NGINX. You check your NGINX's config file. The following path is for Webdock's default stack users:
$ sudo nano /etc/nginx/sites-enabled/webdock
Look for the following directive or something similar:

If you don't find any such configuration, try regenerating your SSL. Webdock users can do so from their dashboard, or you can simply run the following after installing Cerbot. However, ensure that a domain is assigned and pointed to your server's IP addresses before running the command:
$ sudo certbot --nginx
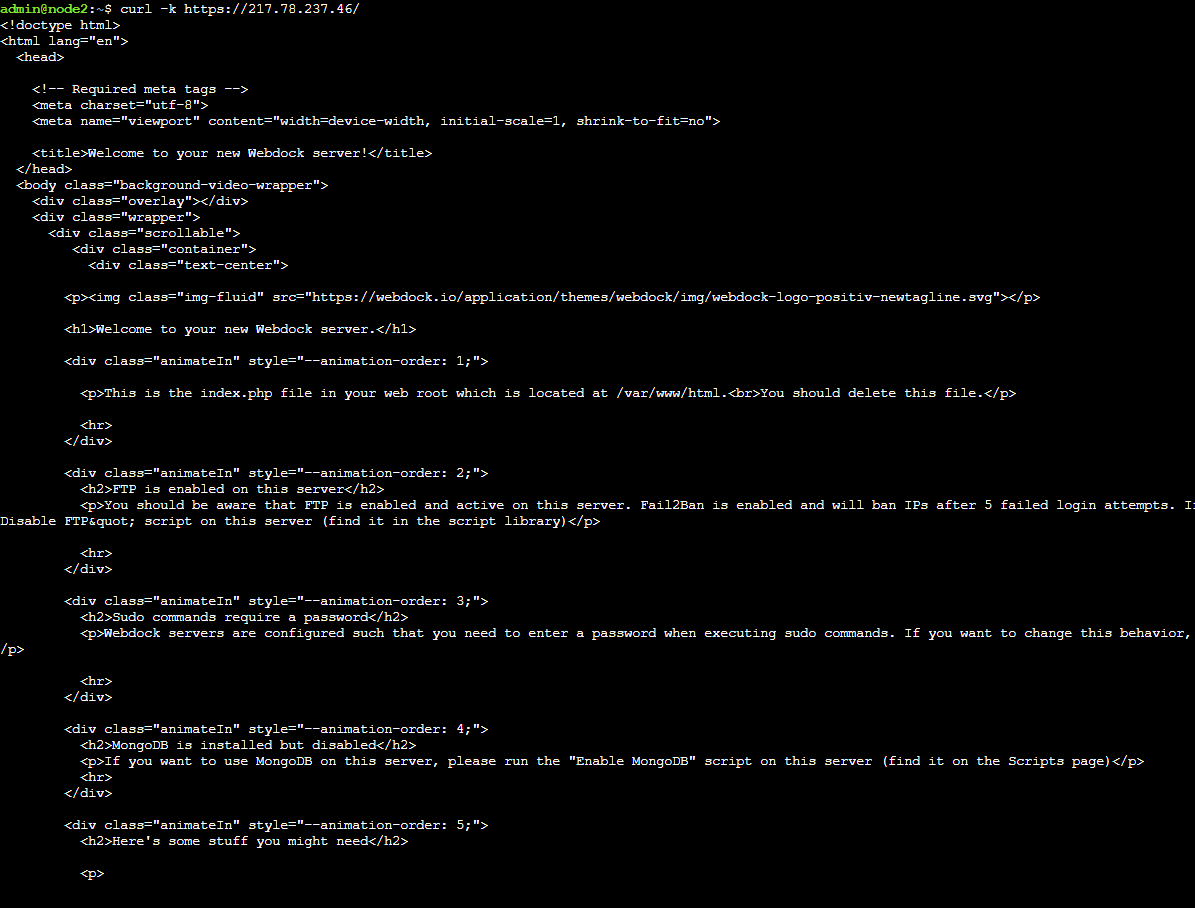
Now, let's try. I'll log in to a server whose IP address I have allowed and send a curl request:
$ curl -k https://{IP ADDRESS}/
And if it goes through, you must see something like this:
However, if you send a curl request from a server not on an allowed list, you shouldn't receive any response.
Conclusion
UFW is a powerful tool that can significantly enhance the security of your servers. Moreover, using UFW to limit service access alongside TLS/SSL encryption, you can establish secure and private communication channels between servers operating on public IP addresses.
This approach strengthens your infrastructure against unauthorized entry attempts and secures data while in transit, which is fundamental in contemporary cybersecurity practices. And in this guide, I showed you how to secure two of the widely used services on servers: MySQL and NGINX. If you set it up correctly, these connections will only work from the specified IP addresses. This way, your servers can communicate securely without needing complex network configurations like VLANs.
Meet Aayush , a WordPress website designer with almost a decade of experience who crafts visually appealing websites and has a knack for writing engaging technology blogs. In his spare time, he enjoys illuminating the minds around him.
