Introduction
A malware or virus infection can happen when downloading files or software from suspicious sites or hosts. Some malware might not create any apparent symptoms, but some may cause unexpected behavior on your server. A server-wide scan can help you identify and remove malicious software if you suspect your system has been infected with malware.
There are a few different ways to clean your cloud server of malware and viruses, and this guide covers three of the most popular scanning software options. These tools can help you keep your Webdock server clean and secure.
Prerequisites
- A Linux Server (I am using Ubuntu)
- A sudo user
Using Rkhunter
Rkhunter is a powerful, free, open-source tool known for scanning backdoors, rootkits, and other general vulnerabilities on POSIX-compliant systems. It can be easily installed using your package manager. Check for updates:
$ sudo apt-get update && sudo apt-get upgrade -y
And then run and follow the instructions on the screen:
$ sudo apt-get install rkhunter -y
Before scanning, you’ll need to update the file properties database:
$ sudo rkhunter --propupd
This allows the scanner to assess the current state of specific files and prevent false alarms. After the update, start the scanner with the following:
$ sudo rkhunter --checkall
The scanner will run through some system commands to check for rootkits, malware, and other malicious software. You should click on the enter key when prompted. Once the scan is complete, Rkhunter will create a log file with a summary of the findings.
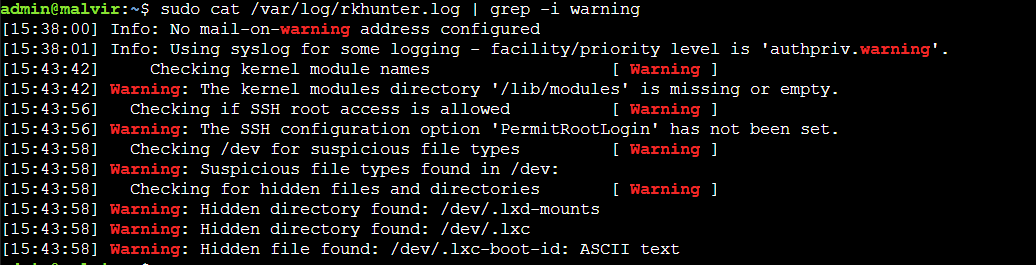
This command allows you to view a bird’s eye version of the scan log:
$ sudo cat /var/log/rkhunter.log | grep -i warning
Using ClamAV
ClamAV is a popular open-source antivirus engine available on many platforms. This software can scan emails and all mail file formats. ClamAV can also check archives and extensions such as tar, zip, rar, 7zip, and more. To install ClamAV, use the command below:
$ sudo apt-get install clamav clamav-daemon -y
To update the virus database for ClamAV, you’ll need first to stop any related processes that might be running. This will allow the update to proceed without any issues. Once the processes have been stopped, you can update the virus database:
$ sudo systemctl stop clamav-freshclam
$ sudo freshclam
After you’ve updated the virus definitions, start and enable the services to get them up and running:
$ sudo systemctl enable clamav-freshclam
$ sudo systemctl start clamav-freshclam
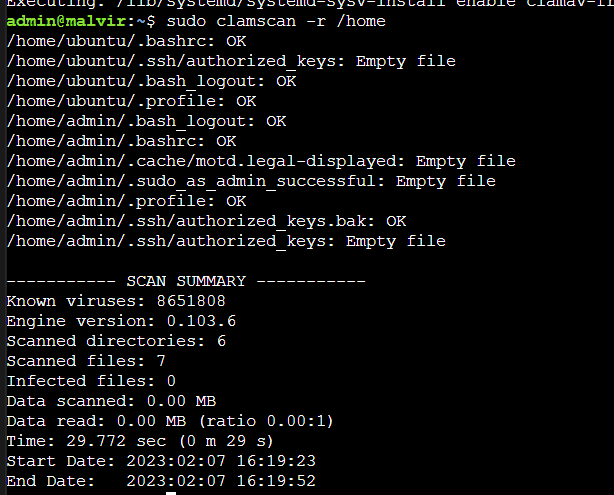
Then, to ensure the scanning works as it should, do a test scan of your home directory using the following command:
$ sudo clamscan -r /home
The scan should return negative if your home directory is clear of viruses or malware.
In case you find something fishy, you can use the following to remove the infected file:
$ sudo clamscan --infected --remove --recursive /home
Note: Use –remove parameter with caution. First, run a scan without it to get an overview of the problem. Then run a localized scan to identify which files need to be removed. Finally, remove the files either manually or with the –remove parameter.
To complete a scan of your cloud server, you can use the following command to have ClamAV recurse through each directory in your system root. This will still skip/sys to avoid unnecessary warning printouts, as the virtual file system consists of unreadable files that could not contain viruses anyway:
$ sudo clamscan --infected --recursive --exclude-dir="^/sys" /
Using Chkrootkit
Chkrootkit is a popular rootkit scanner you can install on most distributions with the package manager. On an Ubuntu system, use the following command to install it:
$ sudo apt-get install chkrootkit
After you finish, scan your server with this command to check for any vulnerabilities:
$ sudo chkrootkit
The scan will check for many infections and print out its findings. You can scroll through the output to check for any warnings.
By default, chkrootkit will only output the results of its scans to the screen. If you wish to automate the checks or save the results for later, you can use the tee command to redirect the output to a log file:
$ sudo chkrootkit | sudo tee /var/log/chkrootkit/chkrootkit.log
Make sure to check the log for any warnings before continuing:
$ sudo cat /var/log/chkrootkit/chkrootkit.log | grep -i warning
Chkrootkit is a valuable tool that can help determine if a machine has been compromised. However, it shouldn’t be the only scanner you use to diagnose infections. Use chkrootkit with other scanners to get the most accurate picture possible.
Conclusion
This guide provided basic step-by-step instructions to install various tools to scan your server for malware and viruses.
Aayush Nair has been designing WordPress websites for eight years now. He is also a content writer, writing blogs on technology and related topics, and likes helping people in his free time.
