Introduction
Scheduling in Linux is being done by a system daemon named cron. The cron daemon executes tasks at specific time and these tasks are called cron jobs. The cron jobs are mostly used to automate system maintenance or administration. You can automate almost everything with cron daemon. For instance, you can set cron job to backup your home directory, send alerts, install software and many more.
While crontab -e is the standard way to edit jobs, using a server control panel free of charge can make scheduling tasks much more visual.
The cron daemon is kicked off automatically from /etc/init.d once you enter multi-user run level. The cron jobs are listed in crontab files and are located in the cron spool area /var/spool/cron/crontabs. Cron searches for these files and load them in the memory for execution. Another file cron read is /etc/crontab. In Debain and Ubuntu /etc/crontab executes programs written under directories /etc/cron.daily, /etc/cron.hourly, /etc/cron.weekly and /etc/cron.monthly on daily, hourly, weekly and monthly basis.
Crontab is a utility that maintains crontab files for individual users. Crontab file is a simple text file having a list of commands that are executed at specific times. It is recommended to use crontab command to access and update crontab files in /var/spool/cron/crontabs. Crontab stands for “cron table” which the cron daemon uses for scheduling jobs. Every user has a crontab file which is regularly checked by cron daemon regardless of whether the user is actually logged in to the system or not.
In the Webdock control panel it is easy to manage your Crontab entries for any user on your server. Check out the Cron Jobs server screen for more information. Get started with the Cron Jobs screen from here
Getting Started with Crontab
To edit or create a crontab file for the currently logged in user, issue following command:
crontab -e
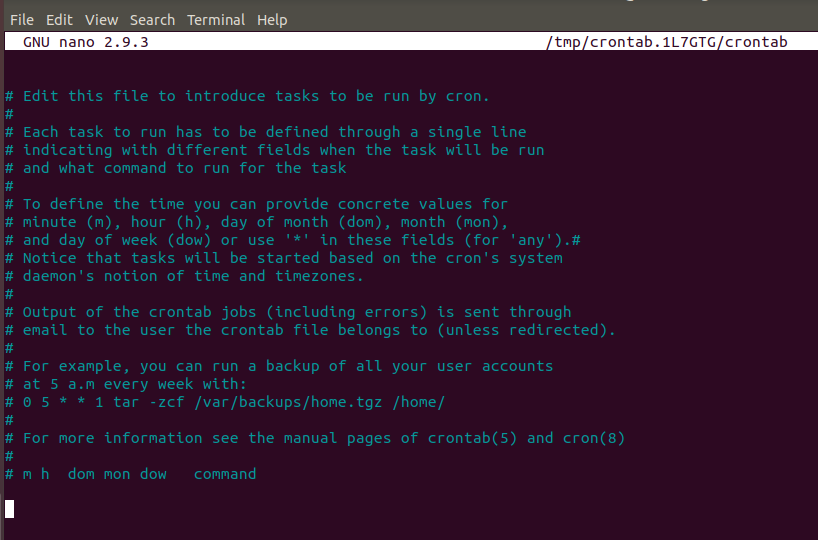
This will open crontab file in your favorite editor located at /var/spool/cron/crontabs/edward (edward is our username in this example, it may differ in your case). Output of the above command will be (our editor here is nano):
To specify a task to run at a particular time, you have to enter the following six fields separated by a space.
Crontab Fields and Allowed Ranges
| Field | Description | Allowed Value |
| MIN | Minute Field | 0-59 |
| HOUR | Hour Field | 0-23 |
| DOM | Day of Month | 1-31 |
| MON | Month Field | 1-12 |
| DOW | Day of Week | 0-6 |
| CMD | Command | Any command to be Executed |
Any of these fields can also be set using the wildcard character (*), which stands for “first through last”. For example, to run a job every hour, put * in the hour field. You can also specify range of numbers in all five fields related to date and time. Ranges are two numbers separated with a hyphen. For instance, 5-8 in hours field specifies execution at hours 5, 6, 7 and 8.
Let’s create a practical example of scheduling with crontab. We have a small script file that will just echo when it was run to a file in /tmp/jobresult at 14:22 on Sep 8th regardless of the day of week. We create a shell script with the following content and place it in /tmp/bill.sh.
nano /tmp/bill.sh
If you do not have nano installed, do so with “sudo apt install nano -y”
Script Content:
 #!/bin/bash
 NOW=`date`
 echo "The cron job ran at $NOW" >> /tmp/jobresult
Make the file executable:
chmod +x /tmp/bill.sh
Once crontab runs your script, you should see a file appear in /tmp/jobresult. If you cat the contents of this file or follow updates to this file with “tail -f /tmp/jobresult” you should see it update with a new line indicating the Cron Job was run at a specific time.
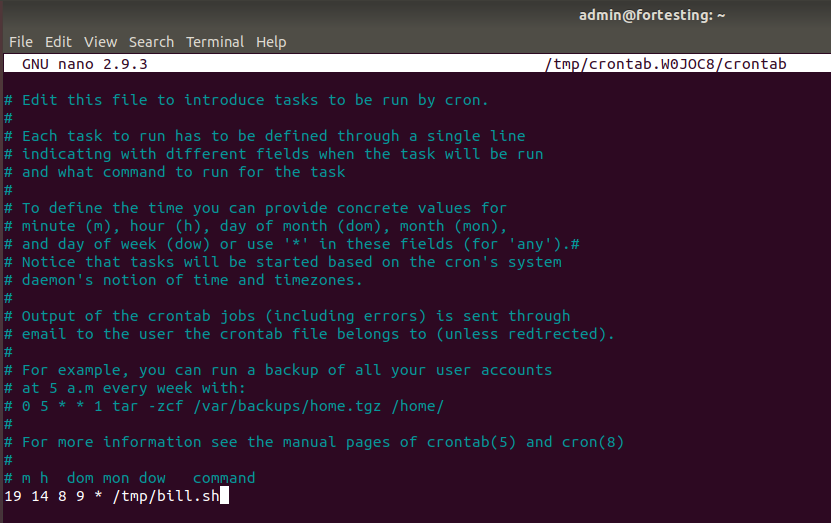
In order to run this script at the scheduled date and time, we enter the correct fields in our Crontab file:
The above screenshot shows that we’ve now configured our crontab to run this script at 14:22 on Sep 8th. Save and exit and you will recieve a message that the Crontab has been updated.
Here is another example: The following line will run our script every hour, at the top of the hour, from 6 A.M to 10 AM every day:
0 6-10 * * * /tmp/bill.sh
To just print the Crontab file for the currently logged in user on screen, you can use the following command:
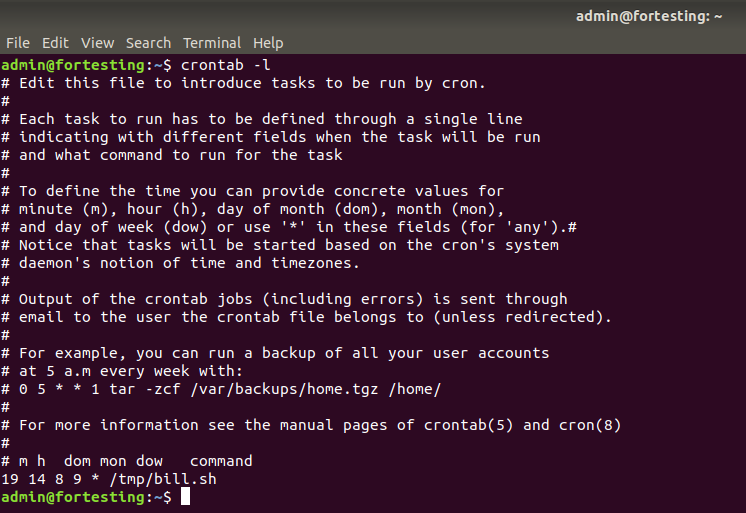
crontab -l
This shows that only one cron job is scheduled on the system. You can schedule more than one job. by simply adding more lines to your Crontab file To remove entries in the cron table just edit your Crontab as before and remove or comment out the line
By default, crontab edit entries of current logged in user. If you want to edit Crontab for another user, use the following command:
crontab -u username -e
You can also use the following command to view crontab entries of the other user:
crontab -u username -l
Restricting Access to crontab.
You can restrict access to crontab command through /etc/cron.d/cron.allow and /etc/cron.d/cron.deny files. Both these files doesn’t exists by default in Ubuntu. Users mentioned in cron.allow and cron.deny files are allowed and denied access to crontab command respectively. In both files you have to add user names, one user per line.
For example, if you want to allow users root and edward to access the crontab command, create a new /etc/cron.d/cron.allow file as shown below:
nano /etc/cron.d/cron.allow
Add the following lines:
root
edward
Save and close the file when you are finished.
Now, only root and edward user have access to crontab command.
Cron Logs
Cron logs are an important way to check whether cron jobs are executed on right time or not. To view cron log, run the following command:
cat /var/log/syslog | grep cron
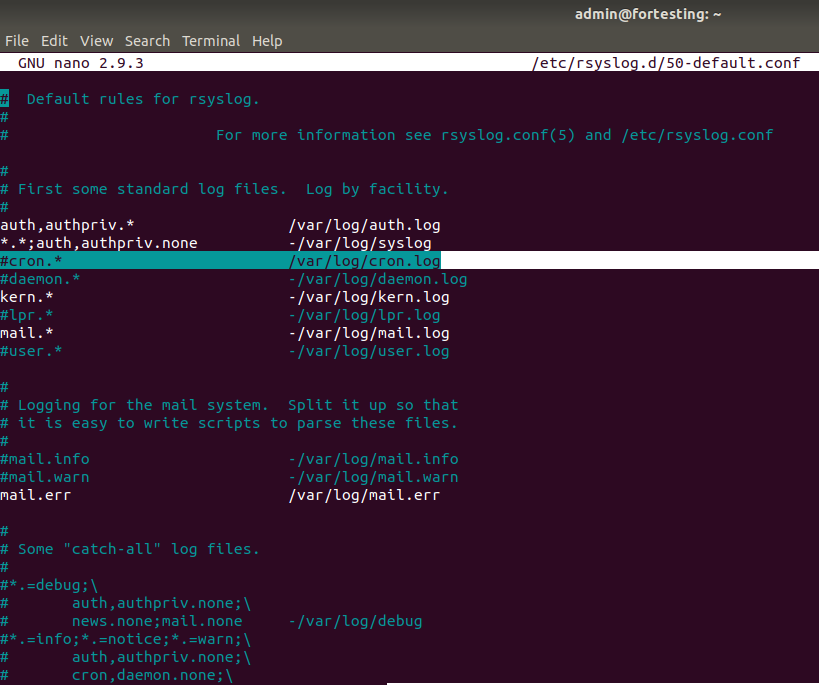
You can also setup cron.log file by going to /etc/rsyslog.d/50-default.conf file and un-commenting the following line.
nano /etc/rsyslog.d/50-default.conf
Uncomment the following line:
#cron.* /var/log/cron.log
Crontab Syntax with Examples
In this section, we will show you different crontab syntax with examples.
| MIN | HOUR | DOM | MON | DOW | DESCRIPTION |
| 10 | 09 | 05 | 02 | * | Execute a job on 5th Feb 09:10 AM |
| * | * | * | * | * | Execute a job on every minutes of every hour of every day |
| 10 | 14 | * | * | * | Execute a job on every day at 02:10 PM |
| */5 | * | * | * | * | Execute a job on every 5 minutes of every hour of every day |
| 15 | 15 | * | * | 1-4 | Execute a job at 03:15 PM on Monday to Friday |
| 10 | 05 | 2 | * | * | Execute a job on every month on 2nd date at 05:10 AM |
| 00 | 08,11 | * | * | * | Execute a job every day at 08:00 AM and 11:00 AM |
| 00 | 10-18 | * | * | * | Execute a job every day at every hours during 10AM to 06:00 PM |
| 00 | */2 | * | * | * | Execute a job at every 2 hours every day |
| 00 | 11 | * | mar,dec | * | Execute a job on March and December at 11:00 AM |
| @hourly | Execute a job once an hour | ||||
| @daily | Execute a job once a day | ||||
| @weekly | Execute a job once a week | ||||
| @monthly | Execute a job once a month | ||||
| @yearly | Execute a job once a year | ||||
| @reboot | Execute the job when the system boots | ||||
Conclusion
In the above tutorial, we learned how to scheduling task using crontab in Linux with several examples. We hope this will help you with routine tasks like scheduling system scanning, daily backups etc.


