Introduction
Before "http://" graces our browsers, the digital landscape was a patchwork of disparate protocols and systems
In the early days, information sharing relied heavily on FTP (File Transfer Protocol), a workhorse for moving files between machines. However, FTP lacked the crucial ability to link documents together, a fundamental requirement for the web's hyperlinked structure.
Email and Usenet newsgroups also served as vital communication channels, but these were primarily text-based and lacked the interactive, multimedia capabilities that would define the web. Gopher, developed at the University of Minnesota, emerged as a menu-driven system for organizing and retrieving information, offering a more user-friendly alternative to FTP. Yet, Gopher's hierarchical structure and limited extensibility ultimately hindered its widespread adoption.
Enter Tim Berners-Lee, a British scientist at CERN, who envisioned a system where researchers could easily share and link documents across the internet. In 1989, he proposed a project called "WorldWideWeb," which aimed to create a distributed hypertext system. This project led to the development of HTTP (Hypertext Transfer Protocol), a simple and stateless protocol designed specifically for retrieving linked documents. The initial version of HTTP, released in 1991, was incredibly basic, focusing on retrieving static HTML documents. However, its simplicity and extensibility proved to be its greatest strengths. Early web browsers, like Mosaic, leveraged HTTP to display formatted text and images, marking the beginning of the graphical web.
The evolution of HTTP continued, with subsequent versions introducing features like persistent connections, caching, and support for various content types. HTTP/1.1, released in 1997, became the dominant version for many years, addressing performance issues and enhancing functionality.
Now, Let’s talk about how the internet actually works. You know, that thing where you click a button, a cat video loads, or your UberEats order magically appears? Behind every cat meme and food delivery app lies a silent conversation between two key players: the client (your browser or phone) and the server (the distant computer doing the heavy lifting).
This isn’t just tech jargon. If you’re building anything for the web, you need to understand this dance. Let’s break it down like you’re explaining it to a very patient, coffee-deprived friend.
Imagine walking into a restaurant (the client). You don’t barge into the kitchen and start cooking, right? Instead, you tell the waiter (the request) what you want: “Two tacos, extra guac, STAT.” The waiter runs to the kitchen (the server), which prepares your order. Minutes later, the waiter returns with your food (the response).
Web communication works the same way.
- Client: Your browser, app, or device.
- Server: The computer storing data/processing logic.
- Request: “Hey, I need X.”
- Response: “Here’s X… or an error because you asked for pineapple on pizza.”
Let’s get technical (but not too technical).
HTTP: The Language of the Web
When clients and servers talk, they use HTTP (Hypertext Transfer Protocol). Think of it as the grammar rules for web conversations. Every interaction is a request-response cycle:
- Client sends an HTTP request: “Give me the homepage!”
- Server processes the request: “Are they logged in? Where’s that file?”
- Server sends an HTTP response: “Here’s the HTML! (Status code: 200 OK)” or “That page doesn’t exist (404 ERROR).”
Anatomy of a Web Request
Let’s dissect a typical HTTP request. Don’t worry—no actual dissection skills required.
1. The URL: Your Request’s Address
A URL (Uniform Resource Locator) tells the client where to send the request. For example:
https://api.tacostore.com/v1/orders?type=burrito
- Protocol:
https://(secure HTTP). - Domain:
api.tacostore.com(server’s address). - Endpoint:
/v1/orders(the “verb” the server understands). - Query Parameters:
?type=burrito(extra instructions).
2. HTTP Methods: The Action Verbs
Every request needs a method to tell the server what to do:
| Method | Use Case | Example |
|---|---|---|
GET |
Fetch data (safe, read-only). | Loading a user profile. |
POST |
Create new data. | Submitting a login form. |
PUT |
Update existing data. | Editing your bio. |
DELETE |
Remove data. | Deleting a tweet. |
3. Headers: The Metadata
Headers are like sticky notes attached to your request. They give the server extra context:
User-Agent: “Hey, I’m a Chrome browser on macOS!”Authorization: “Here’s my API key: 12345.”Content-Type: “The data I’m sending is JSON.”
Here’s a real-world GET request header:
GET /v1/users/ahmad HTTP/1.1
Host: api.example.com
User-Agent: Mozilla/5.0
Accept: application/json
Authorization: Bearer eyJhbGciOiJIUzI1NiIsInR5cCI6IkpXVCJ9...
4. The Body: Sending Data
For POST, PUT, or PATCH requests, the body carries the data you’re sending. It’s like handing the waiter your custom taco order.
Example (JSON body for creating a user):
{
  "name": "Ahmad",
  "email": "[email protected]",
  "password": "supersecret123"
}
The Server’s Response: Success, Failure, and Confusion
Once the server processes your request, it replies with:
1. Status Codes: The Server’s Mood
Status codes are three-digit numbers that summarize the result. Memorize these:
| Code | Meaning | Example Scenario |
|---|---|---|
| 200 | OK ✅ | Successful GET request. |
| 201 | Created ✅ | New user created via POST. |
| 400 | Bad Request ❌ | Missing required data in body. |
| 401 | Unauthorized ❌ | Invalid API key. |
| 404 | Not Found ❌ | Requested endpoint doesn’t exist. |
| 500 | Server Error 💥 | The server crashed. Oops. |
2. Response Headers
The server’s “sticky notes” back to you:
Content-Type: “Here’s JSON/HTML/text.”Set-Cookie: “Store this cookie for future requests.”
3. Response Body
The actual data you requested (or an error message).
Example (JSON response for a GET /users/ahmad):
{
  "id": 123,
  "name": "Ahmad",
  "email": "[email protected]"
}
Let’s Get Practical: Testing Requests
Enough theory. Let’s pretend you’re a developer debugging an API. Here’s how to see requests/responses in action.
1. Using curl (Command Line)
curl is a CLI tool for making requests.
Example: Fetch data from JSONPlaceholder API
curl -X GET "https://jsonplaceholder.typicode.com/users/1"
Response:
{
  "id": 1,
  "name": "Leanne Graham",
  "email": "[email protected]"
}
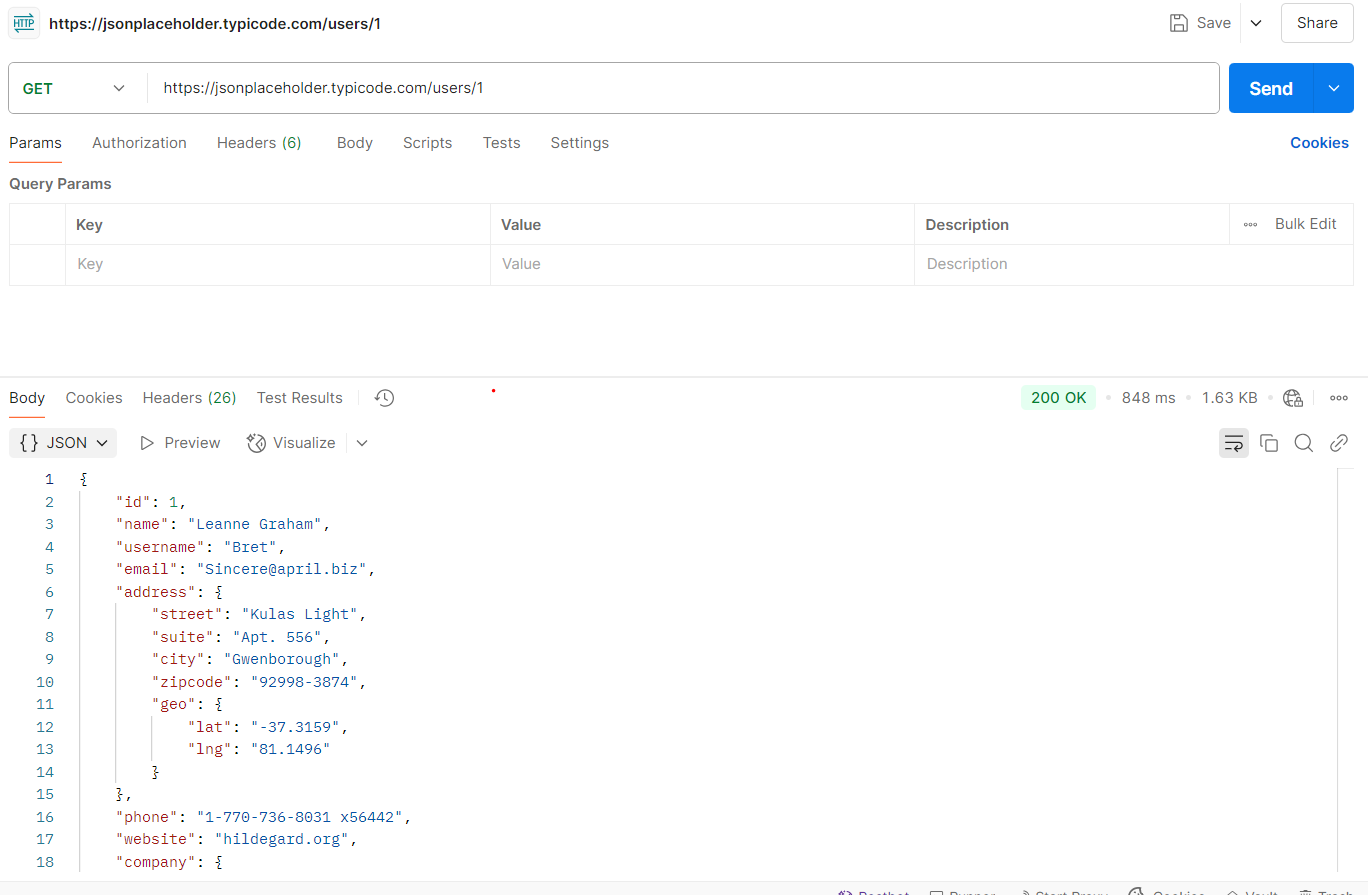
2. Using Postman (GUI)
Postman provides a nice GUI, in case you don't want to deal with the CLI or the DevTools.
3. Browser DevTools (Network Tab)
Open Chrome DevTools (F12 → Network tab). Refresh the page, and you’ll see every request your browser makes. Click one to inspect headers, responses, and timing.

Common Pitfalls (And How to Avoid Them)
Even seasoned developers trip over these:
-
CORS Errors
- Problem: Your frontend (client) can’t access a server’s response due to security policies.
- Fix: The server needs to send
Access-Control-Allow-Origin: *(or your domain).
-
Authentication Headers
- Problem: Forgetting to include
Authorization: Bearer <token>. - Fix: Double-check headers in tools like Postman.
- Problem: Forgetting to include
-
Wrong HTTP Method
- Problem: Using
GETto delete data (it should beDELETE). - Fix: Refer to the API docs.
- Problem: Using
-
Mishandling Async Requests
- Problem: JavaScript fetches data but doesn’t “wait” for the response.
- Fix: Use
async/awaitor.then():
// JavaScript Fetch API Example
async function fetchUser() {
  const response = await fetch('https://api.example.com/users/1');
  const data = await response.json();
  console.log(data);
}
Conclusion
HTTP forms the very backbone of our online experiences, enabling the seamless transfer of data across the web. To delve deeper into its intricacies, explore the comprehensive resources available on the Mozilla Developer Network .
Understanding HTTP is key to comprehending the modern internet.
This article was written by Ahmad Adel . Ahmad is a freelance writer and also a backend developer.
