HTTP2 is becoming more and more widespread and is an improvement to the HTTP protocol which can make your sites load faster. HTTP2 only works on SSL secured (https) pages. HTTP2 configuration support will be added natively to Certbot at some point, so untill then we’ve decided to provide a guide here on how you can enable it manually on a typical Webdock stack.
HTTP2 support in Nginx
In Nginx it is very easy to enable HTTP2. First of all set your domains in Webdock, and then run Certbot in order to generate SSL certificates for your domains. You should now be able to edit /etc/nginx/sites-enabled/webdock and add http2 to the ssl listen directive:
listen 443 ssl http2; # managed by Certbot
...
Restart Nginx
sudo systemctl restart nginx
Now visit your https enabled site and bask in the glory of HTTP2
HTTP2 support in Apache
HTTP2 in Apache is slightly more involved. First set your domains and generate your SSL certificates with Certbot, just like with Nginx. Next execute the following command
sudo a2enmod http2
Next, edit the LetsEncrypt Certbot Apache config file at /etc/apache2/sites-enabled/000-default-le-ssl.conf and enter the correct Protocols line right after the <VirtualHost *:443> line, like so
<VirtualHost *:443>
  Protocols h2 h2c http/1.1
  ServerName http2test.worf.webdock.io
  ServerAlias some-alias.myawesomesite.com
  ...
</VirtualHost>
Finally restart Apache
sudo systemctl restart apache2
Now visit your https enabled site and bask in the glory of HTTP2
How do I know HTTP2 is working?
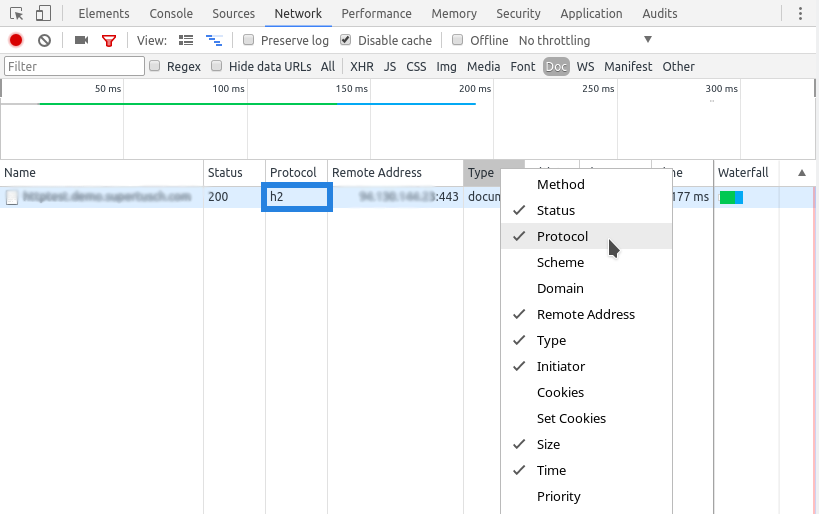
Using the Google Chrome Network Inspector and looking at the Protocol column you can ascertain whether your site is loading using HTTP2.
Look for h2 instead of http/1.1 and you know it’s working! Remember HTTP2 only works over SSL, so it should show the :443 port in the Remote Address column.


