Introduction
Your WordPress hosting control panel shouldn’t cost more than your actual servers. Yet that’s exactly what happens with GridPane, while Webdock gives you a robust management system at no extra cost. This guide shows you exactly how to migrate your sites over, whether you prefer handling things manually or using plugins.
You’ll find step-by-step instructions to move your WordPress sites without hassle, plus practical insights about Webdock’s features that make it the obvious choice for smart server management. Beyond the cost savings, you’ll get a faster, cleaner, and more reliable platform for your WordPress sites.
Here’s Why I Think Webdock Is Better Than GridPane
GridPane’s pricing starts at $100 per month for the base plan, with more comprehensive options costing between $500 and $1500. This cost is just for the management panel, not the server, which is surprising since the panel can end up costing more than the server itself.
While you might think GridPane offers a user-friendly interface for that price, its design feels somewhat like a high-school kid’s all-nighter project after watching several HTML tutorials on YouTube.
It isn’t mobile-friendly and lacks many basic features. Tasks like setting up a simple Cron job should be simpler. The platform seems focused on aggressively adding new features and upselling you with courses and guides to manage an agency, but I couldn’t help but encounter silly bugs.
The system’s performance is slow. Provisioning a $10 Vultr server took about an hour, and deploying a WordPress site took another 15-20 minutes. I could complete a full WordPress design in that same timeframe.
On a personal note, I’d rather not comment on the founder; he is infamous for personally abusing people critical of his product or enabling pitchfork-holding cult users of GridPane to bully anyone with negative reviews about the platform.
Webdock, on the other hand, offers a free control panel, but you only pay for the hardware. It might not have all the extra fluff, but it’s organized and user-friendly, and there’s no upselling of low-quality flipped courses masquerading as genuine knowledge. Most importantly, running WordPress on VPS gives you full control compared to shared hosting.
You don’t need to install anything on your servers, saving valuable time. Webdock provides full server snapshots and application-level backups for data protection. It allows for the management of PHP settings, databases, FTP, Cron Jobs, SSL Certificates, and root SSH access directly from the dashboard. It also has intuitive mobile apps so you can manage your server on the go.
Additionally, Webdock offers free transactional emails through Postmark for plans above €6. It also provides free email forwarding with ImprovMX after the said price limit. If purchased separately, these services would cost over $30 monthly.
And no, there’s no cult around Webdock, and upcoming Elon Musks do not run it. They handle feedback well and actively invite users to share their experiences if they encounter any issues, maintaining an active roadmap for future features.
Obtaining the Core Files for Your Website
If you are a paid user, using GridPane’s backup system would be an easy step, but I won’t mince my words; I couldn’t, in my right mind, pay such a high price for such a basic feature. So, I am going to do the process with some elbow grease.
GridPane doesn’t have a file manager (it starts at $100/mo!). So we’ll have to use good ol’ SFTP to get our files. There are a variety of them, such as Cyberduck and FileZilla. If you are going the backup route, just download the files and skip to the configuring a server in the Webdock section altogether. The process from there would be the same for you, more or less.
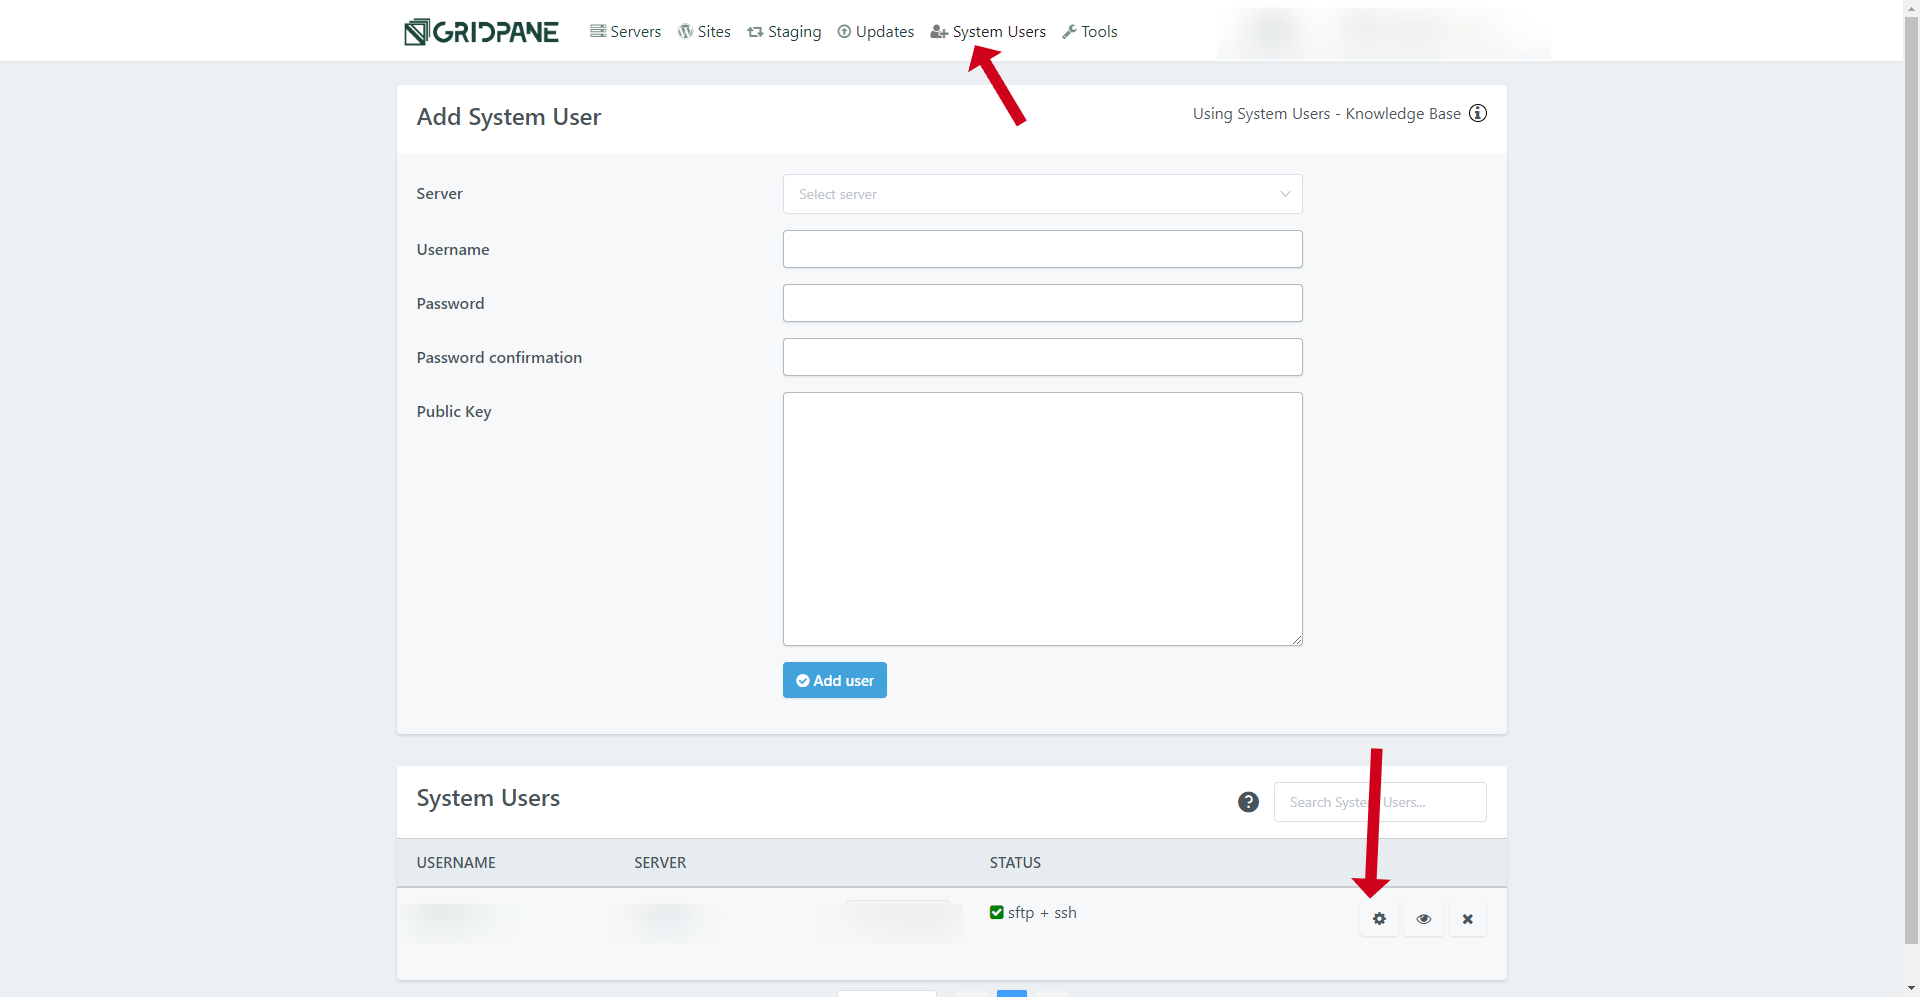
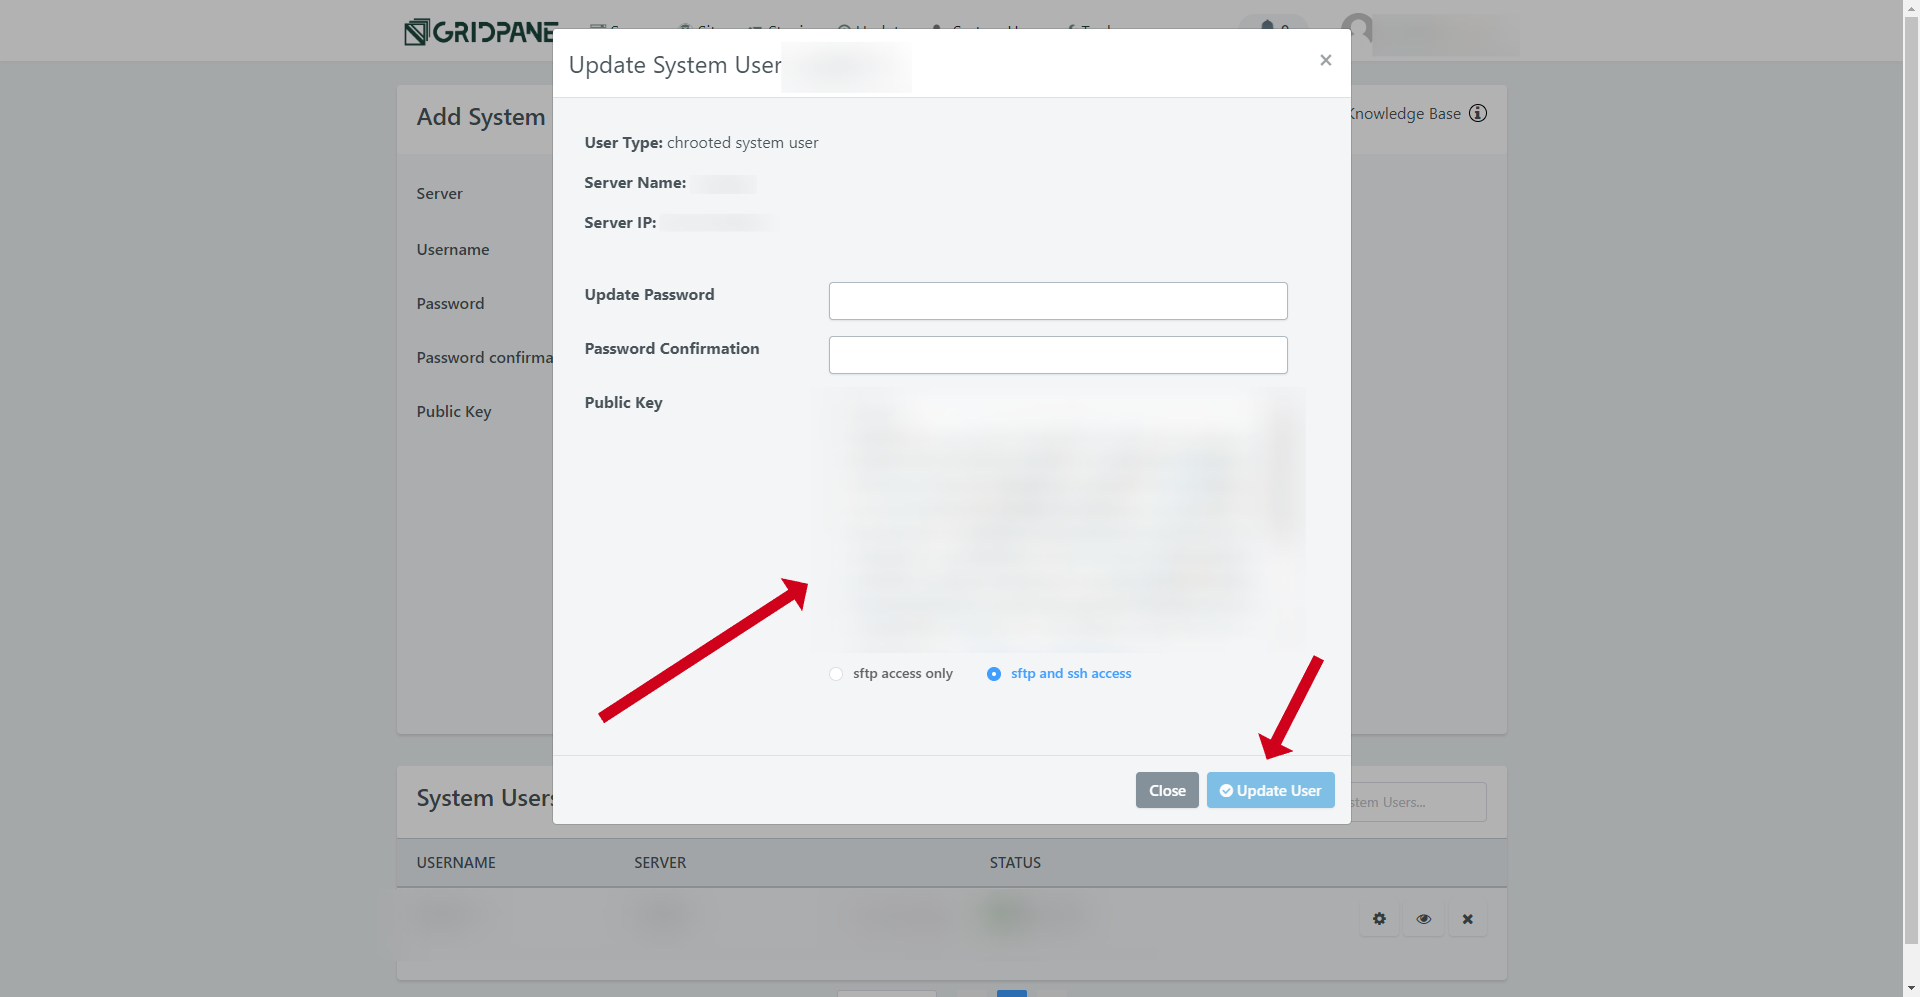
First, if you haven’t done so yet, head to System Users > [user], click on the gear icon and add a public key to your server. You may be asked to enter a one-time password (OTP) before adding the key.
I won’t go into how to generate SSH keys here, but you can use tools like PuTTY Keygen or look for online guides that can assist you. Just remember to keep your private keys safe and store them securely on your computer.
If you’ve forgotten your password, this would be a good moment to reset it.
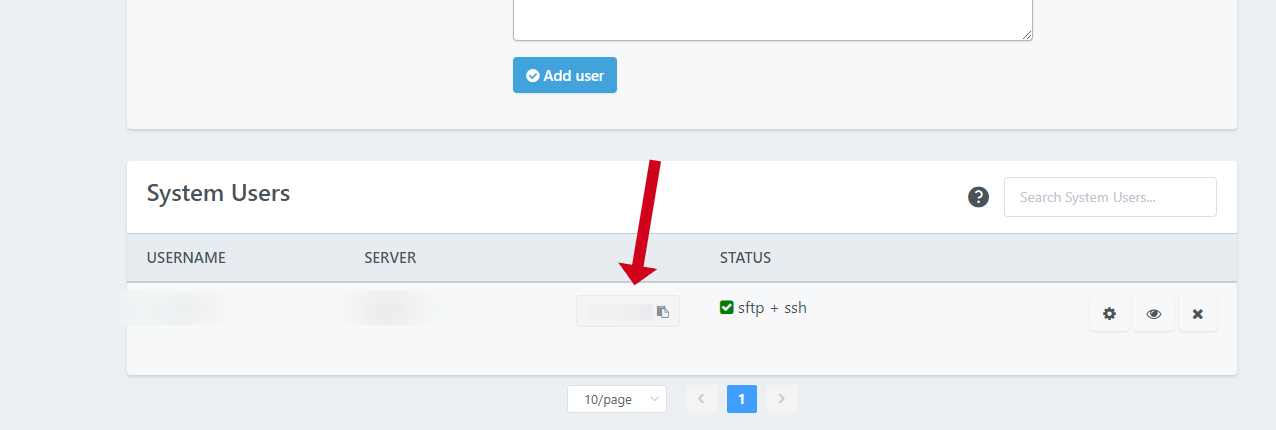
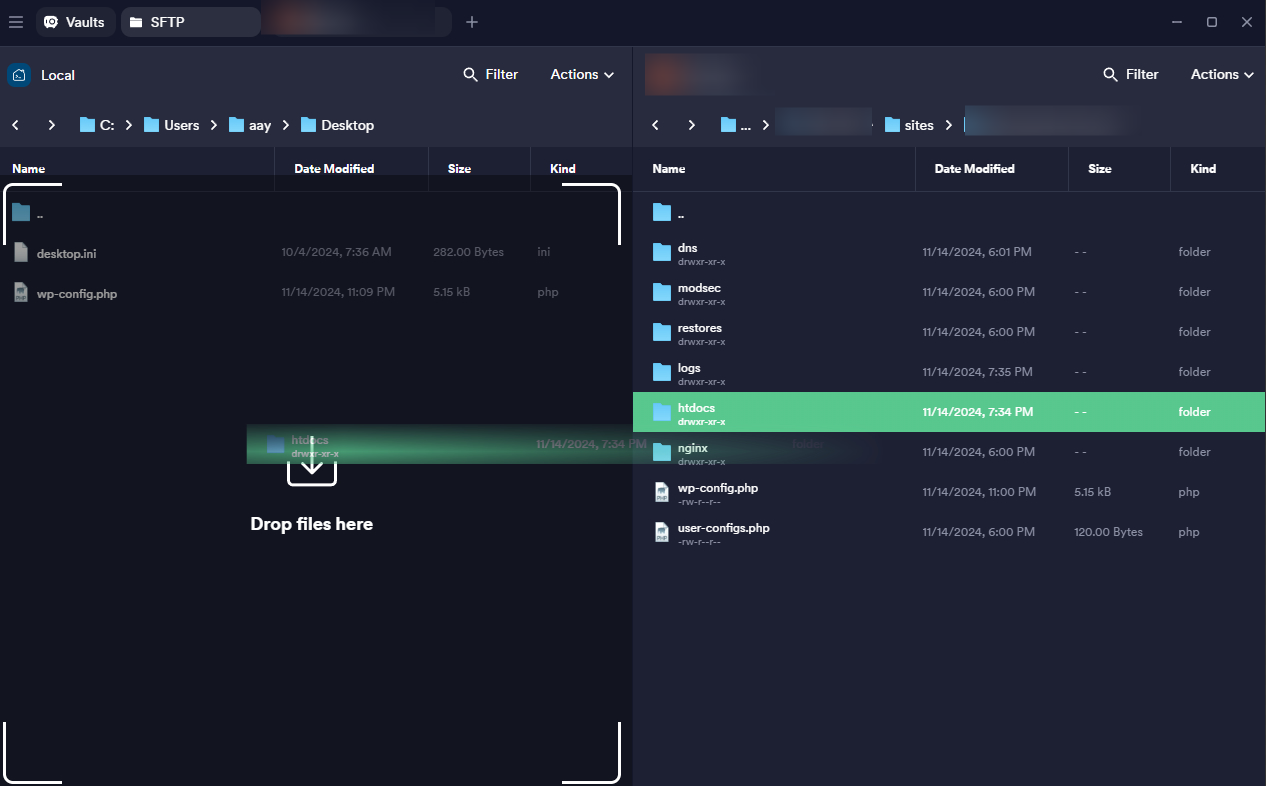
Next, launch your preferred file manager (I’m using Termius), and log in using the user and the private key corresponding to the public key you just added. You can find the IP Address just near your user details.
Again, how to do so is out of the scope of this tutorial, as well as, it will vary differently for each software. Google is your best friend in such cases.
When prompted for a password, enter your sudo password (which you may have just updated).
A fair warning before proceeding…
My approach generally leads to minimal downtime (I’ll share more tips later to help minimize it even further). However, low downtime doesn’t ensure that all changes made during the migration will be captured.
To enhance the process, it’s a good idea to plan your migration during times of low traffic. Utilizing tools such as WP All Import or WP All Export can be helpful for transferring any new data that may not have been included in the initial migration.
Another option is to use a maintenance plugin, which allows you to temporarily take your live site offline until the entire transfer to Webdock is finished.
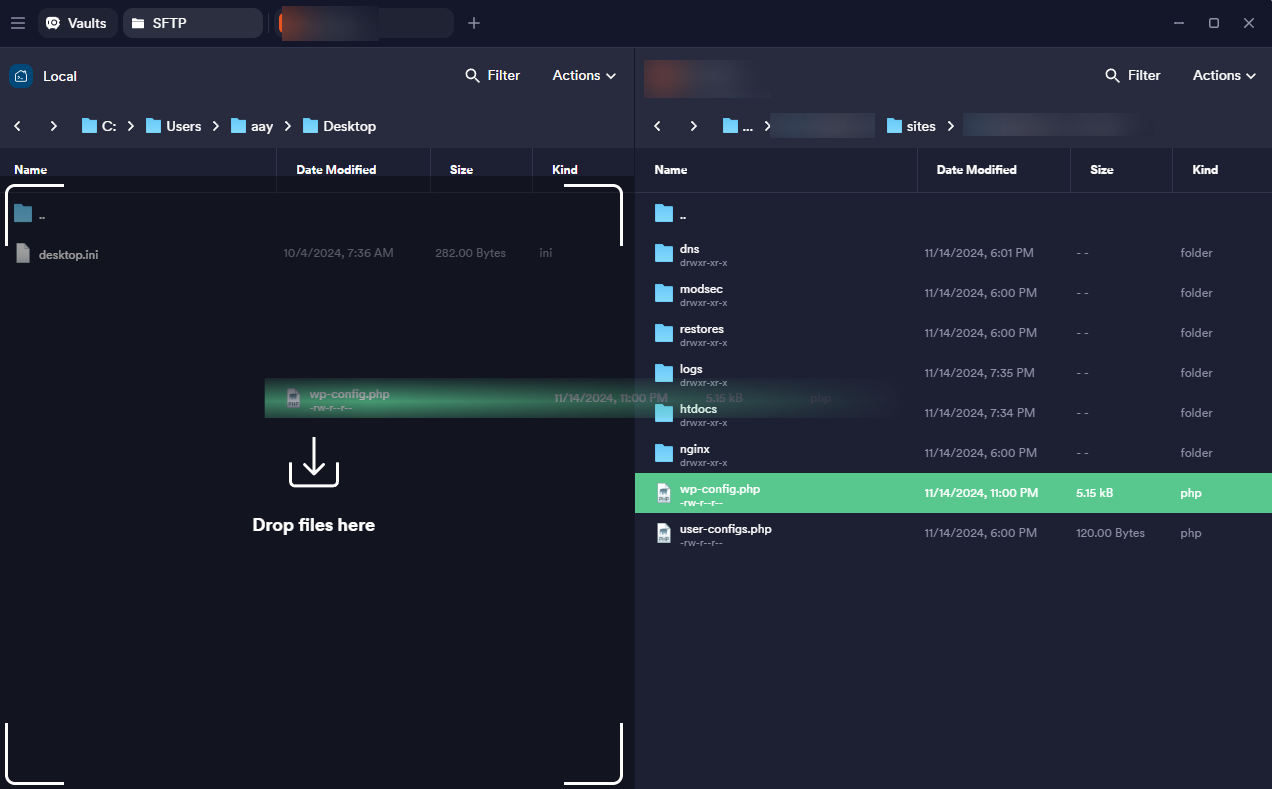
Once you log into your server, you will reach the folder named after your user. In this folder, you will find another folder named after your site. Open this folder.
Here, you will find your wp-config.php file. If you have any custom entries added to it, download the file to your computer, or else leave it.
Likewise, download the ‘htdocs’ folder to your machine. Depending on the SFTP software you use, you might have the ability to compress the folder before transferring it to your computer. If this option is available, it can significantly reduce the time required. Termius doesn’t seem to have it, so I will download the complete folder.
If you’re using Termius, just like me, ensure you convert the ‘htdocs’ folder to a .zip folder first.
Obtaining the Database of Your Website
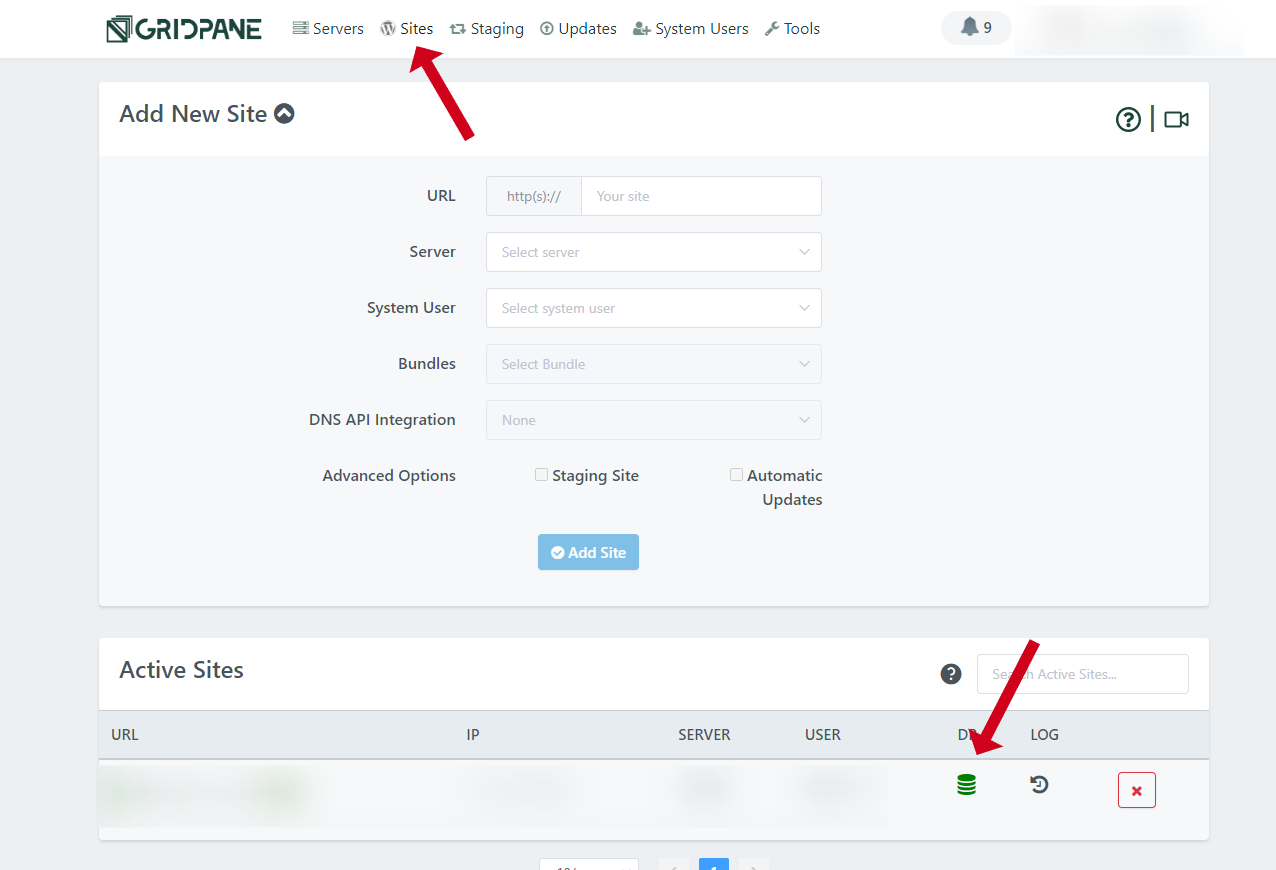
On your GridPane panel, go to Websites and click on the Database icon beside your website’s name.
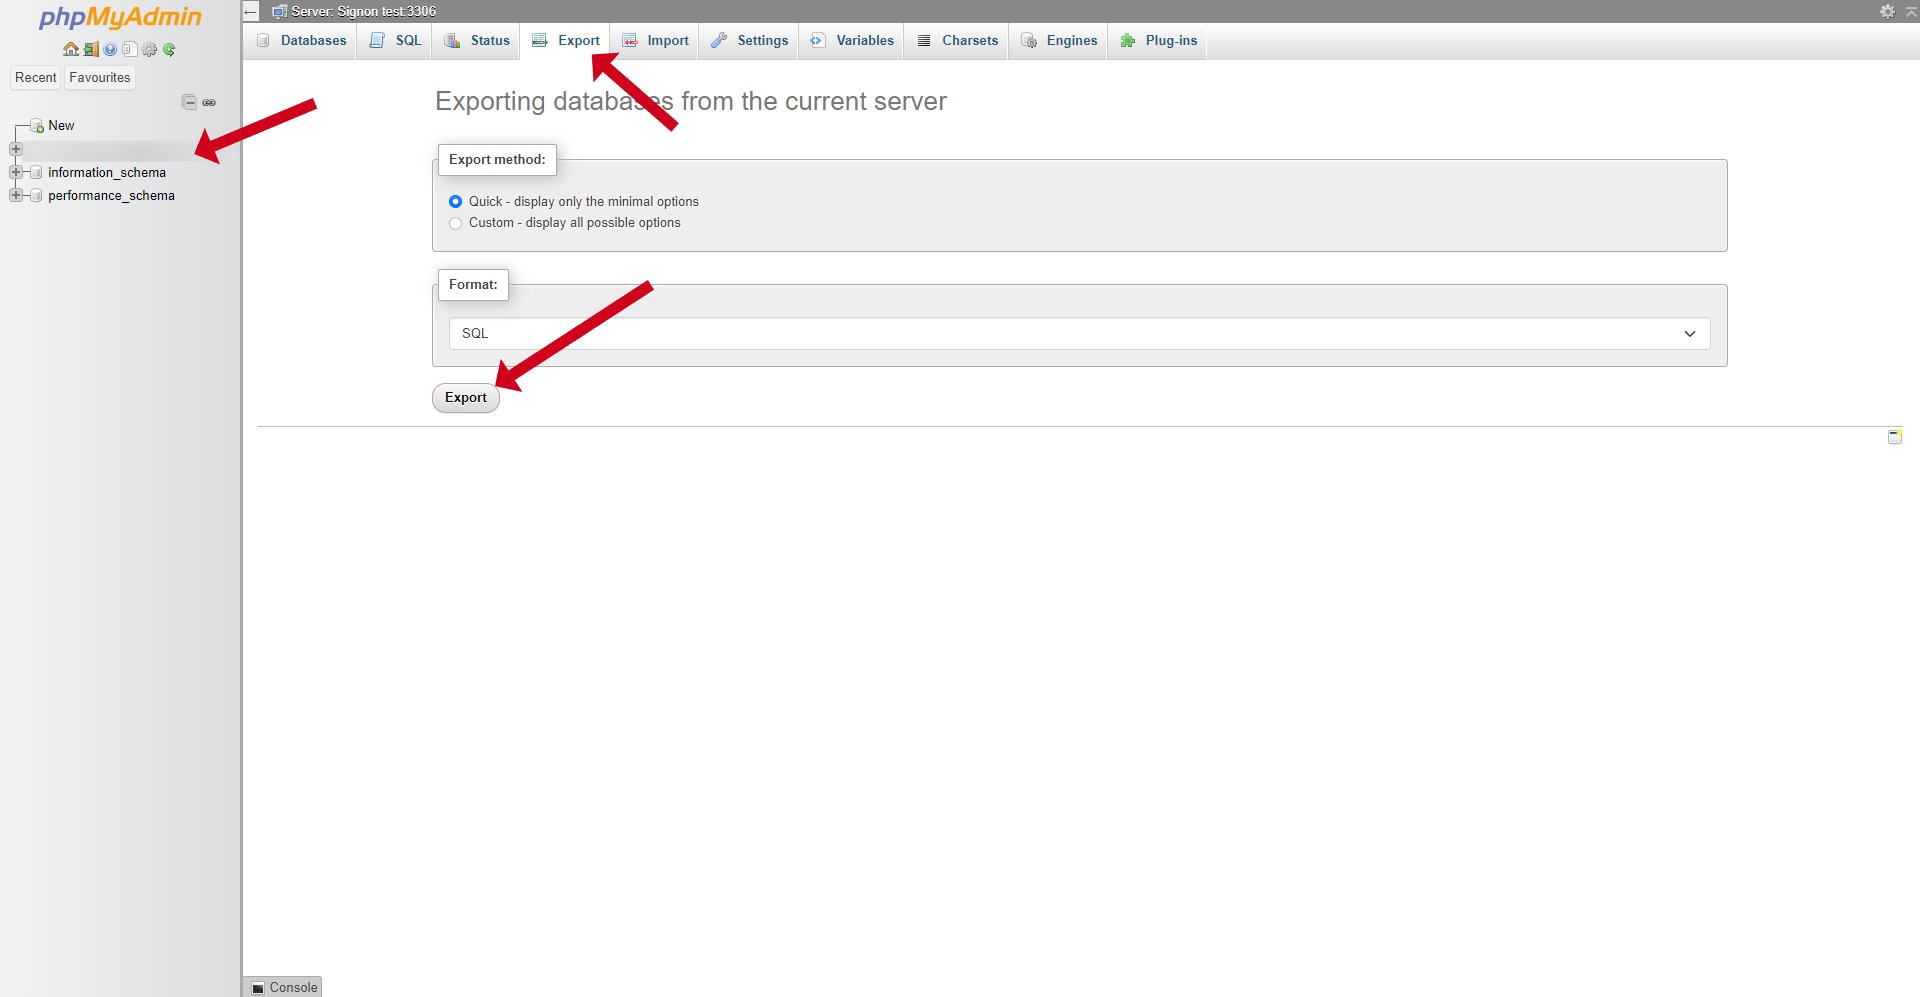
This button will log you into phpMyAdmin. Select your website’s database and then go to Export to export the Database file.
Keep this Database file ready with the ‘htdocs’ zip.
Configuring A Server on Webdock And Installing WordPress
Go to Webdock and create a server with a starting price of €/$5.99 or more. You can select either Apache or NGINX as your server software, with NGINX often being the preferred choice.
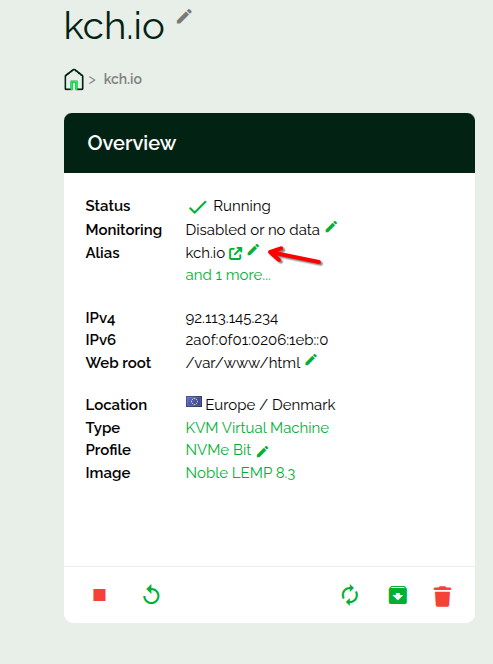
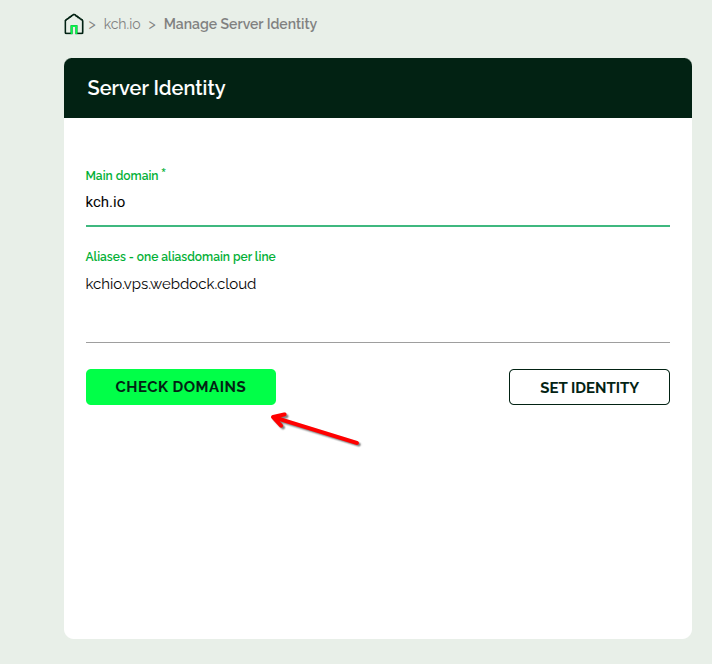
After your server is operational, access its dashboard on Webdock. Look for the small pencil icon next to the Alias field in the Overview tab and click on it.
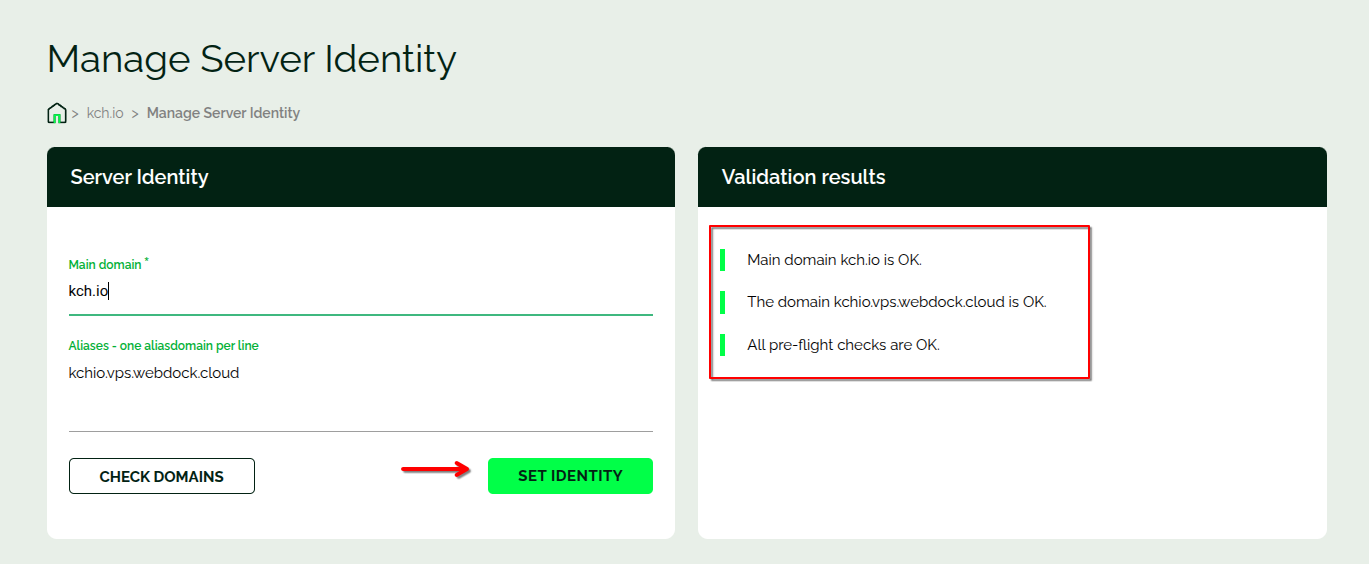
Enter your website’s primary domain in the central domain column. Typically, you would use the Check Domain feature before assigning an identity, but to reduce downtime, feel free to set your website’s domain as the primary one directly.
The setup process may take around 3-4 minutes, and you might encounter an error message—this can be disregarded now.
Return to your server’s overview page and scroll until you locate the Manage WordPress section.
Next, you’ll need to install WP-CLI on your server. Click the button provided to start the installation. Once WP-CLI is ready, click on the Install WordPress Now button. This will bring up a form requiring details such as admin email, domain, path, database, and more. In most instances, the default settings will suffice.
You won’t be able to set your own admin password, but Webdock will automatically generate one for you.
Transferring Database
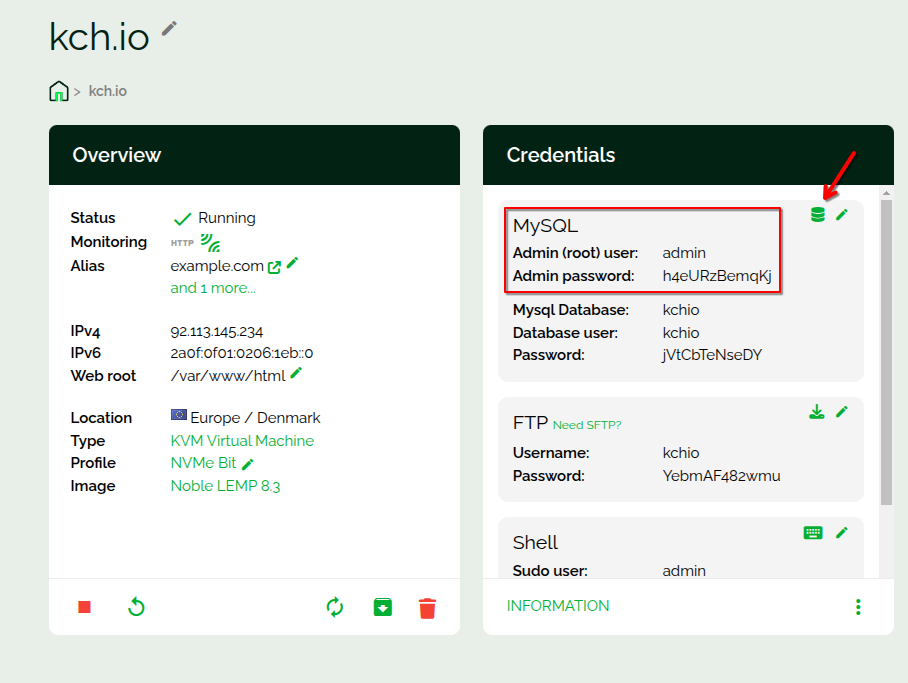
After you’ve set up WordPress, access phpMyAdmin by clicking on the small database icon in the credentials tab.
You’ll need to provide your Admin username and password when prompted.
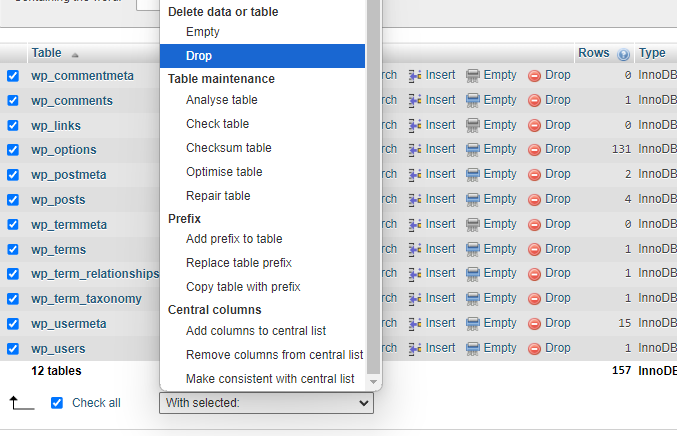
Locate the database linked to your WordPress site, select all the tables within that database, and delete (DROP) them.
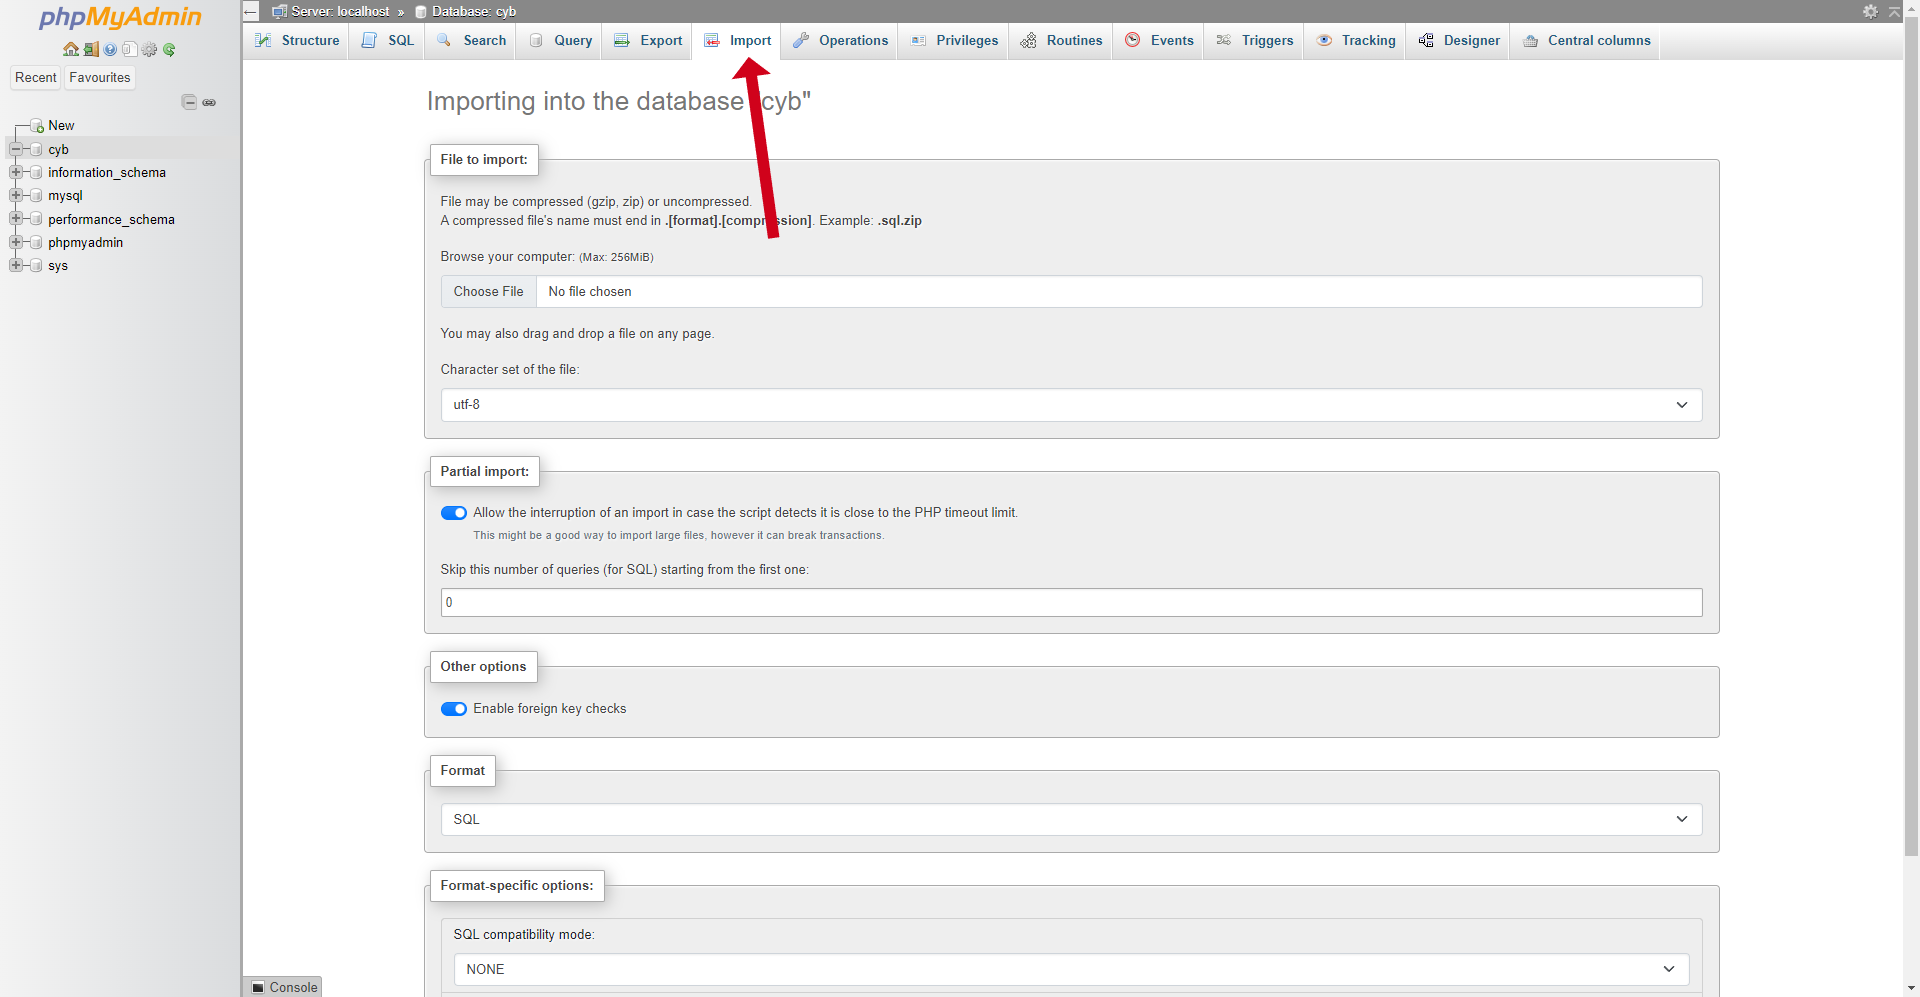
Next, navigate to the import tab. You can either drag and drop the .sql file you downloaded from the GridPane dashboard or manually browse for it on your computer. This file will populate your database with all the necessary data.
Finally, open the “wp_options” table and confirm that the site URL and home option_names contain your website’s URL in the https:// format.
Transferring Website Files
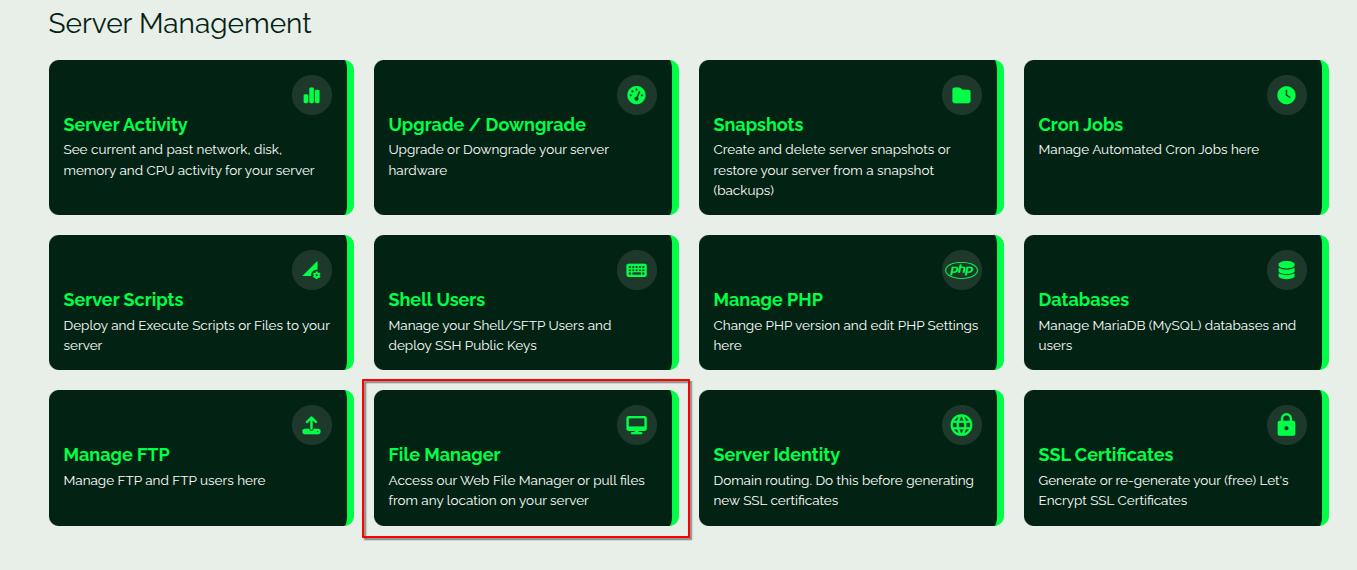
After you’ve imported and confirmed your database, install the File Manager from the overview section and log in.
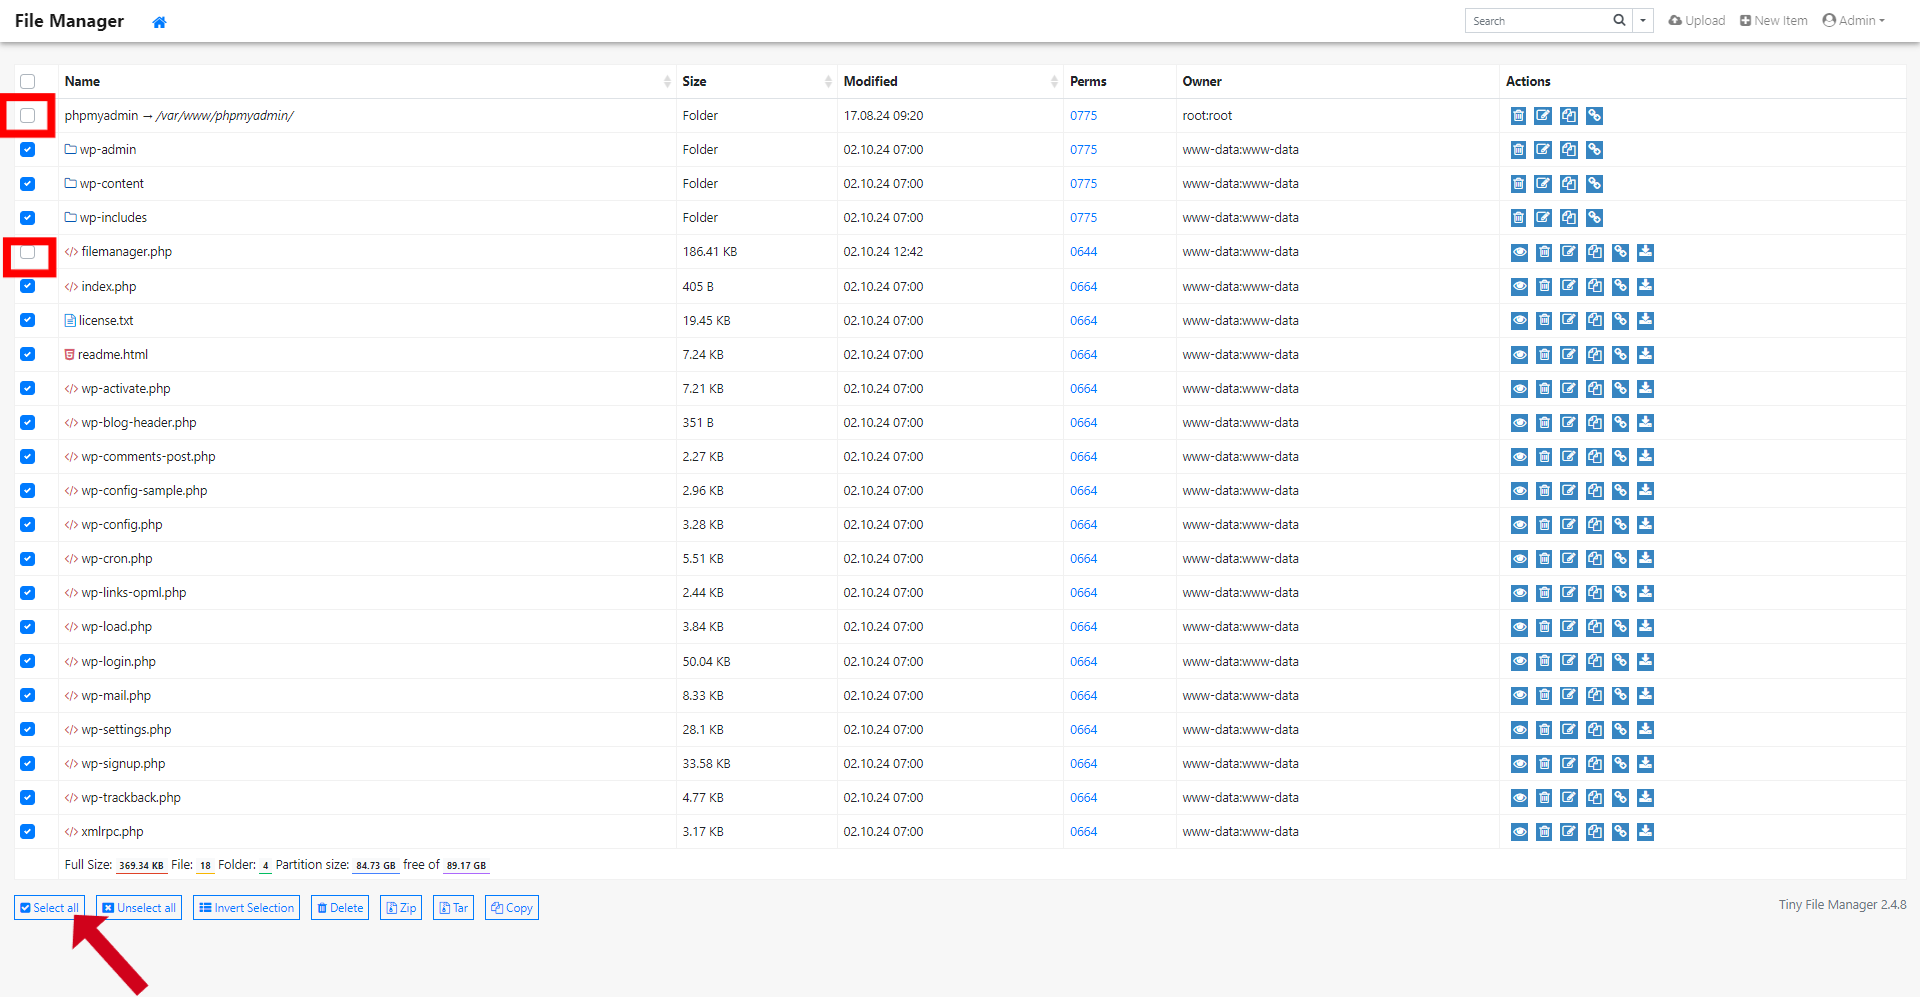
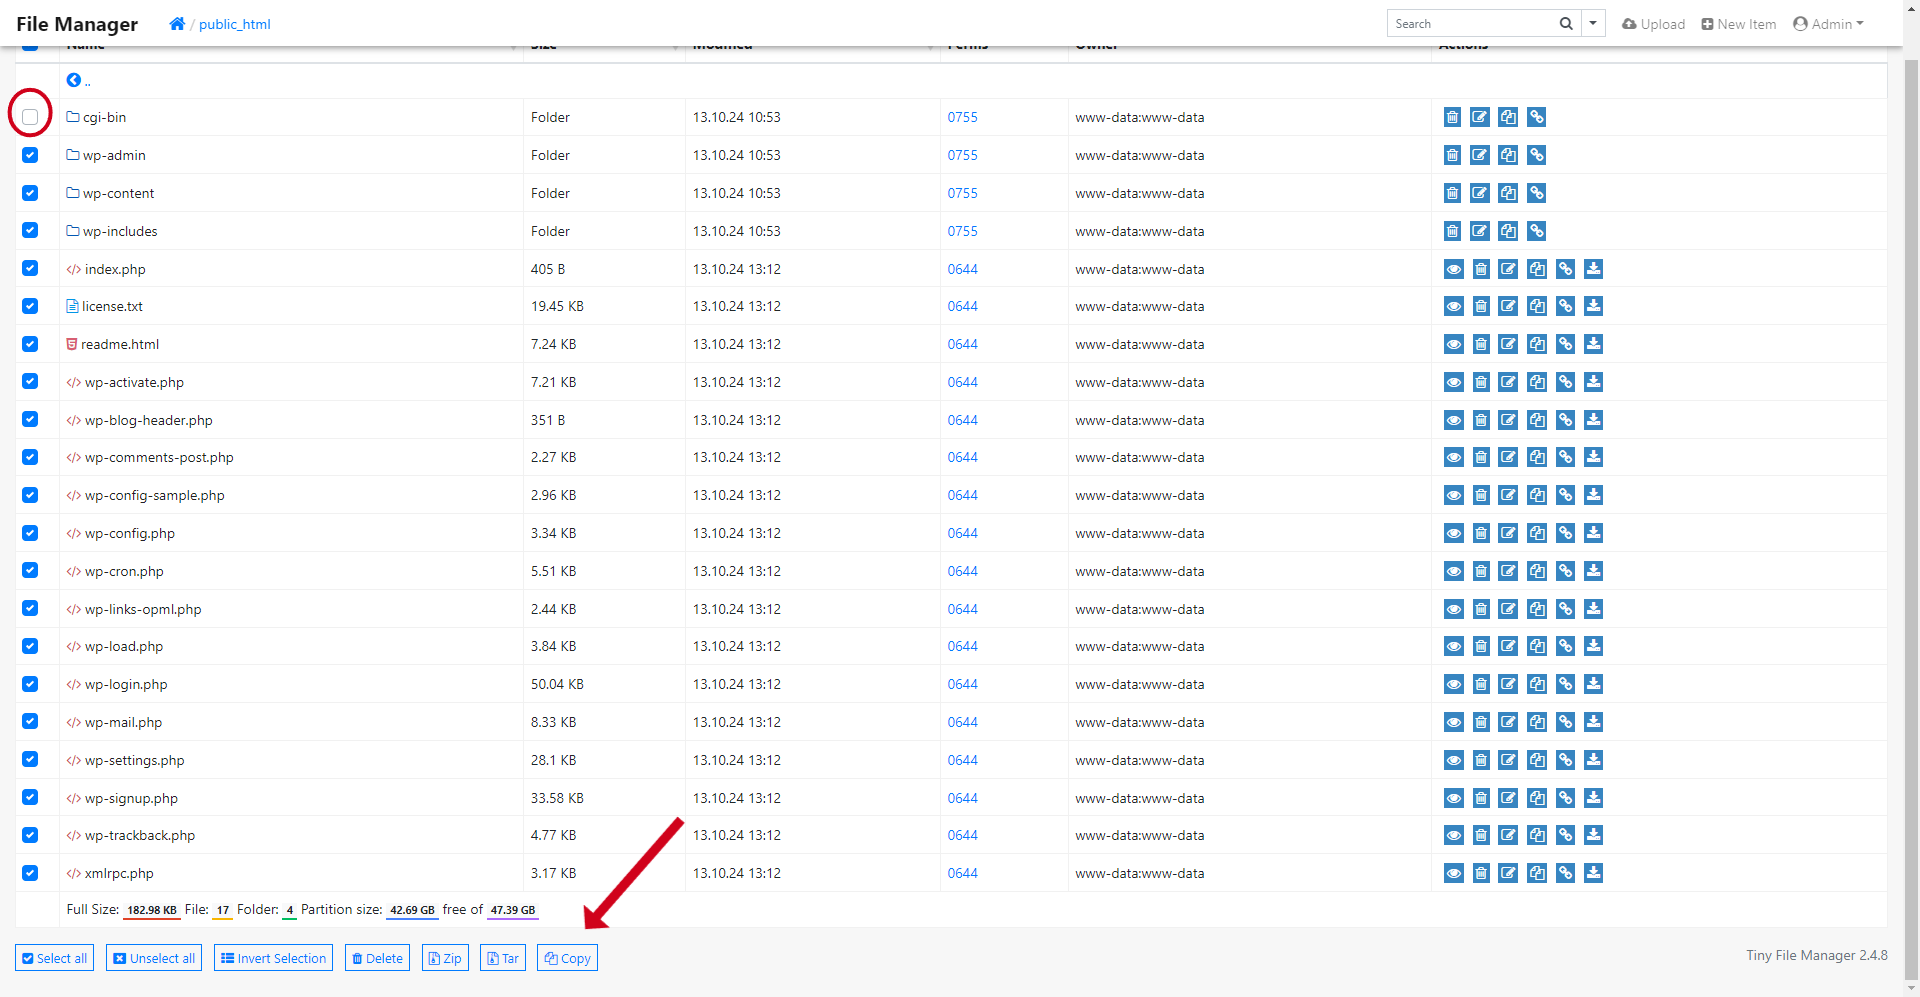
Inside the File Manager, select all files using the “Select all” option. Before deleting the remaining files, be sure to deselect both the PHPMyAdmin folder and the filemanager.php file.
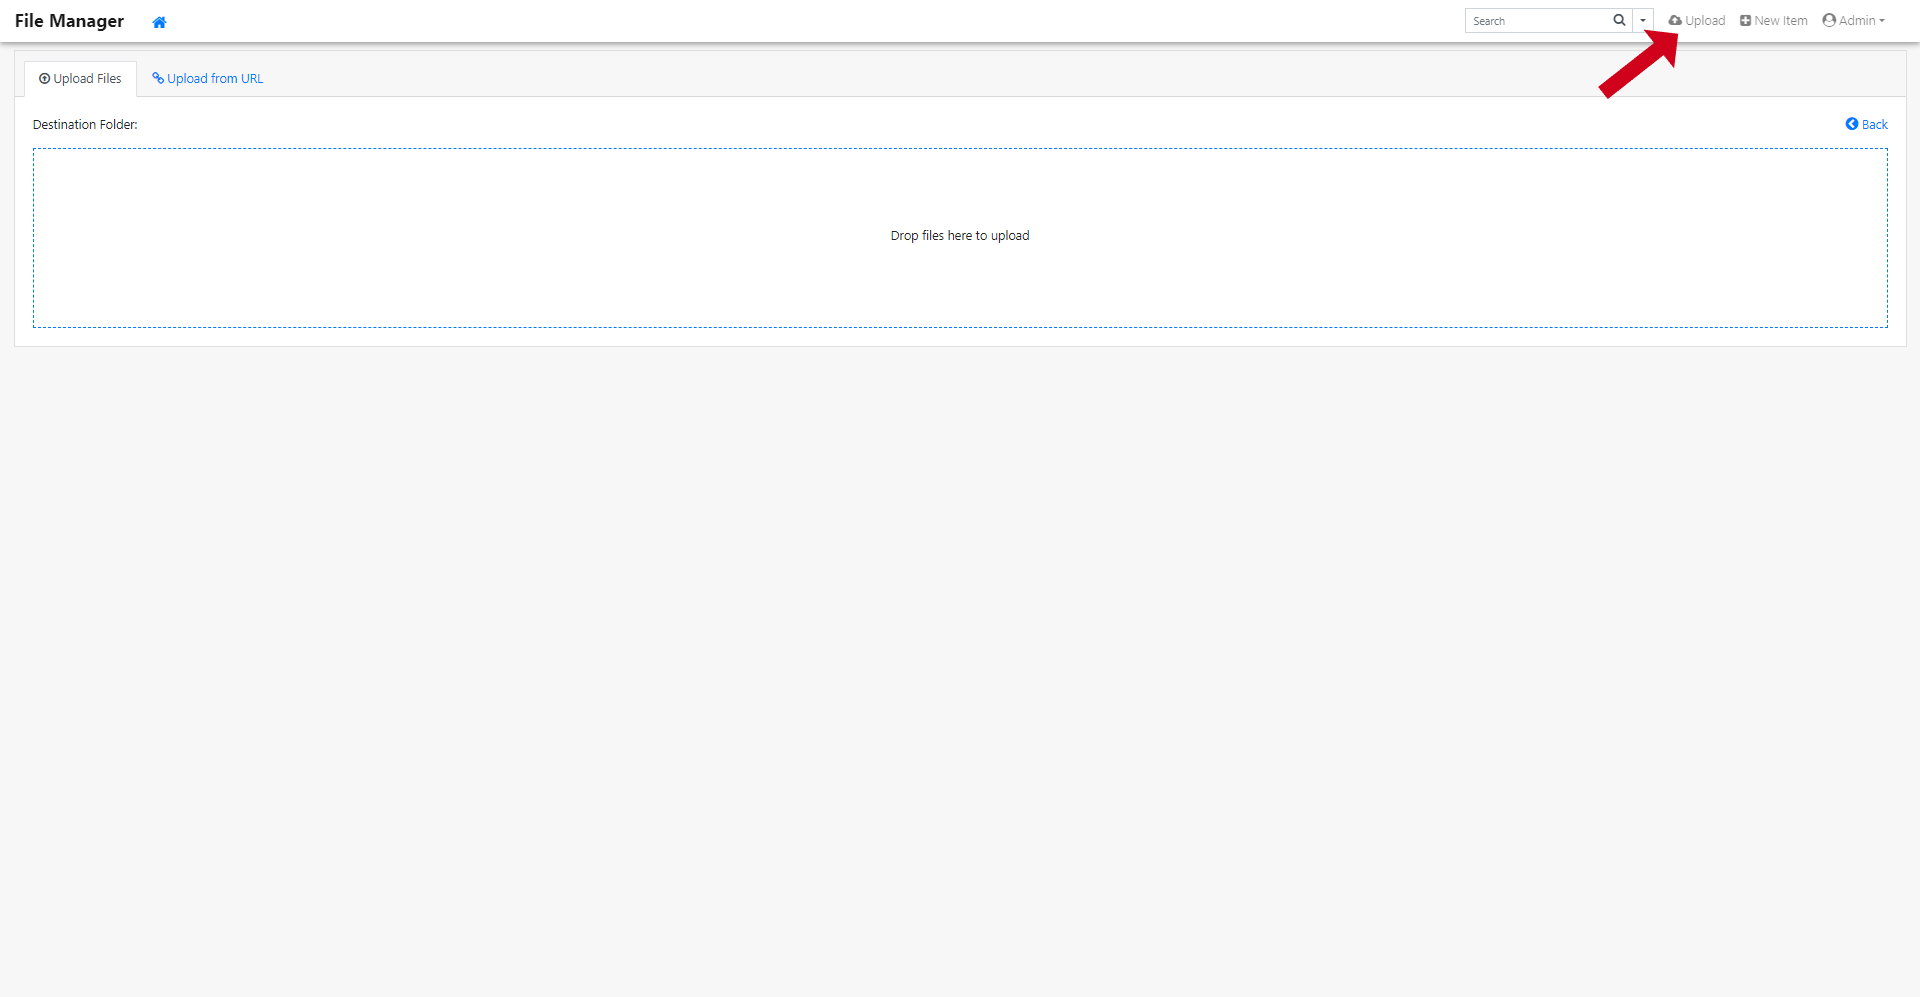
Next, go to the top right corner and click the upload button. Upload the ‘htdocs’ zip file you previously downloaded from GridPane with SFTP by dragging it into the window or selecting it manually from your computer.
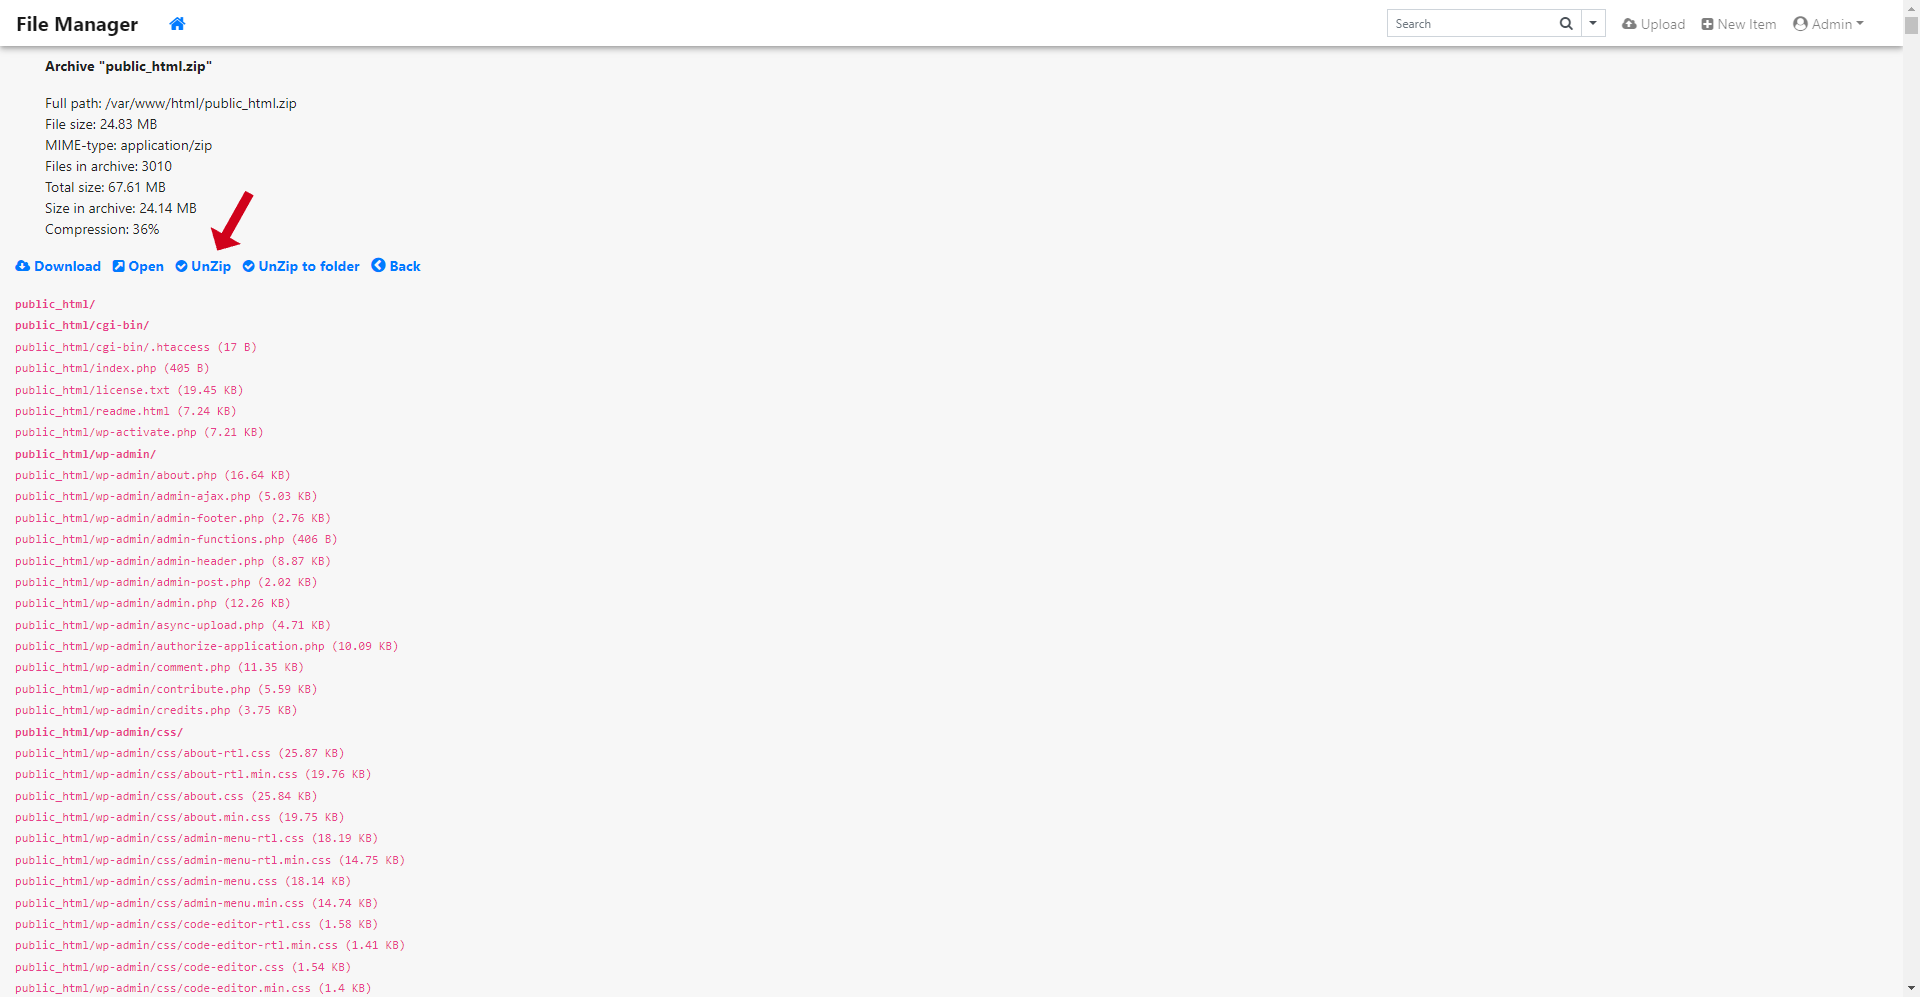
Once the upload is complete, find the zip file, click on it, and choose the option to unzip it.
After unzipping, open the new folder and select all its contents. Then, click on the copy button.
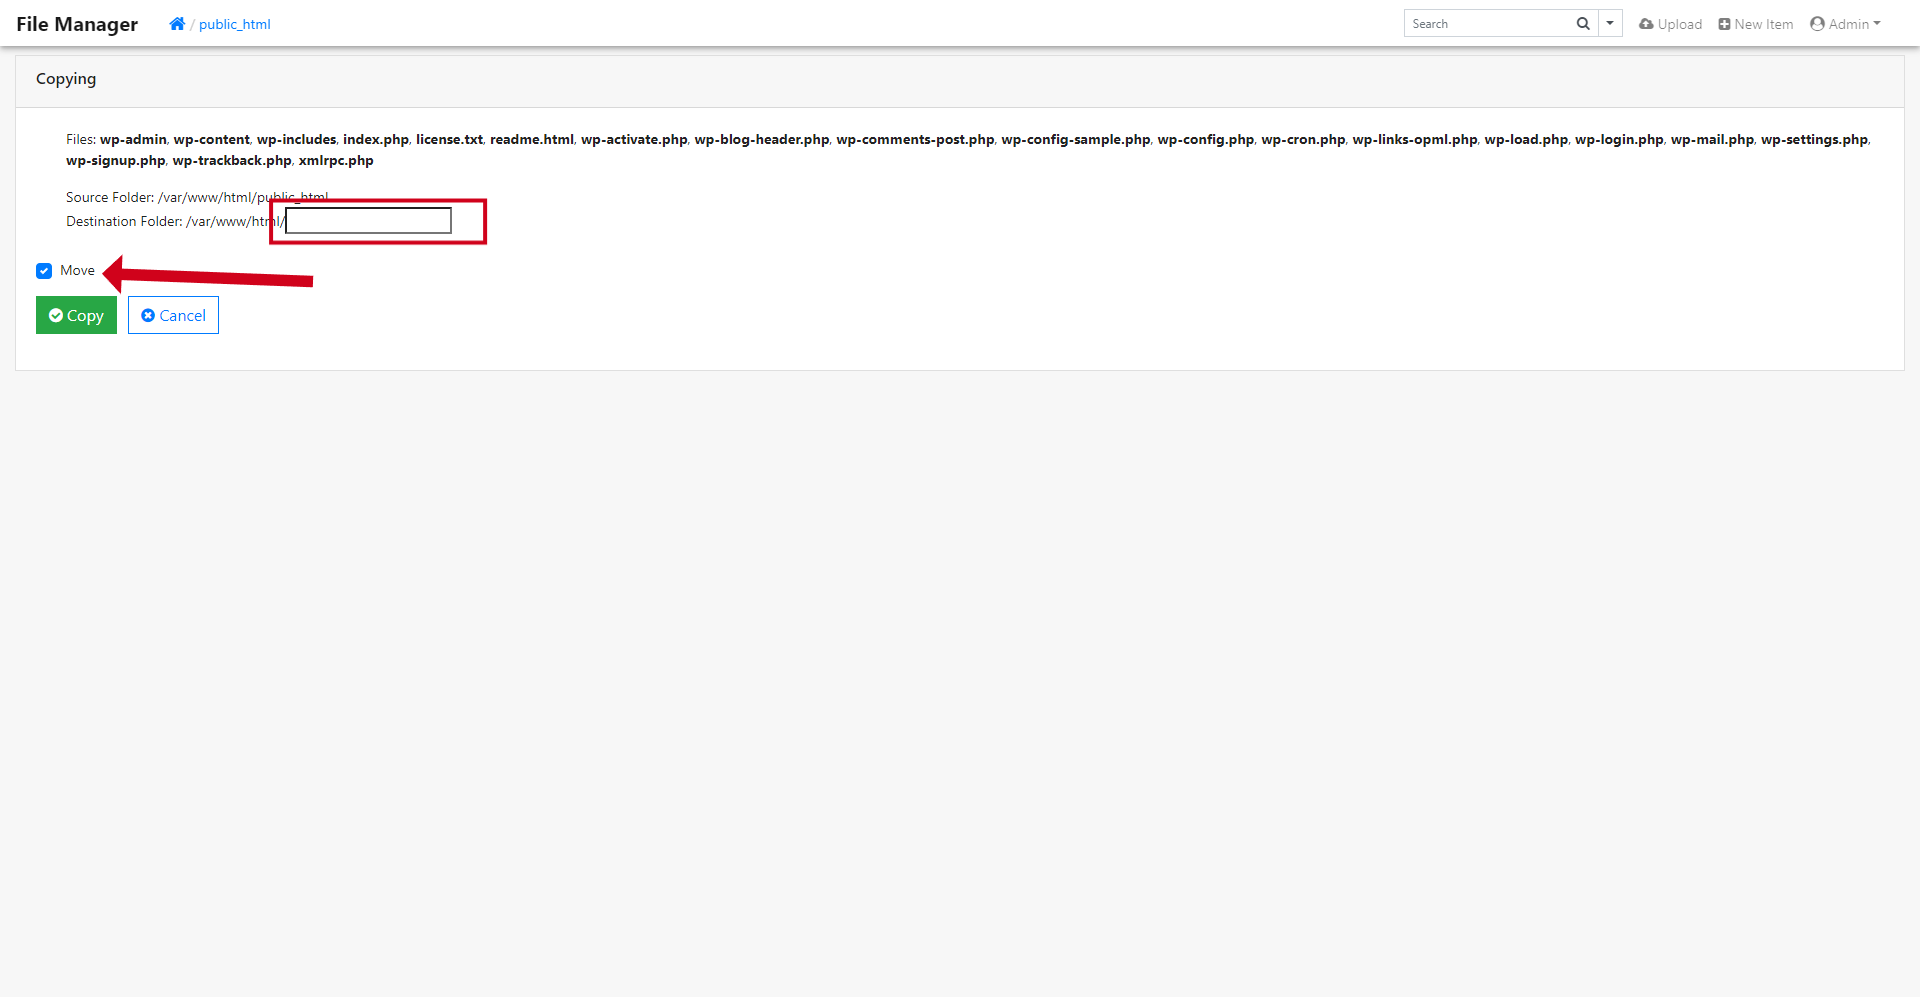
Check the “Move” option in the following screen while leaving the path field empty. This will ensure that everything is transferred to your leading directory.
Now that your files are correctly placed, you can delete both the original zip file and the unzipped folder.
Linking the Database, Fixing the WP-Config file, and Installing the SSL Certificate
Now, you may have noticed that in all of these, I have skipped the wp-config.php file. This is because GridPane amends the wp-config file, which will run your website in error. So you will have to ‘create’ a new wp-config file to ensure your site works right.
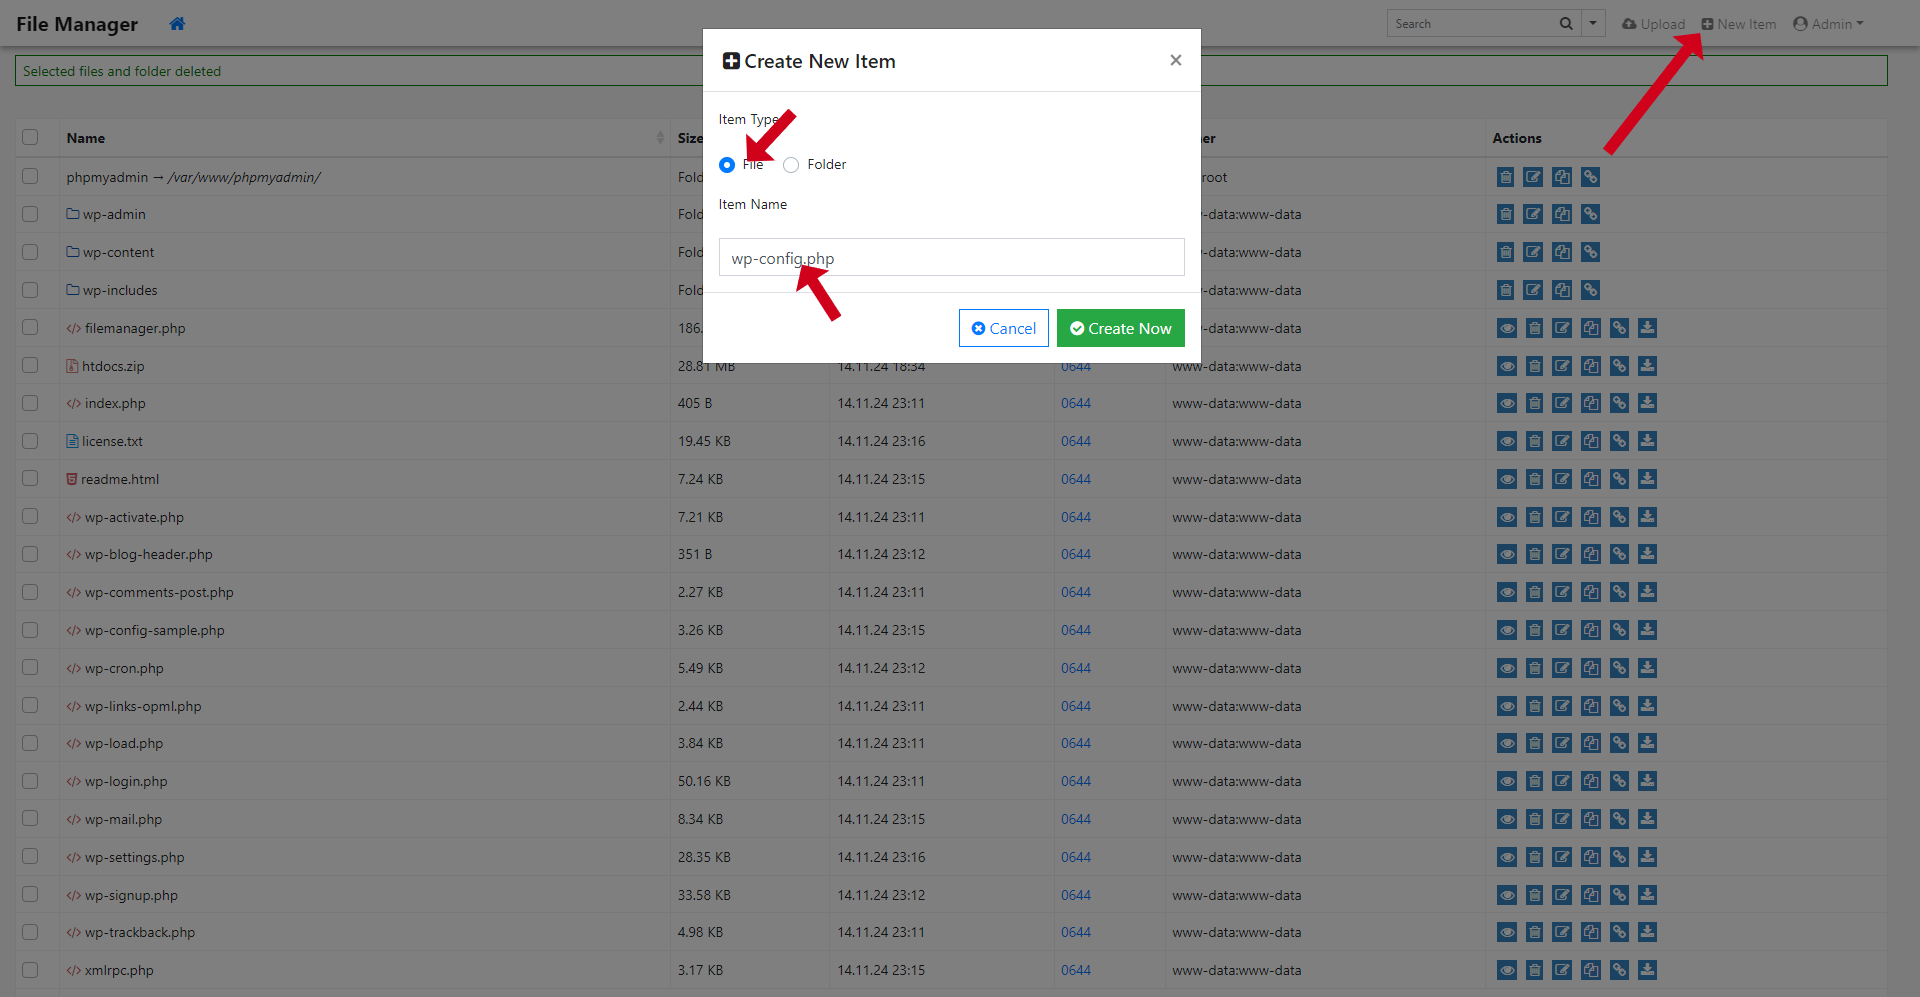
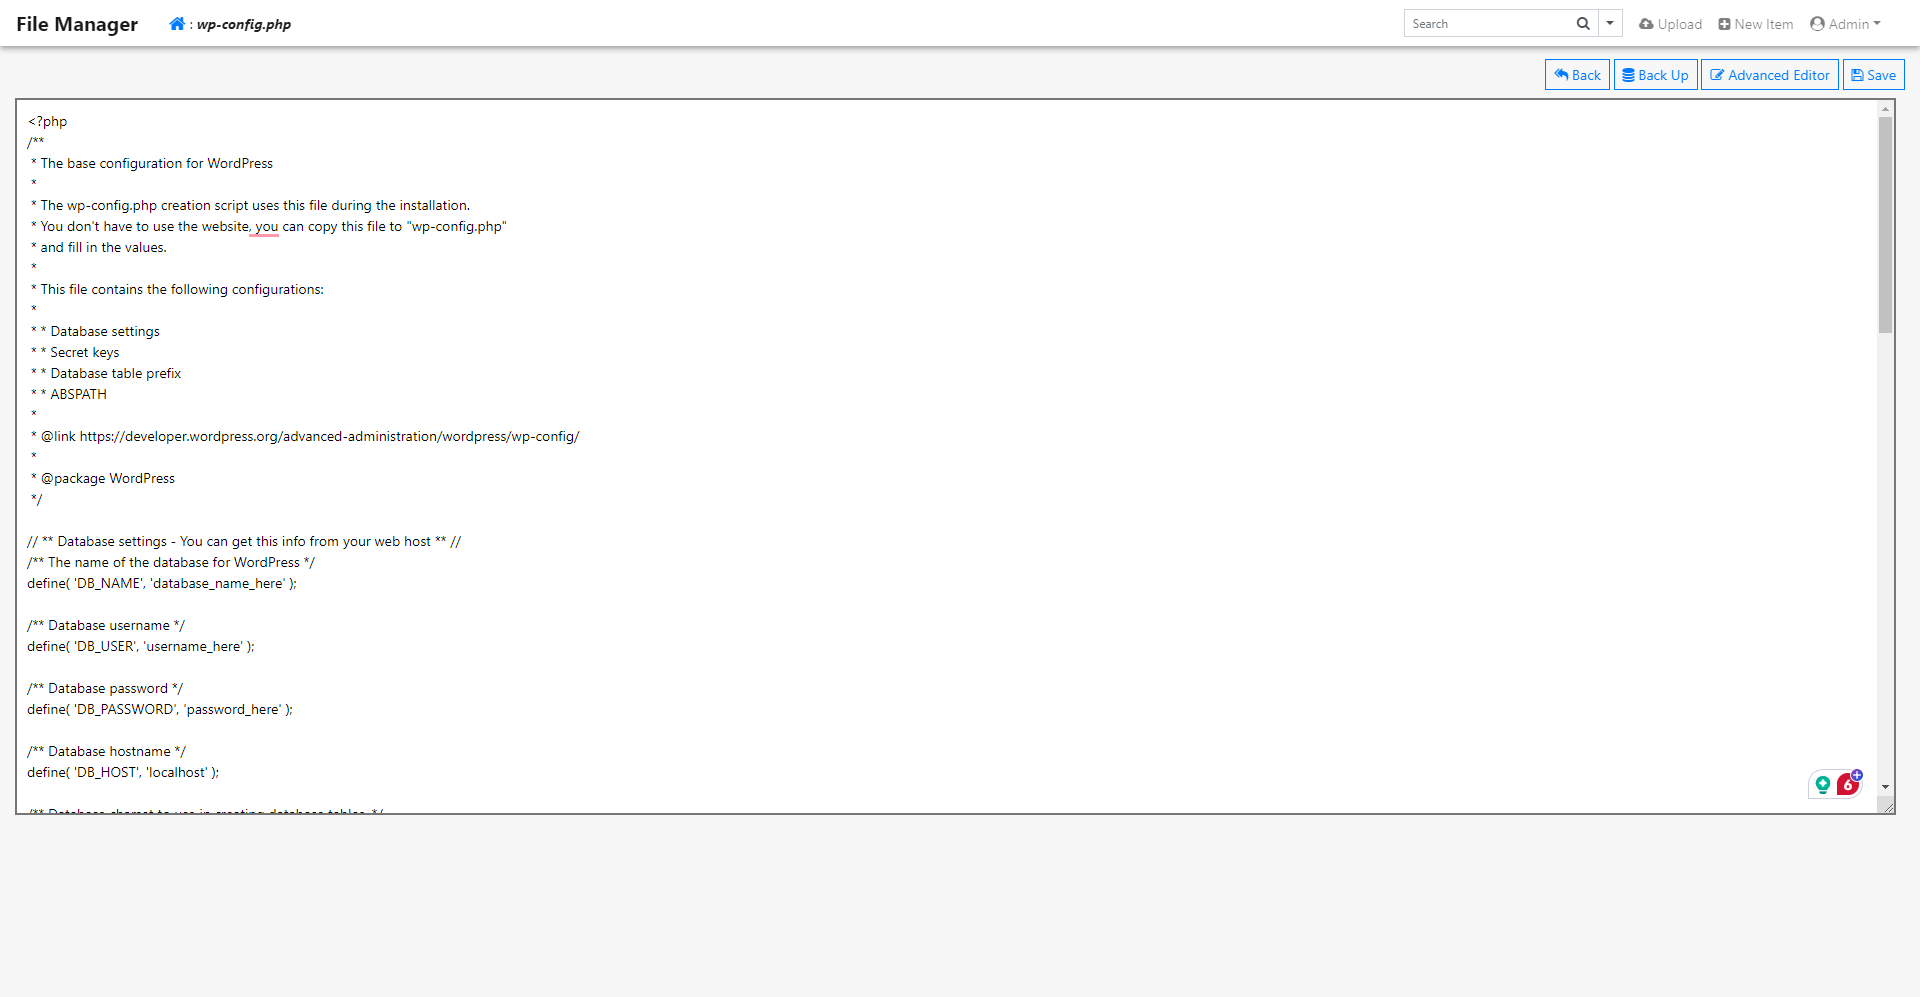
First, create a new file, name it wp-config.php, and exit the file.
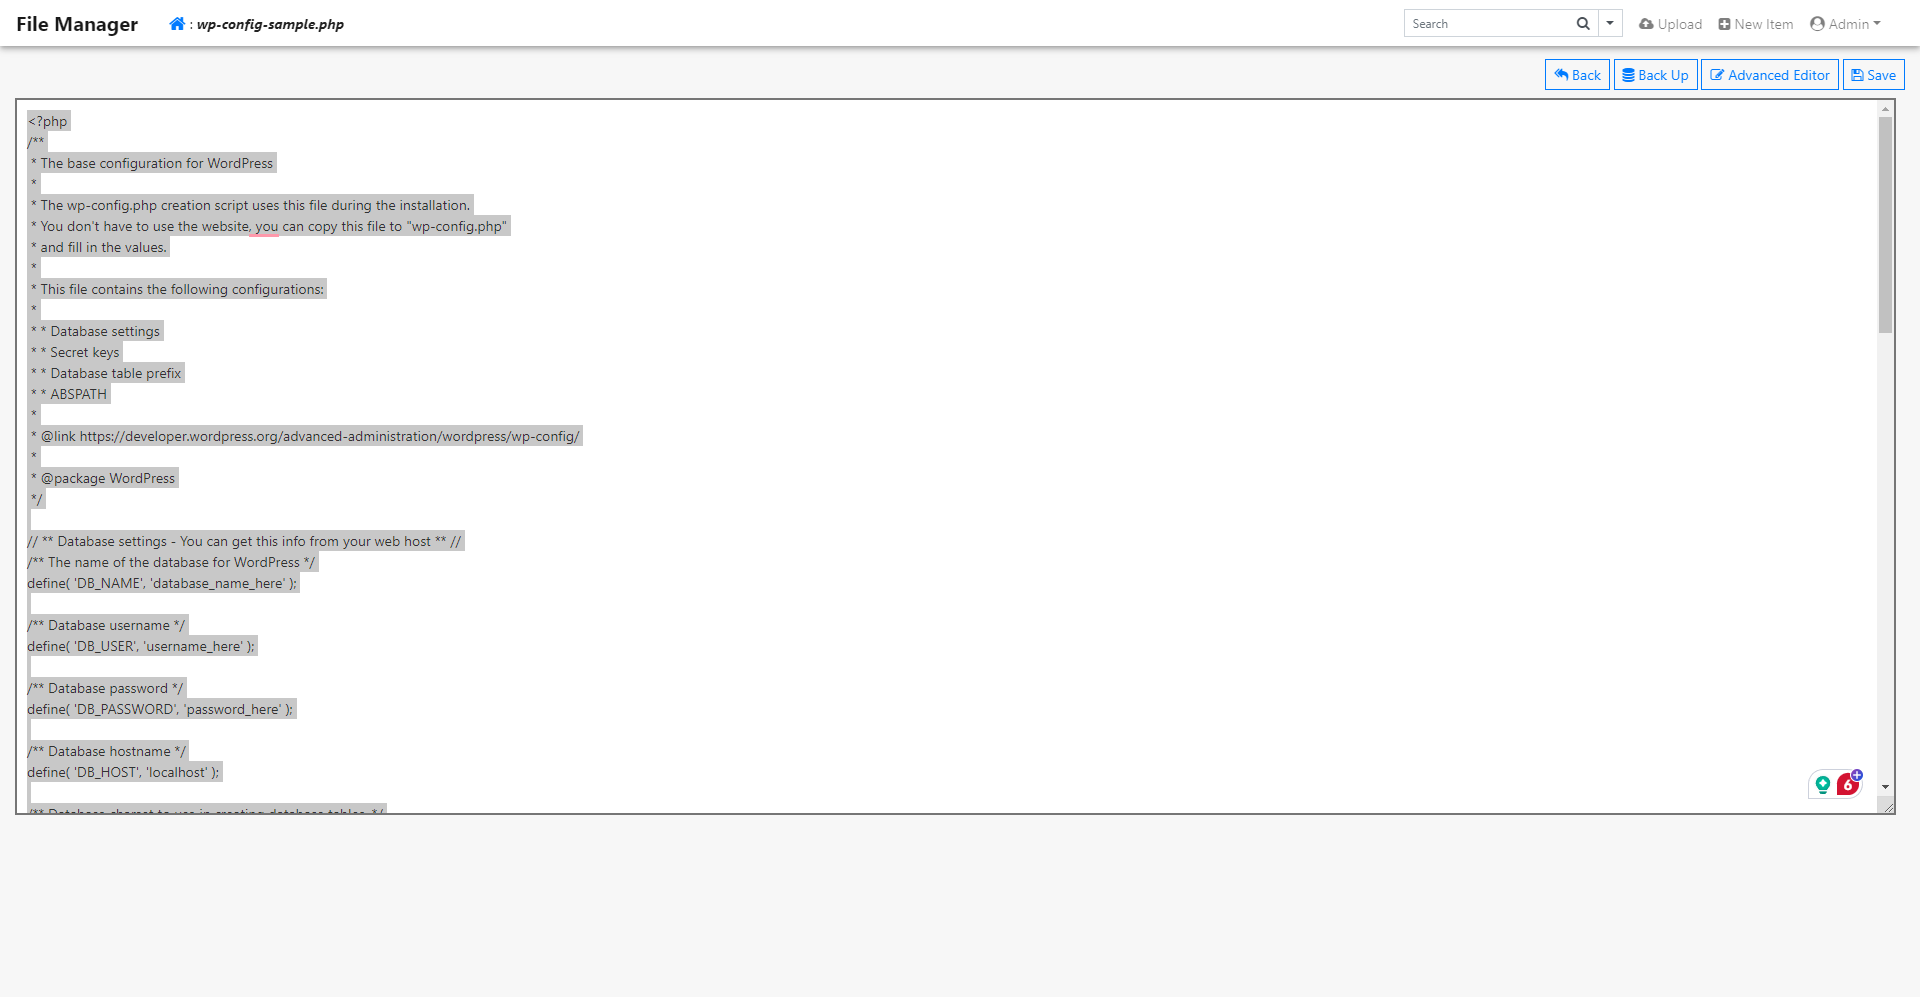
Then, find the wp-config-sample.php, copy all of its content,
And paste it inside the new wp-config.php file we just made.
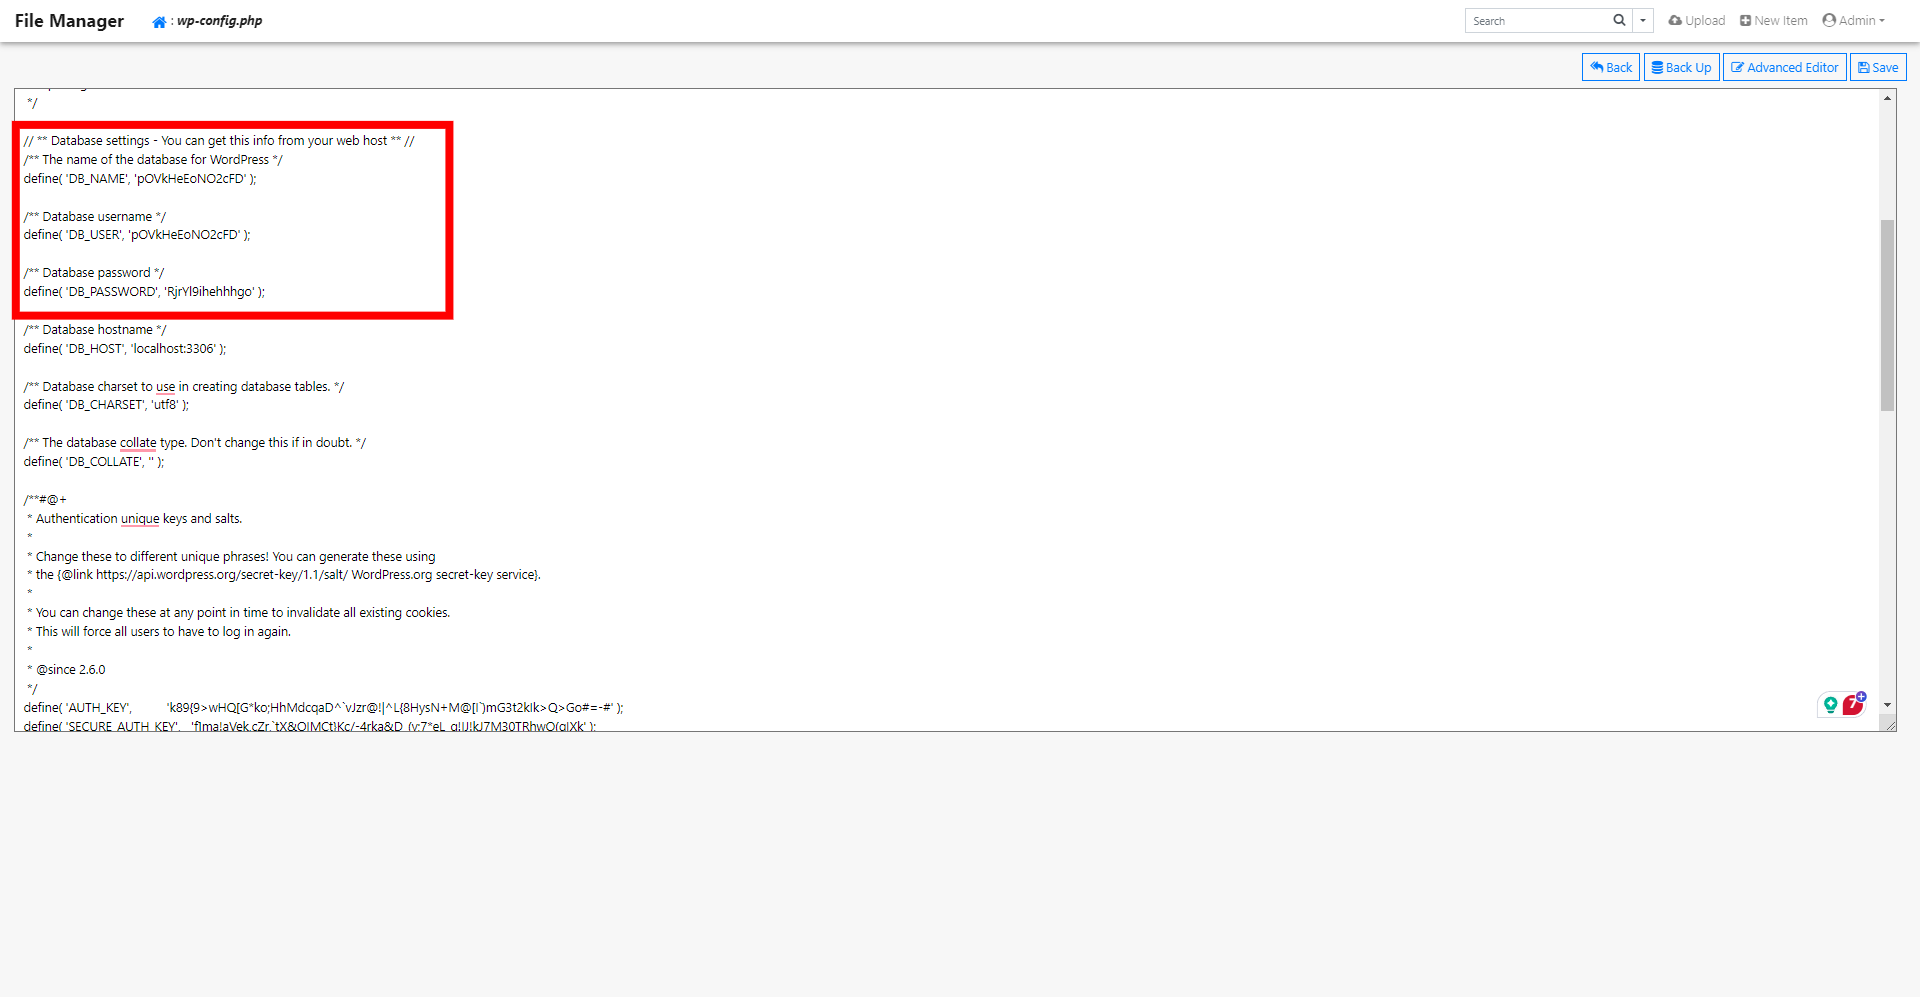
Now, locate the section containing your database information. In the /** Database hostname */ section, leave the path as just localhost.
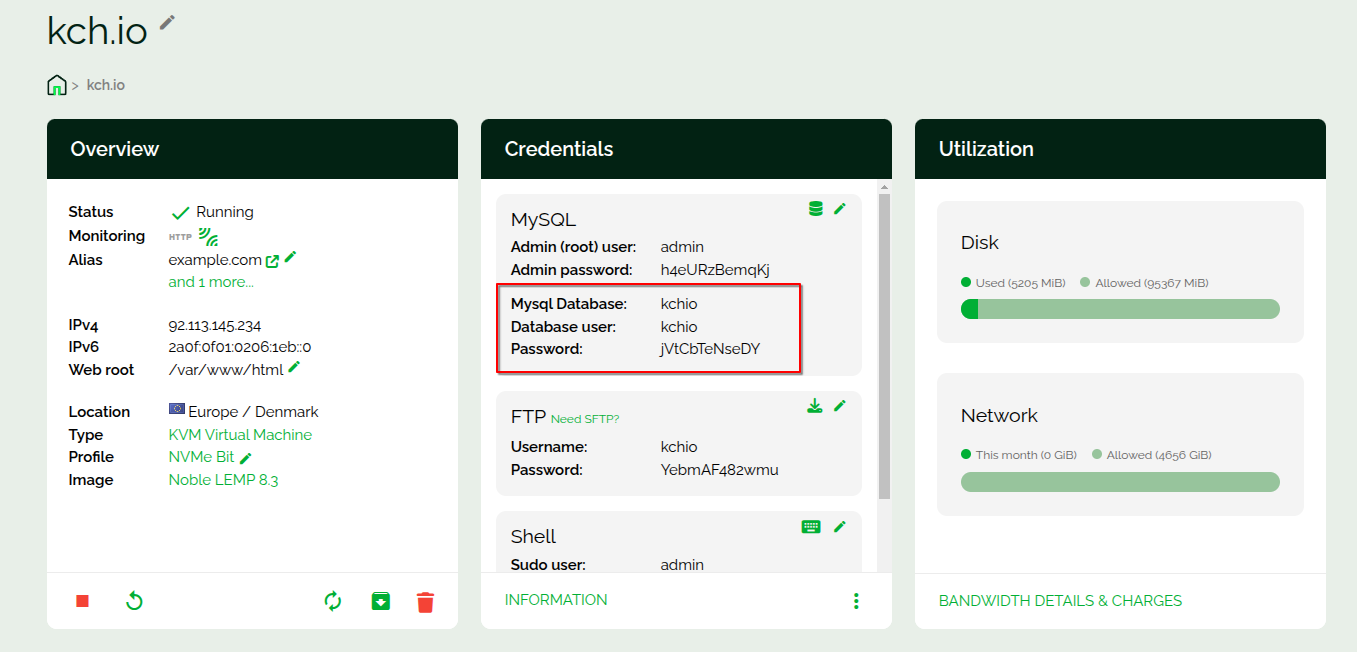
Update this section with the most recent details from your server overview.
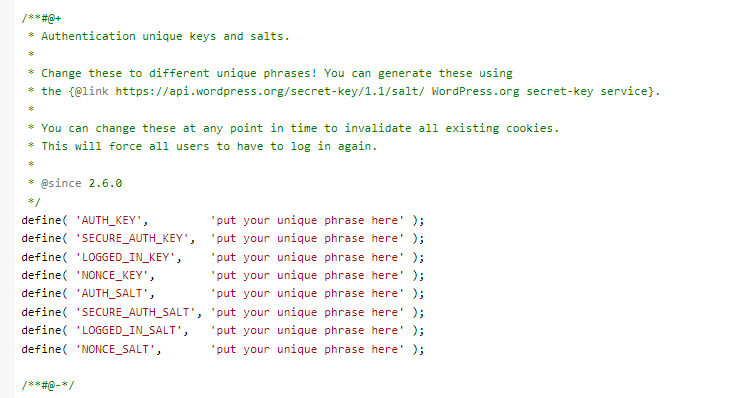
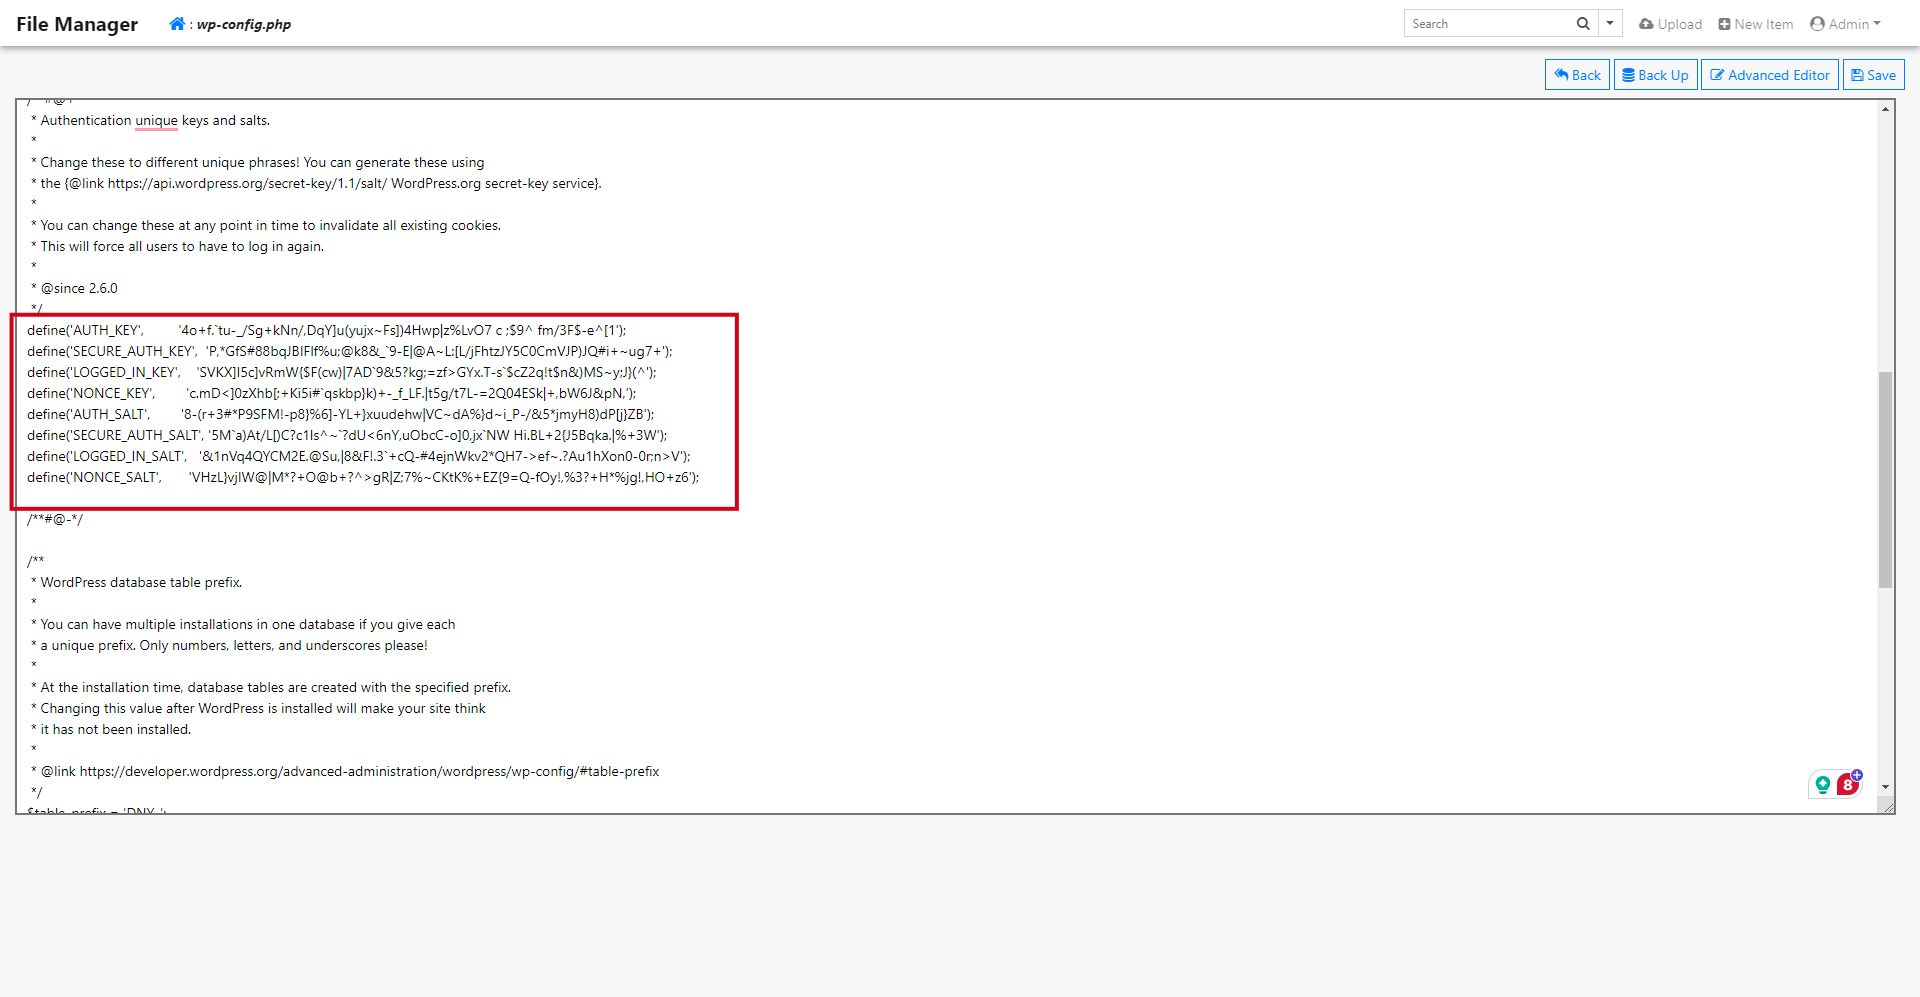
Scroll below and add new WordPress salts. There are multiple methods to do this, but I always recommend using WordPress’ salt generator. Simply copy the generated salts and substitute the template with the copied salts.
If you have custom snippets or code in your wp-config.php, this is the good time to extract them from the wp-config.php we downloaded using SFTP and paste them into our new wp-config file. Save your changes.
After you’ve finished managing the files, it’s important to disable and uninstall the File Manager.
Even though it is password-protected, it still presents a security risk. It’s advisable to remove it once you’re done. You can quickly delete the File Manager from the area where you initially activated it.
Next, update your domain’s DNS settings to direct it to your Webdock VPS IP address using either an A or CNAME record.
As mentioned earlier, return to your server overview, go to the Alias section, and click the check domain button. If everything is verified correctly, you can move forward with setting up the domain.
This step will also regenerate SSL certificates for your site. And just like that, your WordPress website is now live on Webdock after migrating from GridPane with minimal downtime.
The first thing you must do after the migration is clear your caches and also ensure you deactivate the Redis cache plugin (if you used the Redis caching on GridPane). You can, of course, install N number of caching solutions from Memcached to Redis to Dragonfly on your Webdock server, but I digress.
Alternative Approach: Utilizing a Backup Plugin
A backup tool such as UpdraftPlus can make transferring your website to Webdock much easier. This is especially beneficial if you have a large site or if technology isn’t your strong suit. While there are various options available, UpdraftPlus stands out because it offers valuable features without any cost, and utilizing cloud storage can expedite the migration.
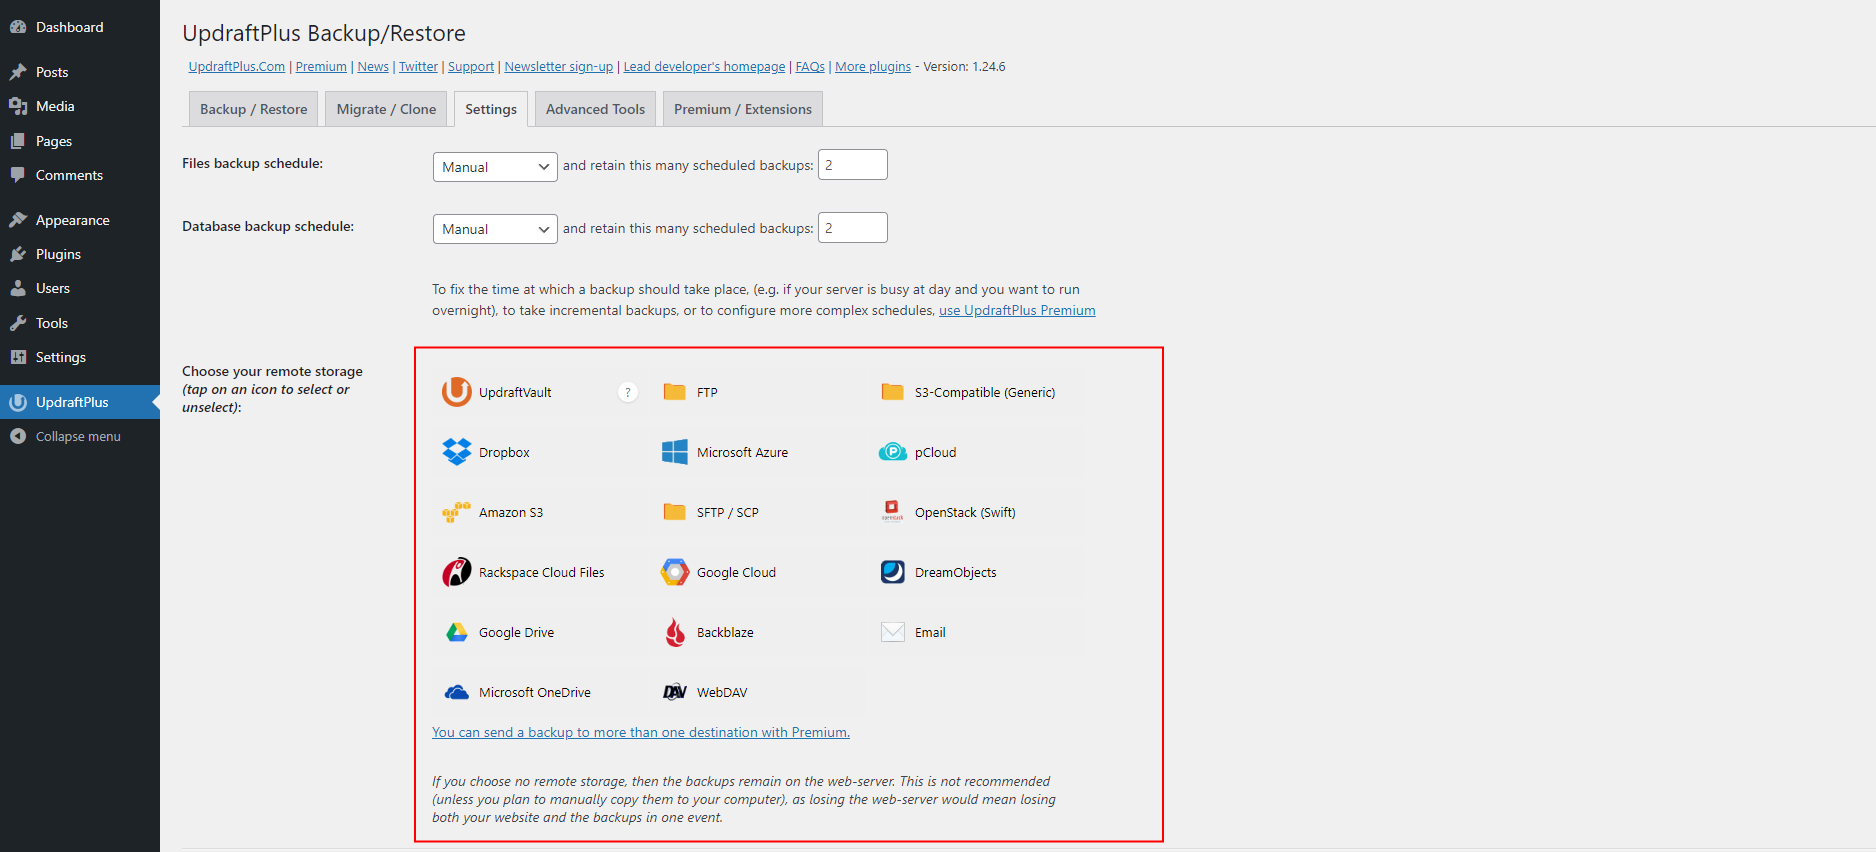
To begin, access your WordPress dashboard. Navigate to the Plugins section, click “Add New,” and search for “UpdraftPlus.” After you find it, install and activate the plugin. Once activated, go to the UpdraftPlus settings to configure remote storage. You can choose from options like Google Drive or Amazon s3. Although it’s not mandatory, this step can save you significant time.
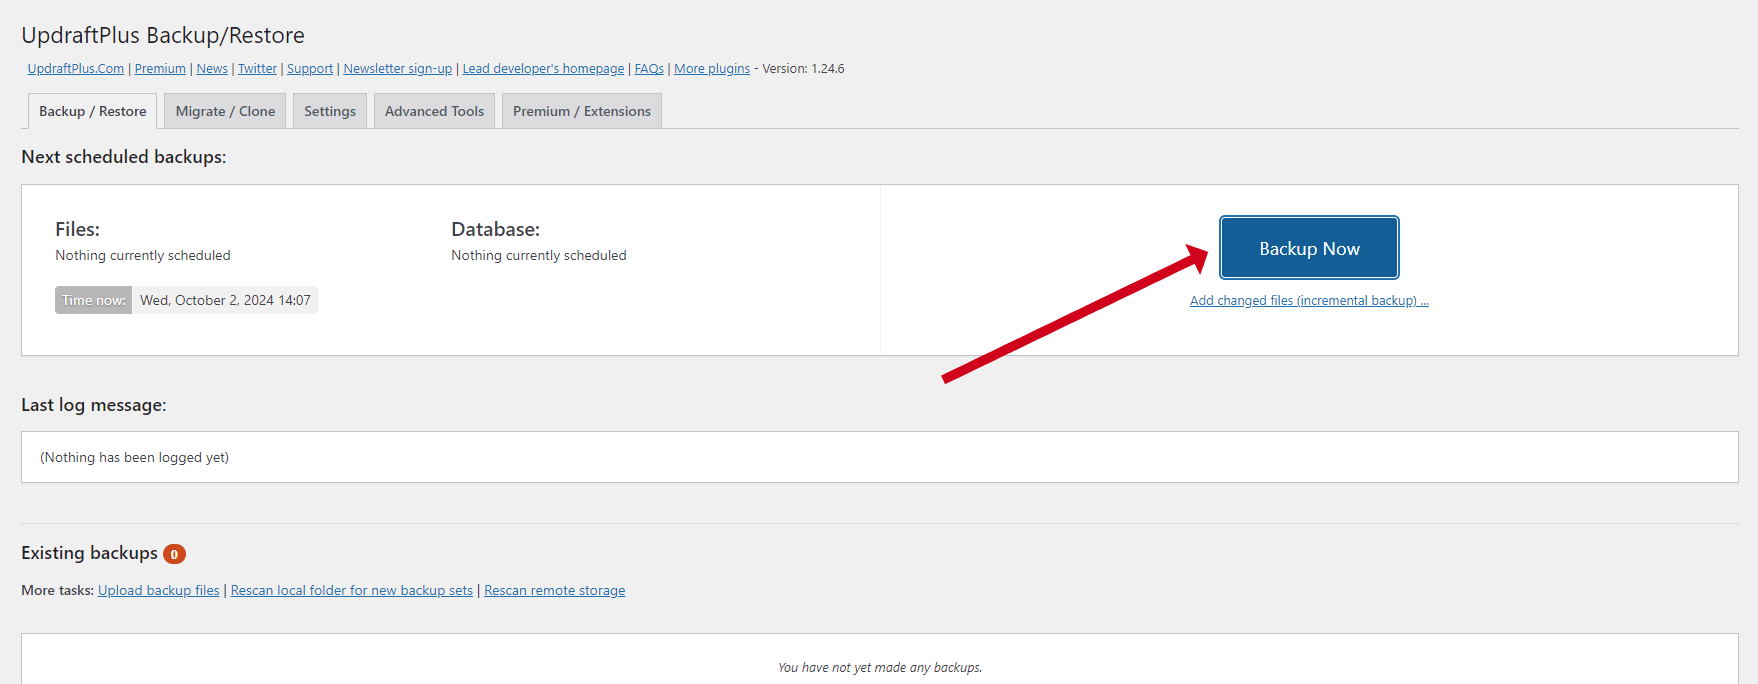
When you’re ready to back up your site, go to the Backup/Restore tab and select “Backup Now,” ensuring all the options are checked. If you decide against using remote storage, you’ll need to manually download each backup file by clicking on the archive name.
Next, select a server plan on Webdock starting at €/$5.99 or higher, customize your profile as necessary, and deploy your server. You can connect your domain directly to your server’s IP address or modify your computer’s host file for preliminary testing. Once DNS propagation is finished, set up your domain in the server identity tab and follow similar steps to install WordPress.
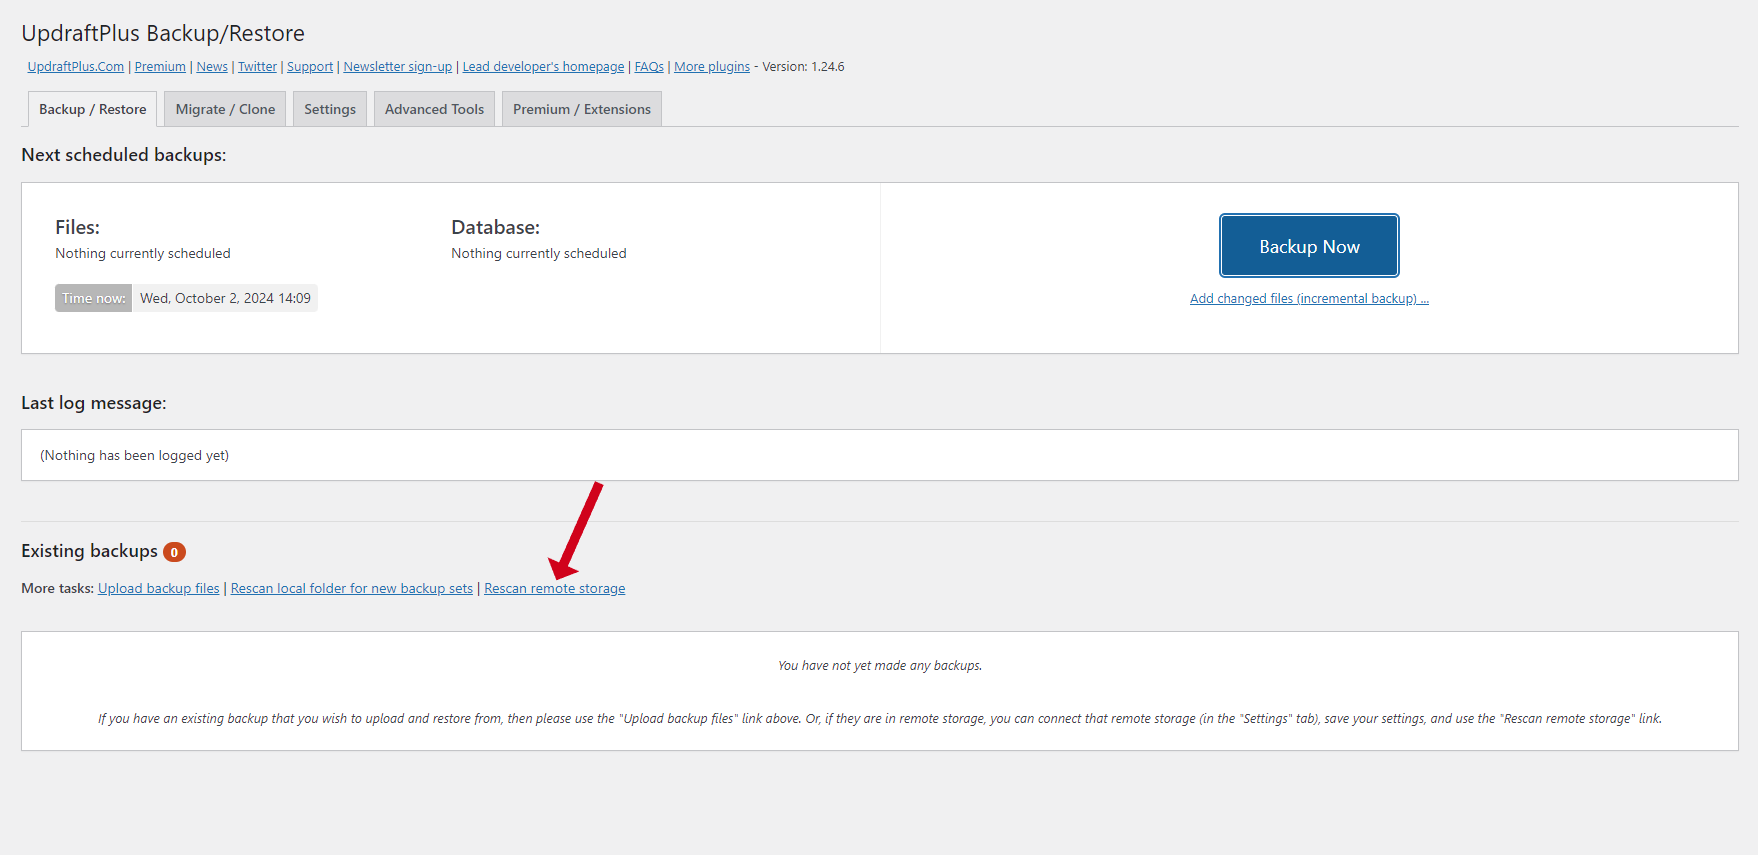
Once you’ve set up WordPress on Webdock, reinstall UpdraftPlus and reconnect it to your selected storage option. In the Backup/Restore section, you may need to rescan the remote storage to find your available backups.
If you’re not using remote storage, you can upload your backup files by clicking the ‘Upload Backup Files’ button manually. After your backup appears in the list, click on Restore, select all the required elements, and proceed with the restoration.
At this point, your WordPress site should be successfully transferred from GridPane to Webdock. Make sure to verify that everything is functioning properly by performing a thorough check.
Moving Without a “Blank Page” Appearing
To prevent your site from displaying a blank page during migration, consider using a WordPress maintenance plugin or wait to update your DNS until after the migration is complete. If you’re comfortable with some technical steps, follow this guide:
Start by skipping the Check Domains button when setting the server alias on your Webdock server and input your domain directly. Proceed even if you encounter any errors or warnings.
Next, you’ll need to edit your Hosts file:
- For Windows: Launch Notepad as Administrator and navigate to c:WindowsSystem32Driversetchosts.
- For Mac: Open Terminal and type sudo nano /etc/hosts.
- For Linux: Open Terminal and enter sudo nano /etc/hosts.
Add your Webdock server’s IP address alongside your domain like this:
123.456.789 example.com
123.456.789 www.example.com
Afterward, clear your DNS cache:
- On Windows: Type ipconfig /flushdns in Command Prompt.
- On Mac: Enter sudo dscacheutil -flushcache in Terminal.
- On Linux: Use system-resolve –flush-caches in Terminal.
Now proceed to install WordPress using Webdock’s manager, then visit your site URL to check the setup. Note that it will only be accessible from your computer at this stage. Install the backup plugin and follow the previous instructions.
Once you confirm that the site has been successfully moved, update your DNS records, create a new SSL certificate by resetting your server alias (just click on the set identity button), remove the entries from the Hosts file, and clear the DNS cache again to complete the process.
Conclusion
Moving from GridPane to Webdock puts your WordPress sites on a platform that prioritizes clean design, reliable performance, and straightforward pricing over flashy marketing and unnecessary features.
While the significant cost savings might have sparked your interest, you now have your WordPress sites on a platform that focuses on what matters: efficient server management without the bloat, drama, or hidden costs. Your WordPress sites deserve better, and now they have it.
Meet Aayush , a WordPress website designer with almost a decade of experience who crafts visually appealing websites and has a knack for writing engaging technology blogs. In his spare time, he enjoys illuminating the minds around him.
