Managing WordPress
Last updated: July 10th 2023
Introduction
A short article on how to install WordPress on your Webdock server using our WP add-on.
Managing WordPress
Note: This addon is available on selected standard profiles and in any custom profile that costs more than a certain fixed price per month.
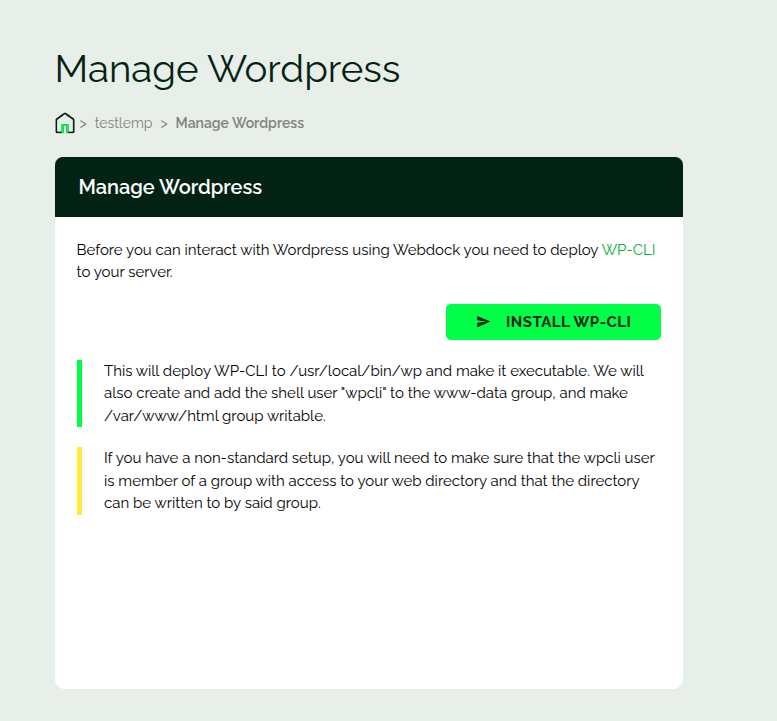
You start by installing the WP-CLI. This can be done from the dashboard.
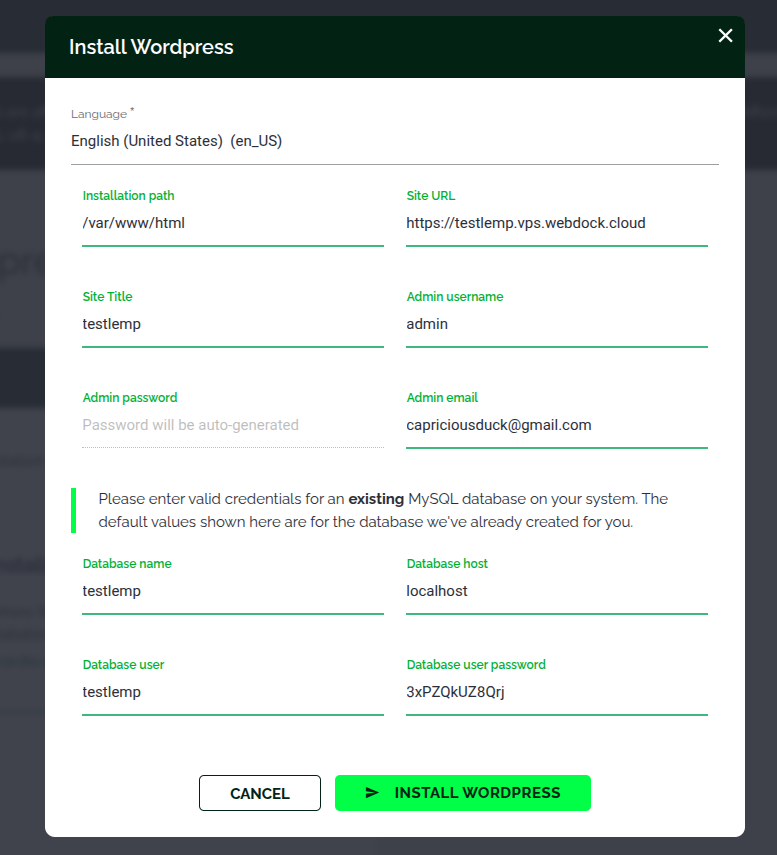
WP-CLI takes care of the WP installation. Next, you'll be prompted for credentials and other site-related information. The credentials will be auto-generated. You could leave them as is, or change them.
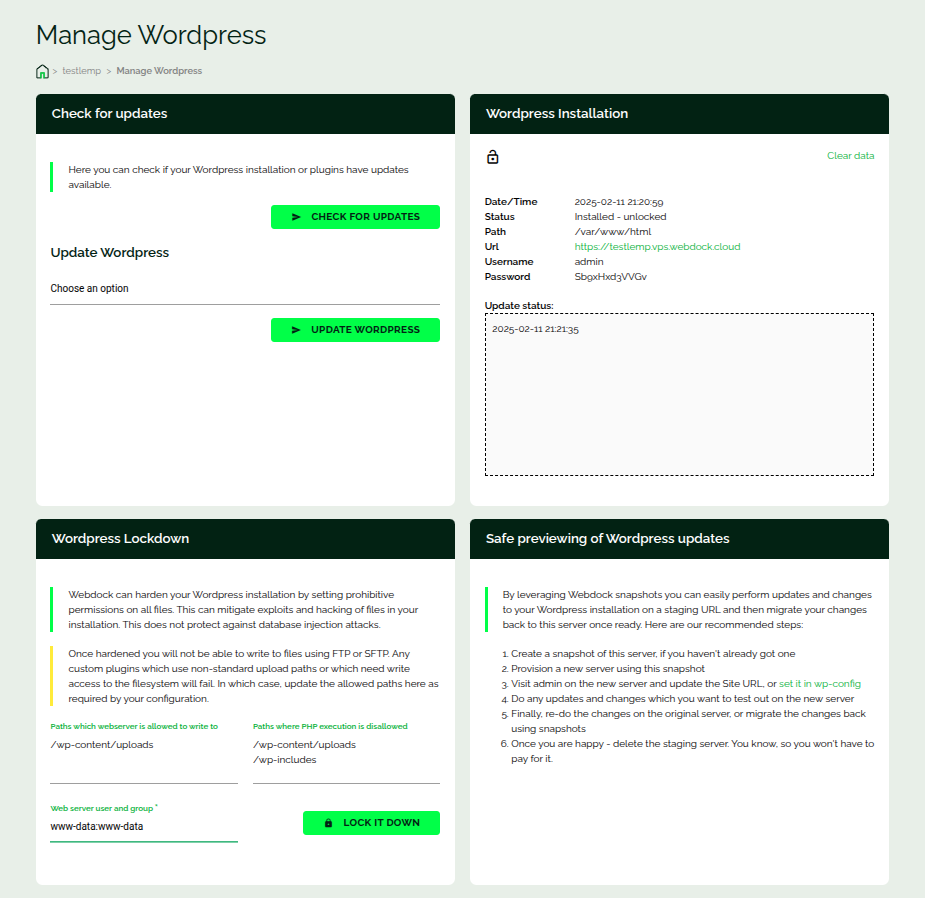
Once WP is installed, you'll see this screen. On this page, you'll find a nice feature called WordPress Lockdown.
WP Lockdown is a security feature. It hardens the WP installation, thereby restricting write access to any directory that's not mentioned on this screen. This avoids exploits and hacking of files. You'll have to unlock (or disable the lockdown) before uploading files or making changes to your site.
Conclusion
This article walked you through the installation of WordPress using our WP add-on.
Related articles
-
Introducing The Webdock Dashboard
A glimpse of how our dashboard looks.
-
Server Management
Brief overview of management tools you'll see in the Webdock dashboard
-
Profile Upgrade and Downgrade
A brief description of our profile change page.
-
Snapshot Management
A brief article on how you can leverage Webdock snapshots
-
Managing Cron Jobs
A short article on how you can create cron jobs
-
Deploying Server Scripts
The easy way to deploy your scripts!
-
Manage PHP
A quick way to change PHP version
-
Managing Shell Users
A article on how to manage shell users and WebSSH to SSH into your server
-
Managing MySQL Databases
-
File Manager
Create FTP users and manage your files in the webroot from the dashboard.
-
Managing Your Server Identity
Domain routing for your server using the Server Identity tool.
-
Managing SSL Certificates
-
Sending Emails Using Postmark
A brief article showing how to link your domain to Postmark for sending emails!
-
Email Forwarding Using ImprovMX
Forwarding incoming emails on your domain to your email box using ImprovMX