Introduction
OpenLiteSpeed is an open-source version of LiteSpeed Enterprise Web Server. Compared to Apache and Nginx, OpenLiteSpeed is a lightweight, fast, and high-performance web server. It has its own LSPHP (PHP + LSAPI) implementation to load the PHP file, and it performs better than PHP-FPM. It has a web-based interface that allows you to configure and manage the server. It combines speed, security, scalability, and optimization in one package.
This article will show you how to Install and Configure OpenLiteSpeed on your Webdock WordPress VPS.
Prerequisites
- A Webdock cloud Ubuntu server with OLS installed.
- You have shell (SSH) access to your VPS.
- You have administrator access to your WordPress.
Disclaimer: As mentioned in the prerequisites, this guide assumes you have already installed OLS and WordPress. If you have not done so already please refer to the below guides:
Guide 1: OLS Installation
Guide 2: WordPress Installation (Using our WP addon)
Install LiteSpeed Cache
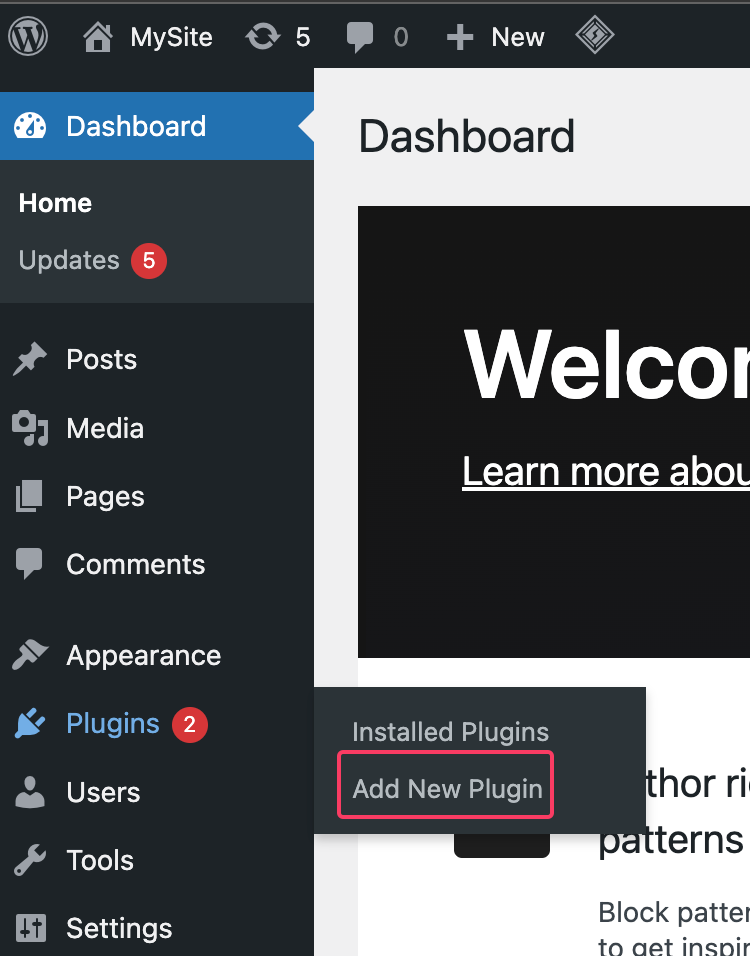
Head over to Plugins > Add new plugin
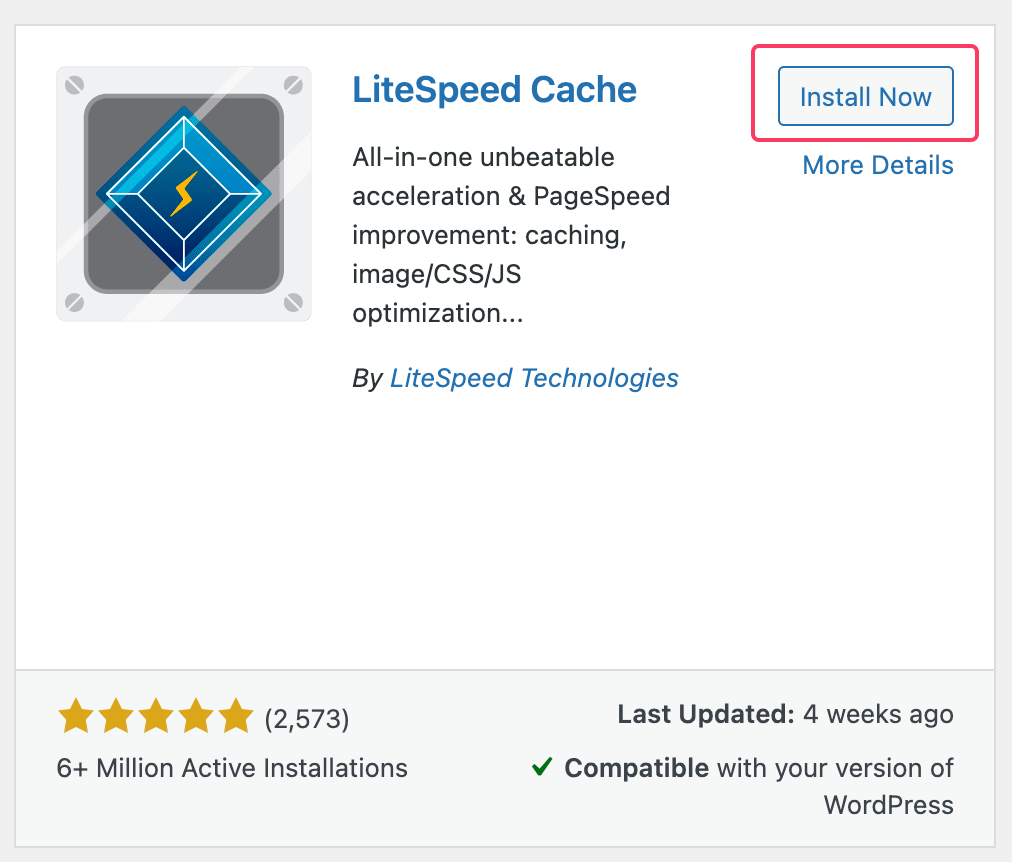
Search for “LiteSpeed Cache” and proceed to install & activate it.
Configure LiteSpeed Cache
Now that you have it installed, there are tons of settings that you can enable to fully utilize this great plugin.
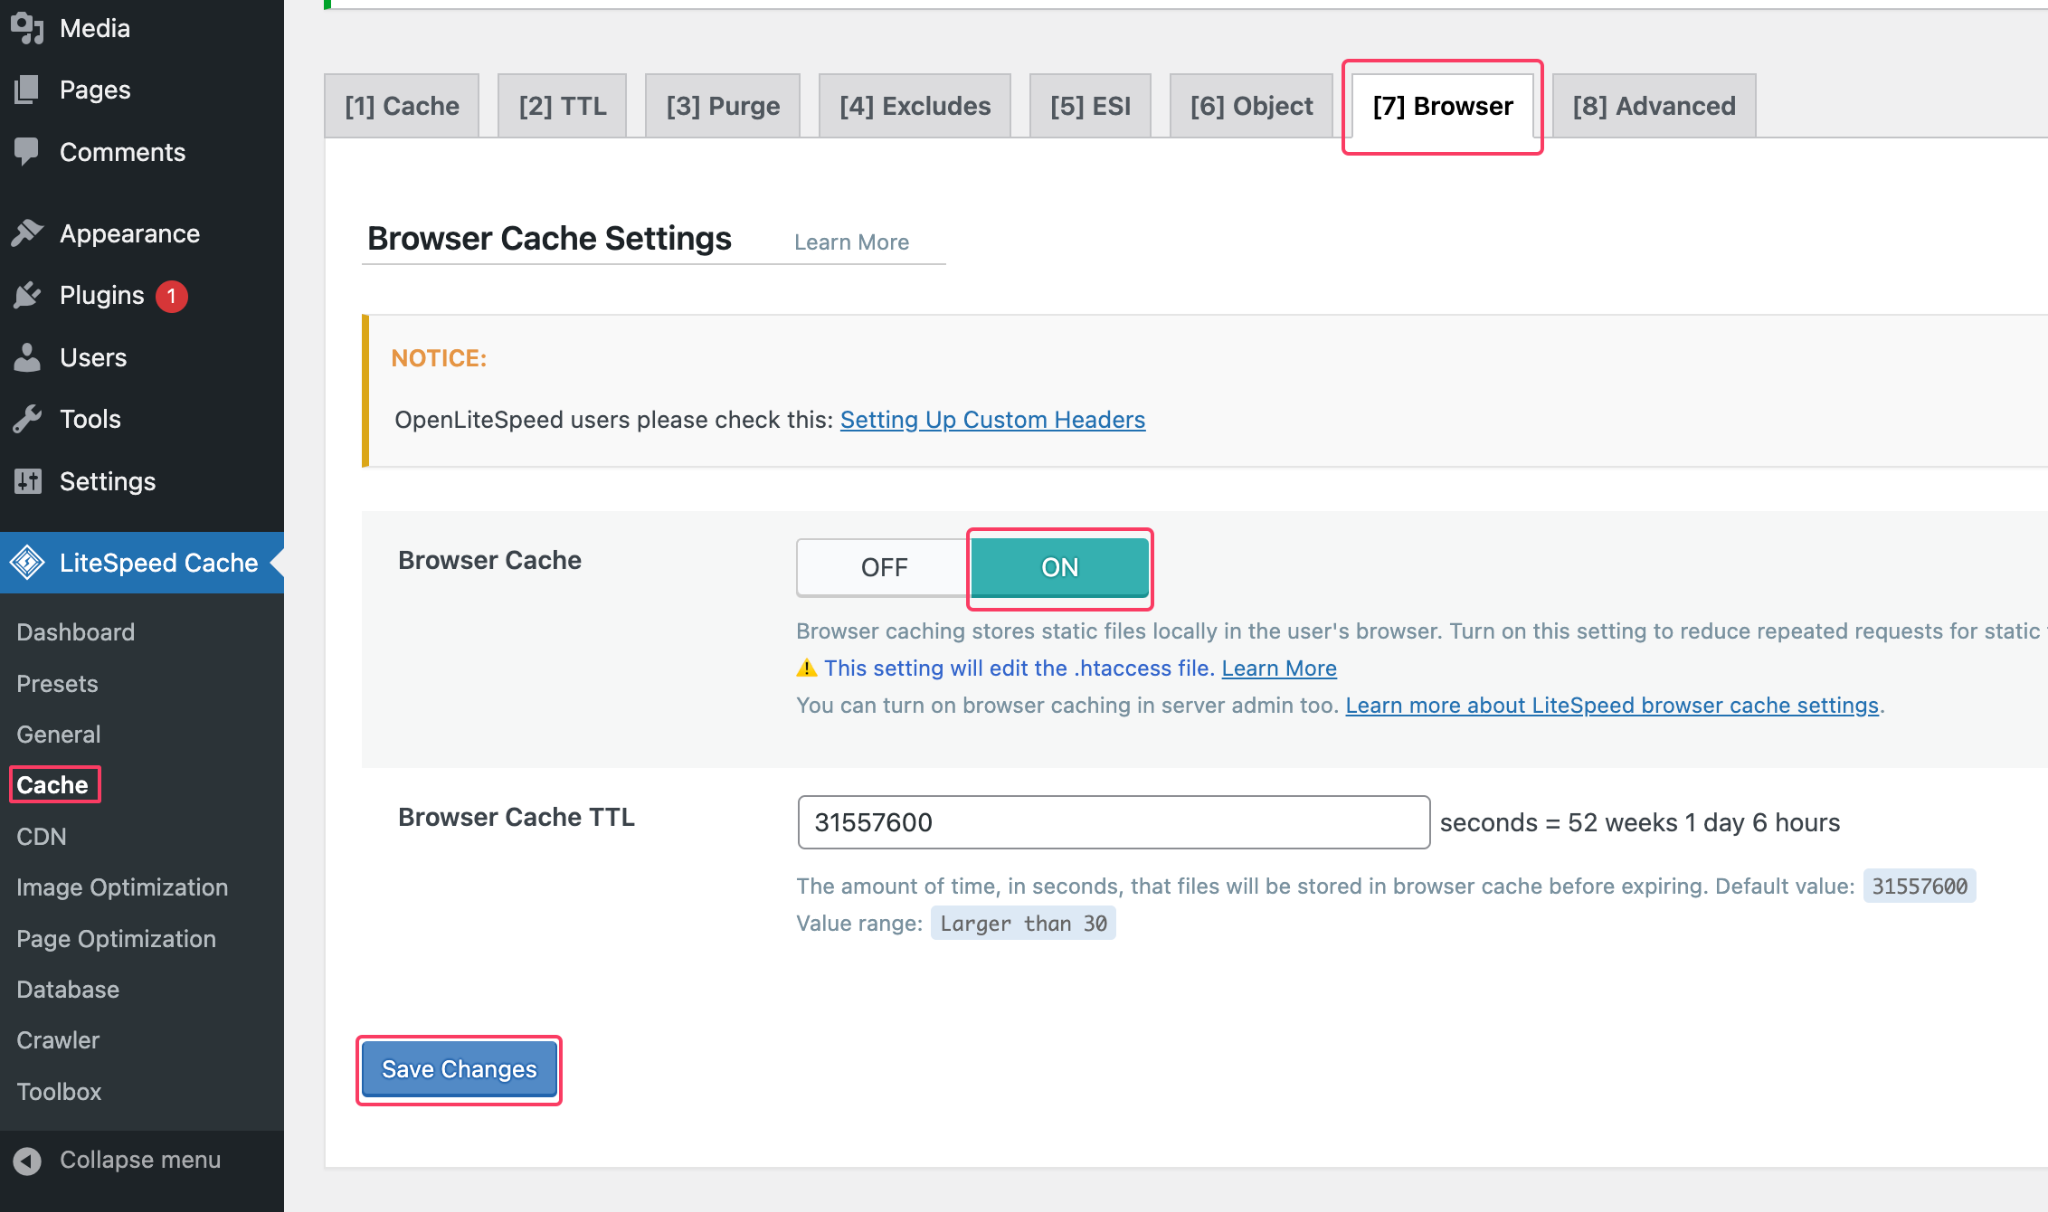
Enable Browser cache
Browser cache can help your visitor load the website faster the next time they load it. The cache will be loaded either from the disk or the memory of their device.
You may go ahead and enable it from your LiteSpeed Settings Cache > Browser.
Enable Object Cache
The object cache is a feature that stores the results of database queries or API calls in the server memory to further improve performance and speed up page load times.
This can be enabled by first installing the Memcached PHP extension by using the steps below.
Switch to root using:
$ sudo su
You can then install the extension by using:
# apt-get install memcached
Once done, make sure the service is running by using:
# systemctl status memcached
Once installed, you may then enable it via Cache > Object and save changes.
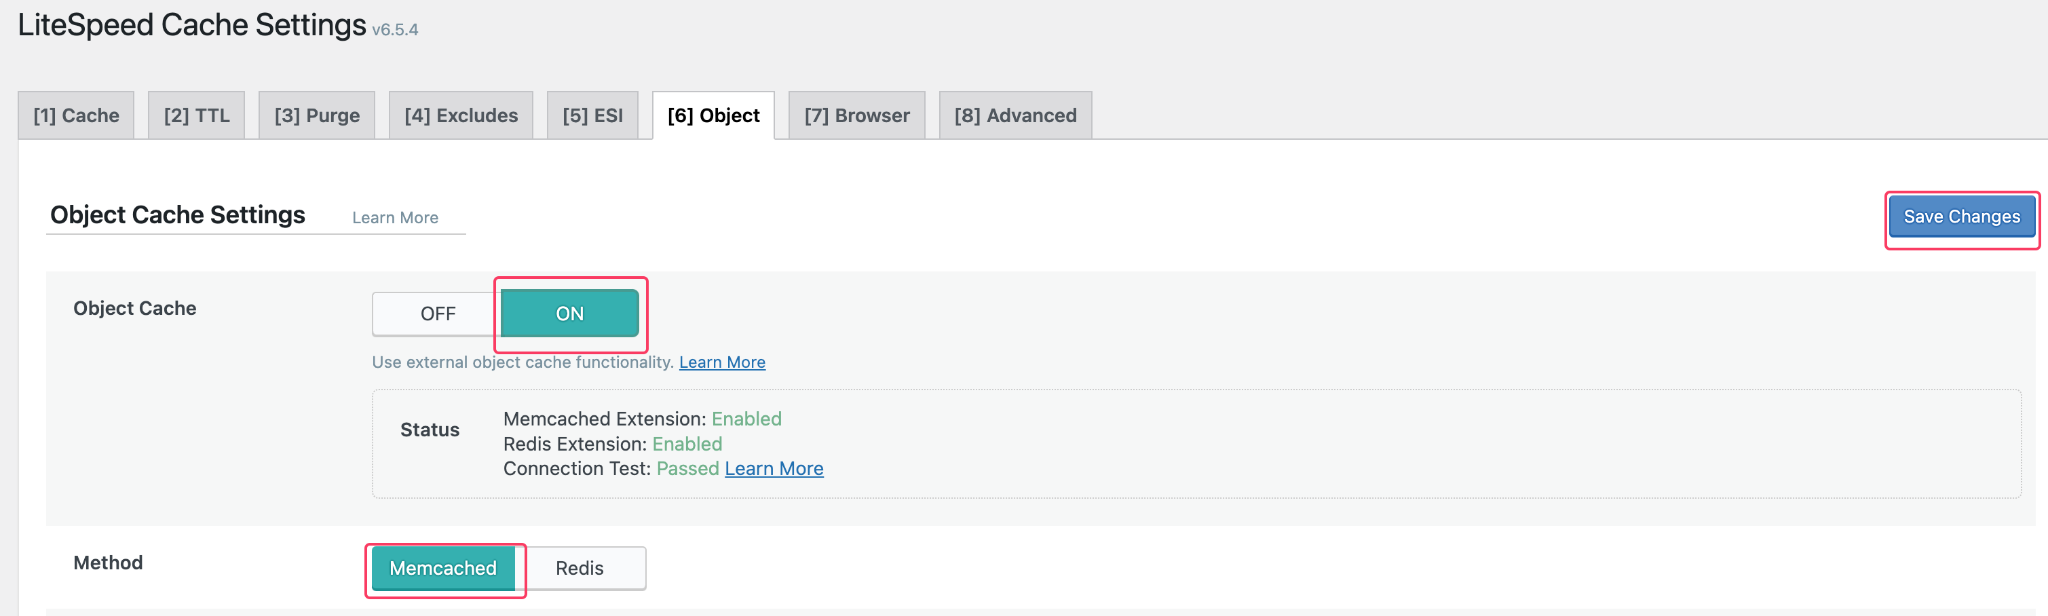
Make sure the connection test is Passed. If it’s not, you may reach out to Webdock Support for us to make it happen.
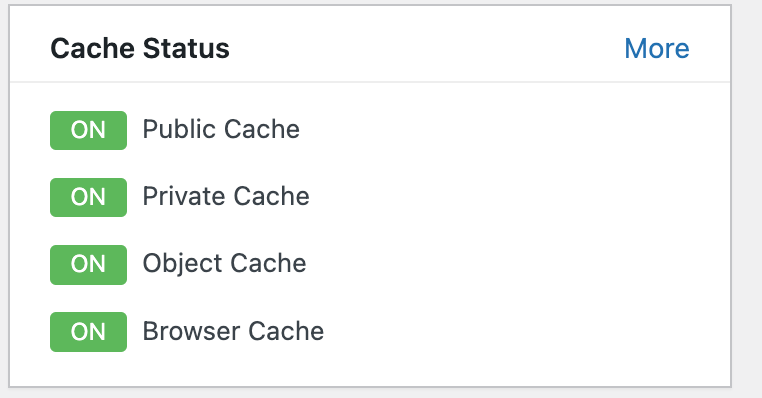
By now, all of your Cache can be seen as enabled on the LiteSpeed Cache dashboard.
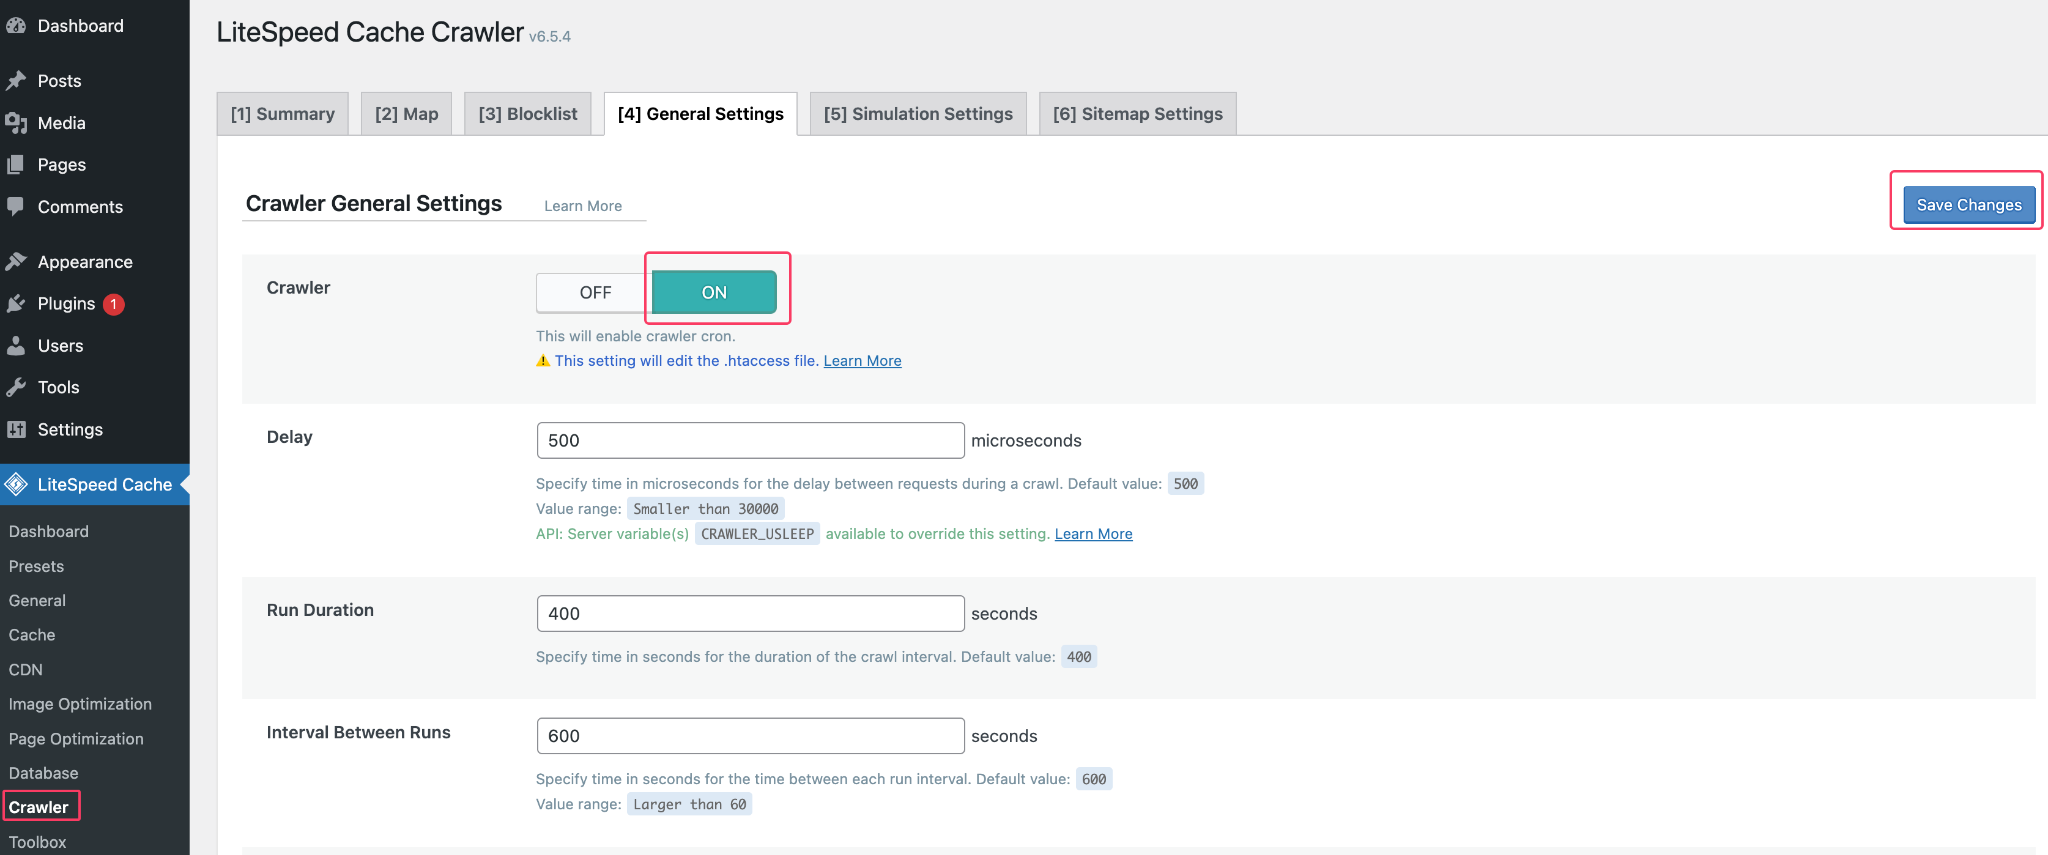
Enable Crawler
LiteSpeed Cache works by caching all the data in the server when a visitor has visited a page, this will result in the first visitor having a hard time loading the page due to they are not being served by the cached page.
Crawler fixes that by using a bot to visit your website page by page.
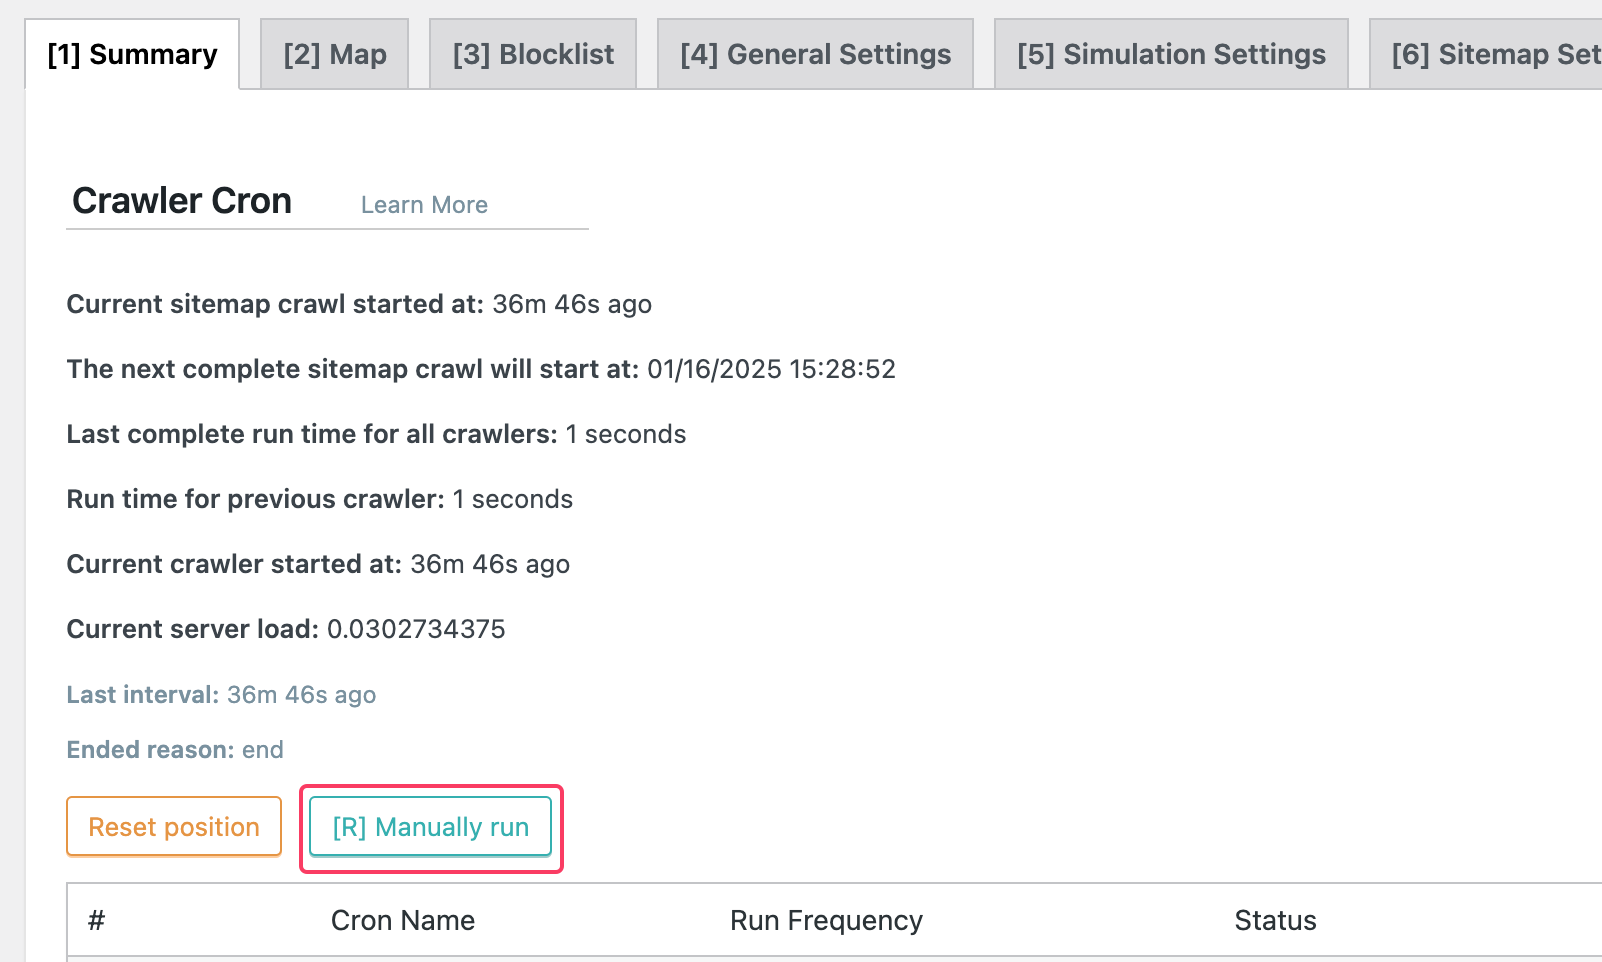
To start, enable it via LiteSpeed Cache Crawler > General Settings.
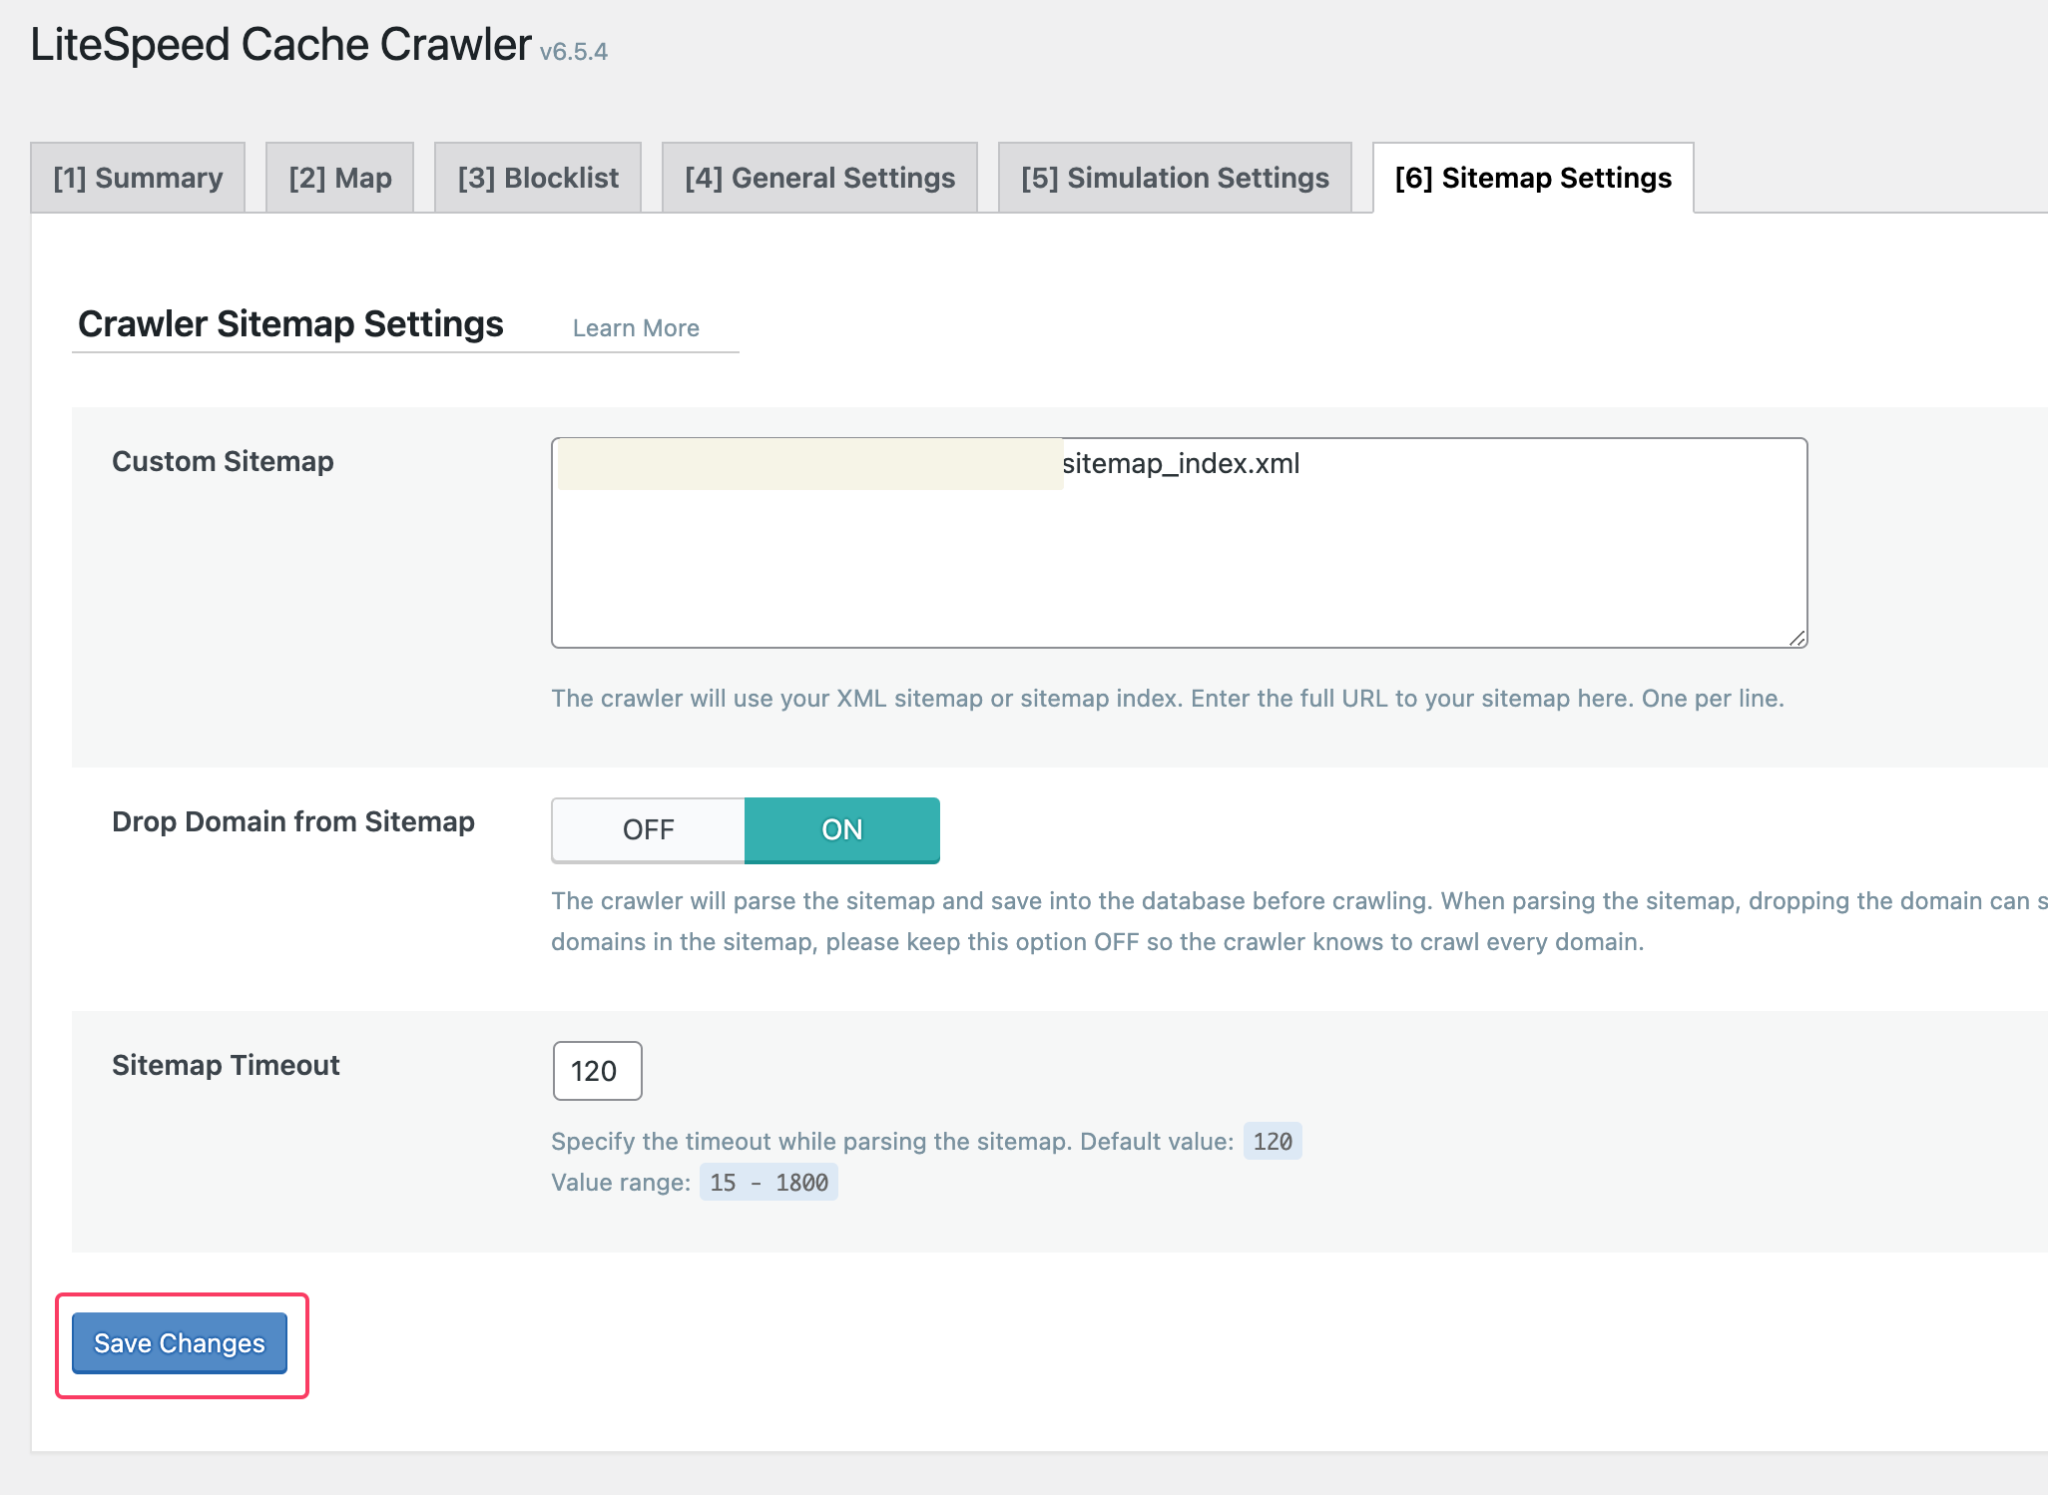
Next, you will need a sitemap of your website for the Crawler to use. You may use any sitemap plugin you like. In this guide, I am going to be using Yoast SEO.
Enter the sitemap URL in Crawler > Sitemap Settings > Custom Sitemap and save changes.
Refresh the map accordingly.
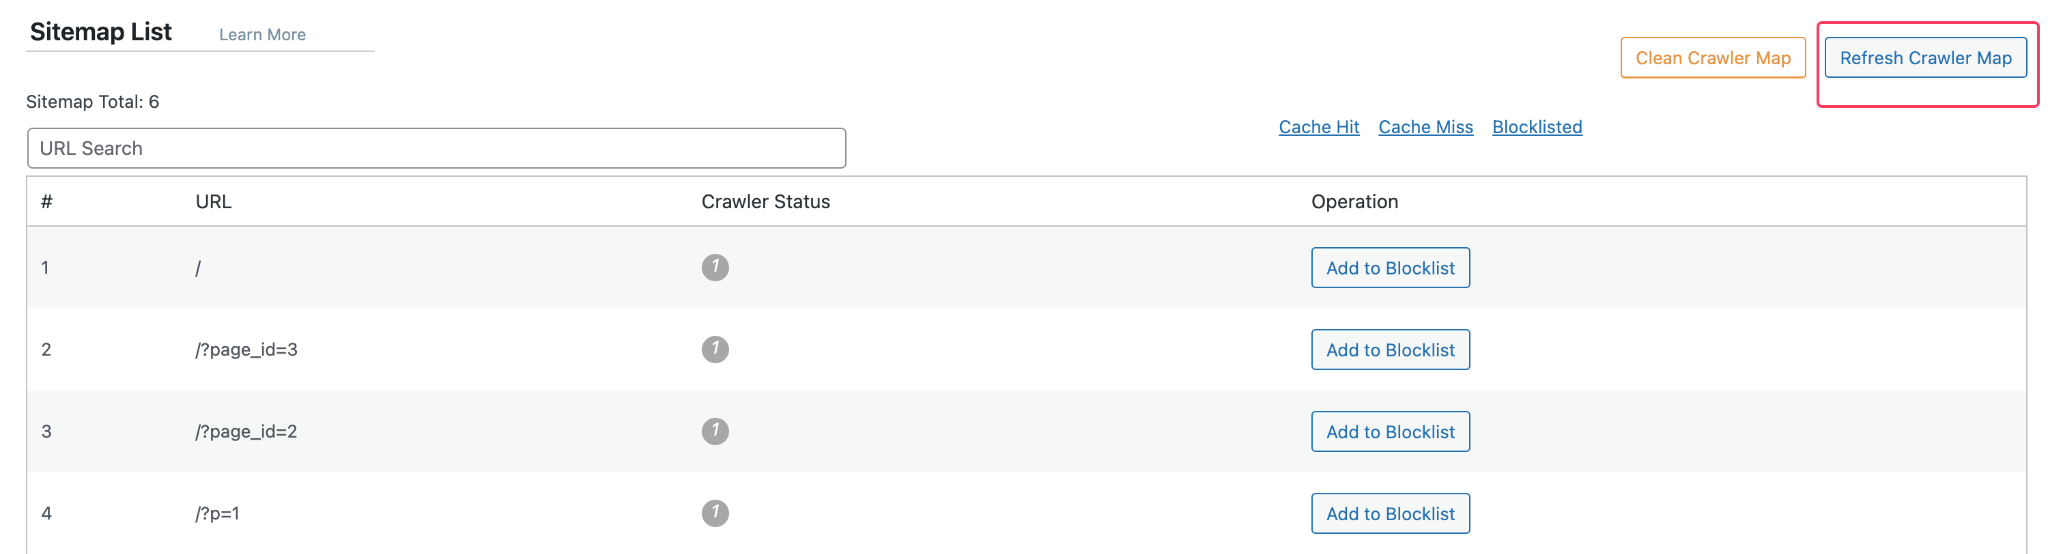
You can now run the crawler manually or wait for the cron job, which runs every 10 minutes by default.
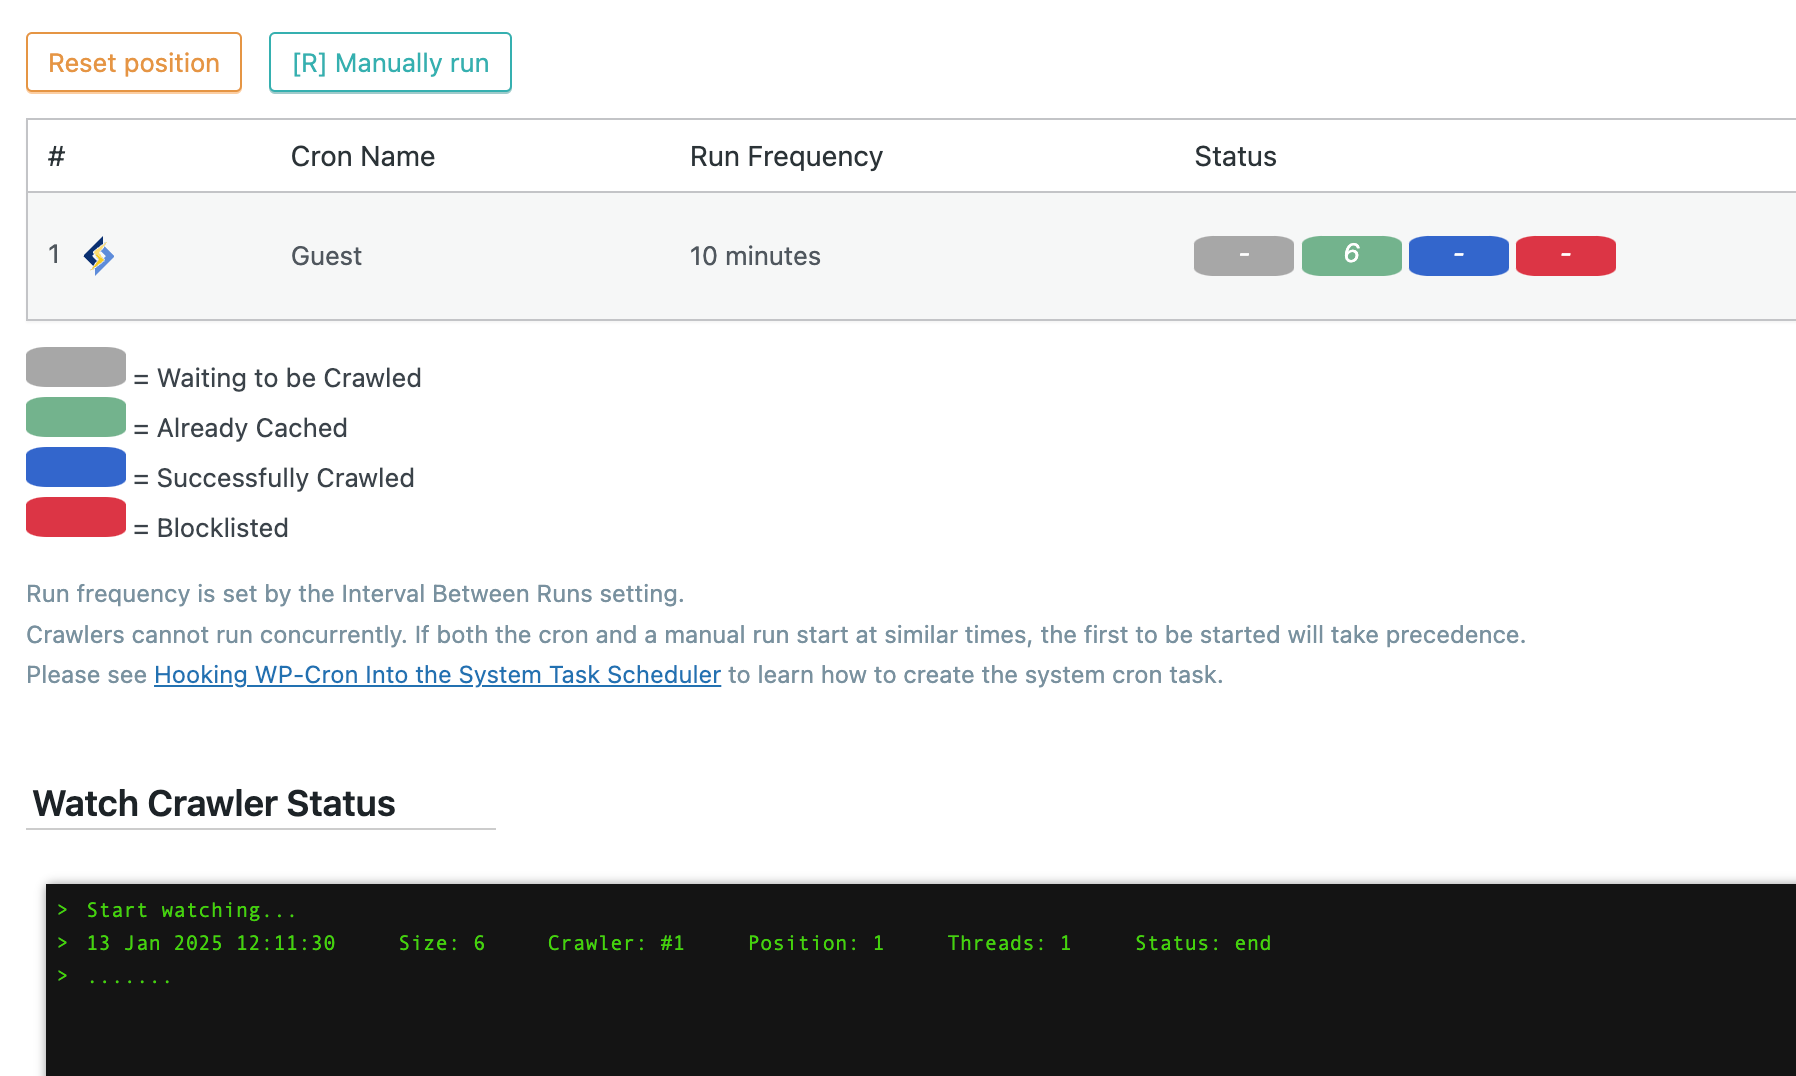
Once the crawler is successfully configured, you’ll see the number of crawled URLs displayed in the green status box.
Congratulations! Your website is now equipped with LiteSpeed Cache along with Crawler to make sure all your content is cached automatically.
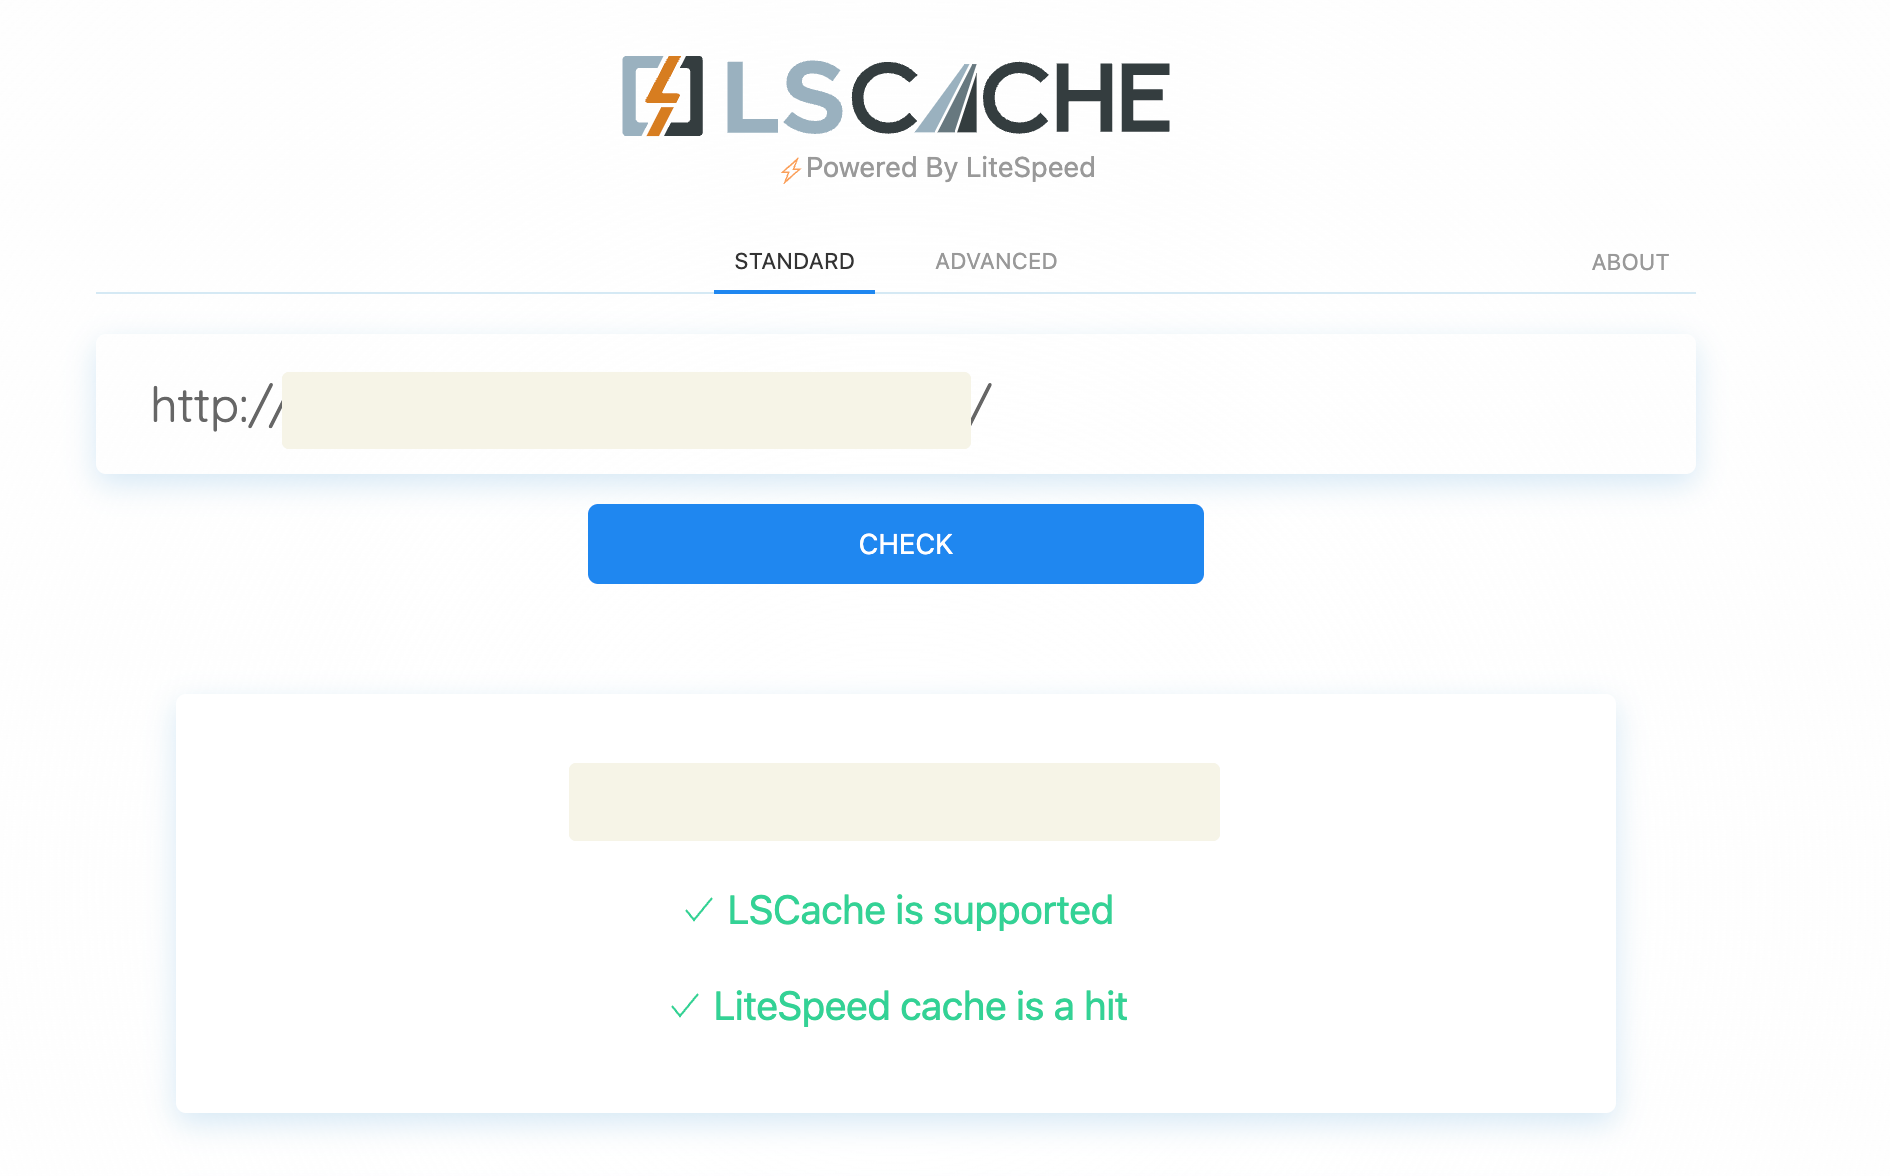
You may visit https://check.lscache.io/ to check if all your hard work has paid off.
Conclusion
By following these steps, you’ve successfully installed and configured LiteSpeed Cache on your WordPress site. Your site is now optimized for faster loading times and improved performance.
For further assistance, feel free to reach out to Webdock Support.
This article was written by Webdock Support Specialist Taufiq Zainal. Taufiq is passionate about Cloud Hosting and helping Webdock Customers succeed wherever he can.
