Introduction
Looking for a hosting control panel free of maintenance headaches? Webdock’s native tools might be a simpler alternative to aaPanel.
WordPress is the most popular CMS in the world for quite some time. It is so popular, that it drives almost 40% of the current websites.
In this guide, we will install and setup a basic WordPress site with aaPanel.
Prerequisites
Please make sure you fulfill the prerequisites for this guide.
- Fresh & clean Ubuntu Focal installation (or above)
- Registered and valid domain (preferable with no DNS records aka new)
- User with root privileges (sudoer) – You will need shell access, read more here on how to get shell access to your server.
We already published an article about installing, securing, and connecting your domain with the aaPanel software. So please check it: How to Install and configure aaPanel on Ubuntu. This tutorial is a direct sequel to the mentioned article, so please make sure you have done as mentioned there.
In this article, we will avoid “one-click deployers” and do things manually. This way, all future troubleshooting is much easier.
Create Database
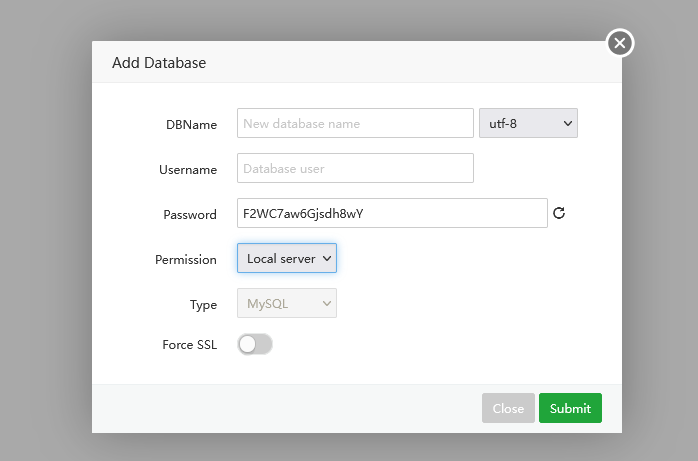
Create a database and write down credentials. From left pane select: Database > Add Database
Add website
We will create a generic website.
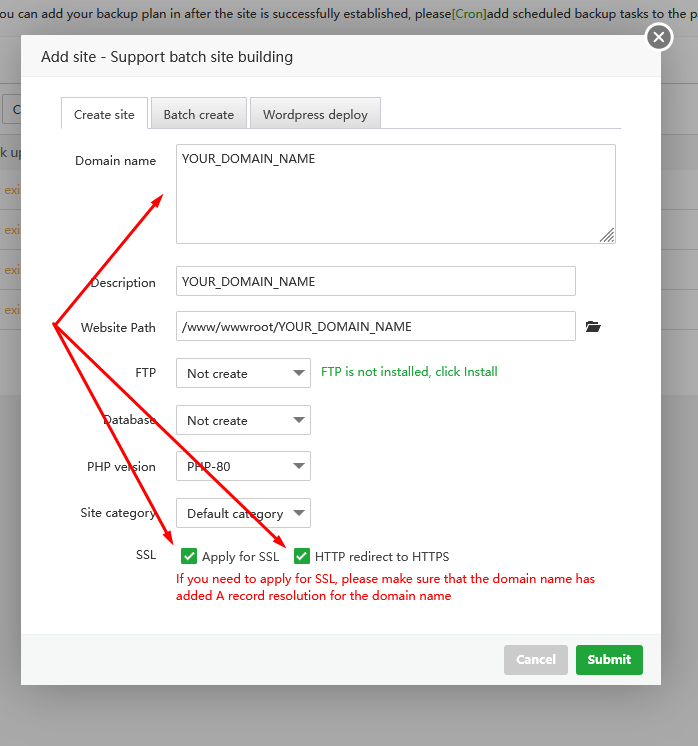
Populate domain name and skip database selection, since we are going to set it up through the WordPress installer.
Now,
- Go to WordPress.org and download the zip file.
- Unpack all files into the website folder (be aware of the nested WordPress folder inside the archive).
- Visit the website from your browser.
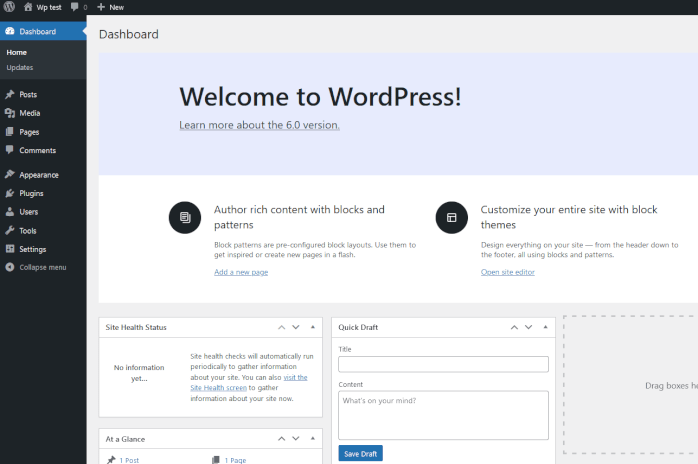
If you have done everything properly, you should see the WordPress install screen. Proceed with the installation until you see admin panel.
Now, go to website configuration screen and setup rewrite rule:
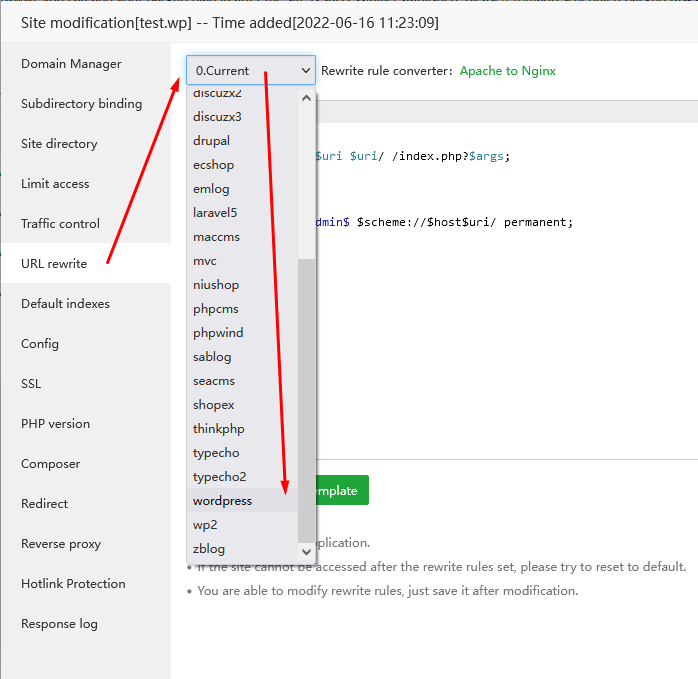
Be informed that we are using NGINX as our web server, so rewrite rules should match the NGINX pattern (consult prequel article mentioned above).
Redis as your cache engine
The beauty of owning your own web server instead of using shared hosting for your WordPress website is in freedom of using advanced software, usually not available on shared hosts. Redis is an in-memory cache engine with the ultimate speed of accessing pre-compiled pages, instead of using HDD as storage space.
As mentioned in the previous article, your Redis application is already installed with the PHP redis extension.
Notice: Whenever you install a new version of PHP, you need to install extensions again for that particular version.
Let´s install an appropriate plugin.
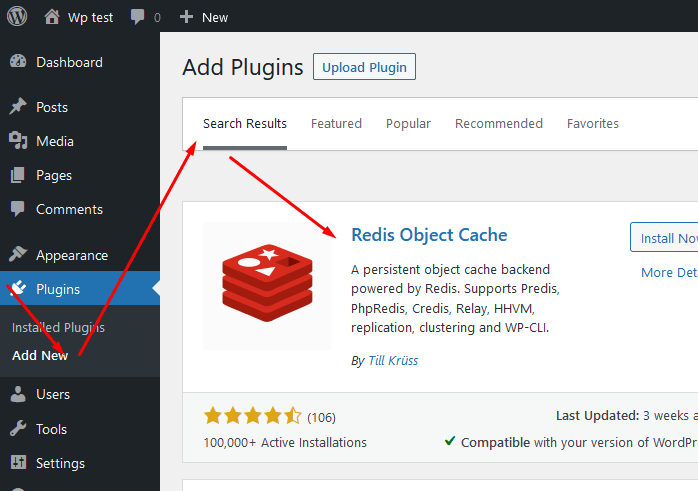
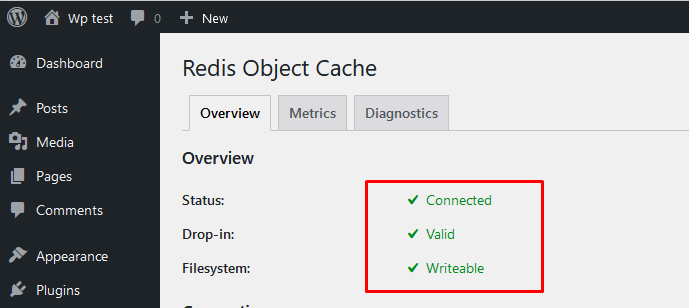
Install, activate and enable drop-in, and you are ready to go. If everything is ok you should see a screen like this:
Basic security settings
WordPress is a very popular CMS engine, thus making it a very popular target for hacker attacks. There is no perfect defense and all we can do is make life harder for any possible attacker. Here is the list of what you should do right after deployment to strengthen WordPress installation.
In aaPanel website configuration:
- turn ON session isolation. [ Site modification > PHP version ]
- turn ON Anti-XSS attack. [ Site modification > Site Directory ]
Install WP security plugins:
- WordFence or Sucuri plugin, at least free versions.
- Hide Login URL. Bots will try to exploit weak and commonly used passwords to login in on your behalf. Hiding/changing usual login URLs will render obsolete any brute force login.
- Hide or disable the xmlrpc.php file but beware, some of the plugins might need this service.
If your hosting provider creates daily basis backup snapshots (like here on Webdock), you are more than welcome to turn ON automatic plugin/theme updates.
Also, worth mentioning: always use very strong passwords and plugins with good reviews and which are regularly updated. The plugin download statistic is more like a guideline, not necessarily proof of the quality (due to high downloads, prone to an extensive search for exploits).
With these simple security measures, your WordPress installation is pretty much secured from 95% of attacks and almost 100% of generic bot attacks.
Troubleshooting and common mistakes
Here are the two most common errors every WordPress developer experiences at least once in their career.
1. Import failed. Theme demo content can not be processed and/or uploaded
This error is almost exclusively related to your php.ini settings. While default settings are really OK for website everyday functioning, imports can be really heavy. In one of my previous articles I already explained development php.ini settings, so I’ll repeat it here (if not stated otherwise by your theme developer team):
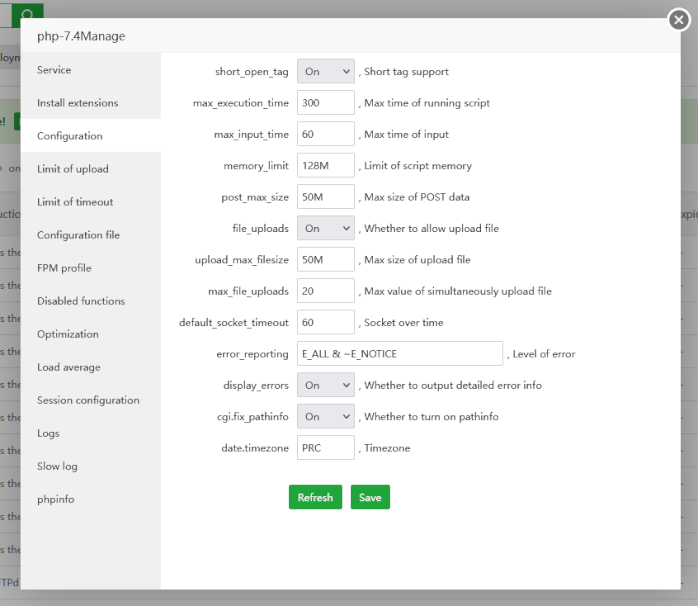
| option | default value | new value | known issues |
|---|---|---|---|
| max_execution_time | 300 | do not change | WP users 1000, demo upload |
| max_input_time | 60 | do not change | WP users 400, demo upload |
| memory_limit | 128M | 2G | Composer memory exhaust; installing packages |
| post_max_size | 50M | do not change | WP users 256M, demo upload |
| upload_max_filesize | 50M | do not change | WP users 256M, demo upload |
| date.timezone | PRC | UTC | do not change if you are in Bejing |
Remember your default settings, so you can revert it back after a successful demo import.
2. Can not install theme or plugin, access denied, folder not writable, need FTP account settings.
No, you actually do not need to provide FTP settings or install FTP service. The problem is with your bad file/directory permissions/ownership where WP is installed. All files inside the WP installation directory should be with 644 permission, while directories with 755. Ownership for both should be www.
Only exclusivity from this rule are server-specific files where files are owned by root user like .htaccess or .user.ini, which is good to know if you are going to use firewall plugins (you need to change ownership for a brief period of time and then revert back).
Conclusion
The combination of the VPS + Ubuntu + aaPanel is a very powerful solution for every WordPress developer. The aaPanel only lacks a multiuser approach, but for those who own multiple WordPress websites, it is an almost perfect solution.
As you can see from this article, the advantages are numerous:
- full control of the environment and websites
- no limit to using advanced software
- no more third-party SSL plugins, or expensive certificates (a sinkhole of your budget for shared hosting)
- affordability
So, this should work well both for experienced WordPress developers and enthusiasts. Hope it helps!
Series Author: Aleksandar Milivojevic is a PHP programmer for over 12 years (Laravel and WordPress). Writing articles in brief pauses between projects, to help out the community and popularize PHP in general.
