This resource is designed to assist users of all technical levels in setting up Rocket.Chat efficiently. We'll cover everything from system requirements to post-installation configuration. Whether deploying for personal use or enterprise-level communication, this guide will ensure a smooth setup process. Let's get started!
What is Rocket.Chat?
Rocket.Chat, an open-source communication platform, offers real-time messaging, voice and video calls, and file sharing for internal teams. If you are looking for an alternative to Intercom, it can prove to be a robust customer service portal with features like live chat widgets for websites, chatbots, and ticketing systems. It further lets you integrate these services with your mobile apps, WhatsApp channels, Instagram DMs, and more (depending on the plan.)
With its omnichannel support, great customizable features, and mighty security measures, Rocket.Chat gives you complete control over your customer service and internal communication infrastructure. Its flexibility and scalability make it suitable for businesses of all sizes that seek a comprehensive communication and customer engagement solution without burning a hole through their wallets.
System Requirements
The choice of the hardware for your deployment may differ based on your business requirements and can change over time. For example, if your organization setup involves up to 200 users and 50 concurrent users, the recommended configuration would be:
- At least 2 CPU Cores
- 2GB RAM
- 50 GB Storage
The above also includes appropriate buffers for unexpected surges. There’s also additional storage you may need. According to Rocket.Chat’s “formula”: If every customer sends around 5 MB of attachments monthly and has 100 users at the same time, you would require at least 6 GB of storage per year.
With the leading VPS companies, the price for any such configuration can range between $12 and $24. But with Webdock’s SSD Bit plan, you get double the memory and 0.5 CPU cores extra for almost half the price! You can even build your own VPS and tailor it exactly to your needs, potentially saving more.
You will also need a dependable email infrastructure to send notifications and enable omnichannel communication. Most VPS providers, including Webdock, block the email ports due to their high abuse potential. Setting up and running your email servers is also a headache-inducing task.
That’s where you’d need email sending or SMTP services. Any reputable SMTP provider like Postmark can cost up to $15/mo/10K email. Well, guess what? With any plans from SSD Bit, you get access to the Postmark addon, enabling you to send unlimited transactional emails for free using Postmark’s world-class email infrastructure.
All that being said, I’ll move on to the actual process of installation. Do note that I’ll be using Webdock’s default LEMP stack, which preinstalls NGINX and other helpful services, but if you’re starting on a vanilla server, just install NGINX yourself by running:
$ sudo apt-get update && sudo apt-get install nginx -y
Also, all steps in the tutorial will require you to be logged in as a root user. Use "sudo su" to switch to root user.
$ sudo su
Installing the Rocket.Chat Server
We’ll use Snap to get started with Rocket.Chat. Most Ubuntu servers have Snap pre-installed. If you’re unsure, just go ahead and install it yourself:
# apt update && apt install snapd -y
Done? Now, let’s install Rocket.Chat using Snap:
# sudo snap install rocketchat-server
Once you finish installing it, the Rocket.Chat server will automatically start running on localhost:3000 as its default setting.
I recommend that you set up a reverse proxy server. This way, you can conveniently and securely use a domain name by forwarding the default port to the HTTP and HTTPS ports. The reverse proxy server also serves as a foundation for enabling SSL encryption, which I will cover shortly.
Assuming you already have NGINX installed, go ahead and open its config file:
# nano /etc/nginx/nginx.conf
Make sure the file has a line that includes configurations from the sites-enabled directory. You can verify it by looking for a line that says include /etc/nginx/sites-enabled/* in the http block; If it's missing, just place it beneath the /etc/nginx/conf.d/.conf directive:
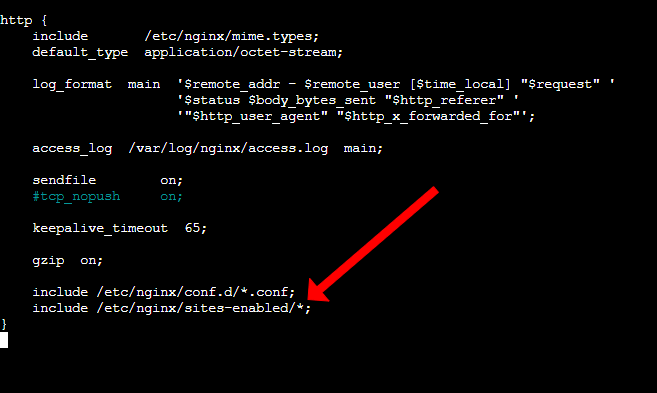
Press CTRL + X and then Y to save the changes. Now, we’ll need to make changes to Webdock’s sites-available config file. I have discussed how to do this on a non-Webdock server below these steps.
First, run an empty echo for the file:
# echo " " > /etc/nginx/sites-available/webdock
This will clear all the existing blocks and directives. This step is optional; you can manually clear all of it yourself, but this makes the process much quicker. Once that’s done, open the file:
# sudo nano /etc/nginx/sites-available/webdock
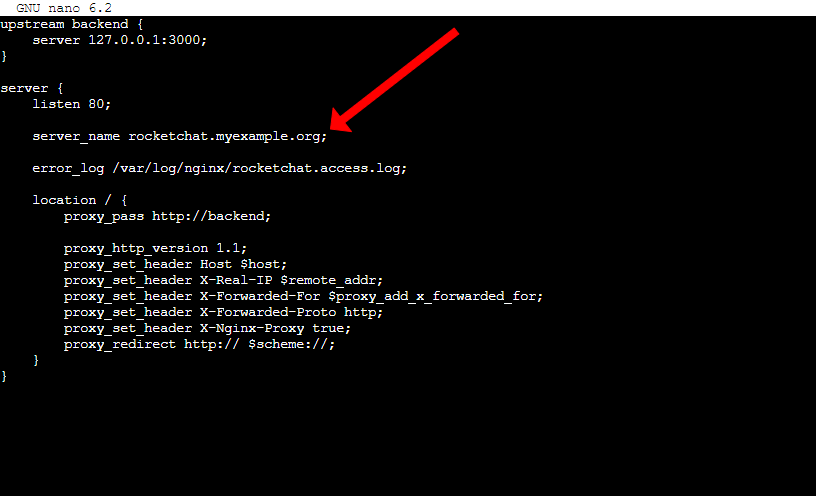
And add the following content:
upstream backend {

    server 127.0.0.1:3000;

}

server {

    listen 80;
    server_name EXAMPLEDOMAIN.COM;

    error_log /var/log/nginx/rocketchat.access.log;

    location / {

        proxy_pass http://backend;
        proxy_http_version 1.1;
        proxy_set_header Host $host;
        proxy_set_header X-Real-IP $remote_addr;
        proxy_set_header X-Forwarded-For $proxy_add_x_forwarded_for;
        proxy_set_header X-Forwarded-Proto http;
        proxy_set_header X-Nginx-Proxy true;
        proxy_redirect http:// $scheme://;

    }

}
Ensure that you change the EXAMPLEDOMAIN bit with actual info. Save the file and, if you haven't yet, point your domain to your server’s IP by adding an ‘A’ record.
Then check if everything is working as expected:
# nginx -t
You should have a green signal:

Go ahead and restart the NGINX server:
# systemctl restart nginx
If you’re not a Webdock server, you’ll create a new config file to pass the Rocket.Chat installation through reverse proxy. You can call it anything, but for the sake of simplicity, I’ll move on with the name ‘rocket.conf and the above content to the same’:
# nano /etc/nginx/sites-available/rocket.conf
Save and exit. To enable the site configuration, you need to create a symbolic link in the directory /etc/nginx/sites-enabled:
# ln -s /etc/nginx/sites-available/rocket.conf /etc/nginx/sites-enabled/
Check if everything is working as expected:
# nginx -t
And restart the NGINX server:
# systemctl restart nginx
Now, if you visit your domain, you’ll be able to access your Rocket.Chat installation:
Secure It With SSL
Securing your Rocket.Chat installation with an SSL certificate is optional but still essential for encrypting data shared between your server and users. This encryption protects sensitive information like login details and messages from potential eavesdroppers. Additionally, SSL authenticates your server's identity and prevents man-in-the-middle attacks.
There are numerous ways to install SSL on your server, but the most straightforward and my preferred way is through Certbot. Just start by installing Certbot via Snap:
# snap install --classic certbot
Certbot is pre-installed in default Webdock LEMP stacks.
And then run and follow the instructions:
# certbot --nginx
Remember: To ensure Certbot installs an SSL for you, you should have the domain pointing to your server’s IP, or the process will fail.
Once Certbot installs an SSL for you, we must also make changes to our rocket.conf file. You won’t need to do this on Webdock. Start by opening the config file:
# nano /etc/nginx/sites-available/rocket.conf
And add/replace the directives between your domain and error_log path with the following in the server block:
listen 443 ssl;
ssl on;
ssl_protocols TLSv1 TLSv1.1 TLSv1.2;
ssl_certificate /etc/letsencrypt/live/EXAMPLEDOMAIN.COM/fullchain.pem;
ssl_certificate_key /etc/letsencrypt/live/EXAMPLEDOMAIN.COM/privkey.pem;
Ensure to replace the domain with actual values and save changes. To confirm that the adjusted NGINX setup successfully clears the NGINX tests, you should test it:
# nginx -t

Then restart:
# sudo systemctl restart nginx
With these, you have successfully installed Rocket.Chat on your server, which is now accessible through your domain and is successfully secured with SSL.
Basic Setup
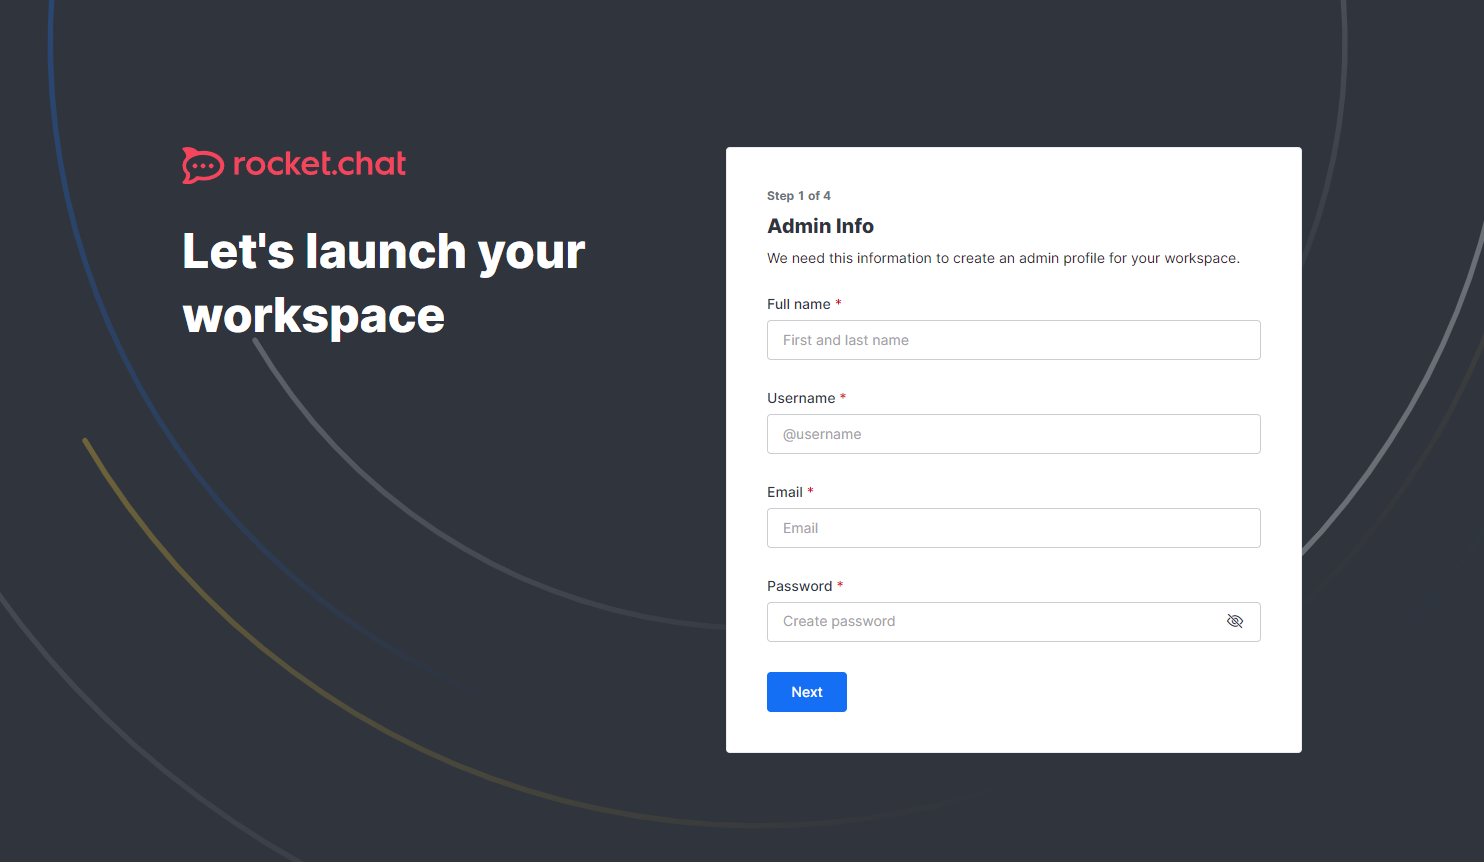
When you first log in to your instance, you need to set everything up. This involves making an administrator user, providing details about your organization, and signing up your instance.
When you encounter a warning about the site being set up for localhost:3000 but accessed from a different domain, simply agree to the suggested configuration adjustment. You’ll have to provide your email and confirm it.
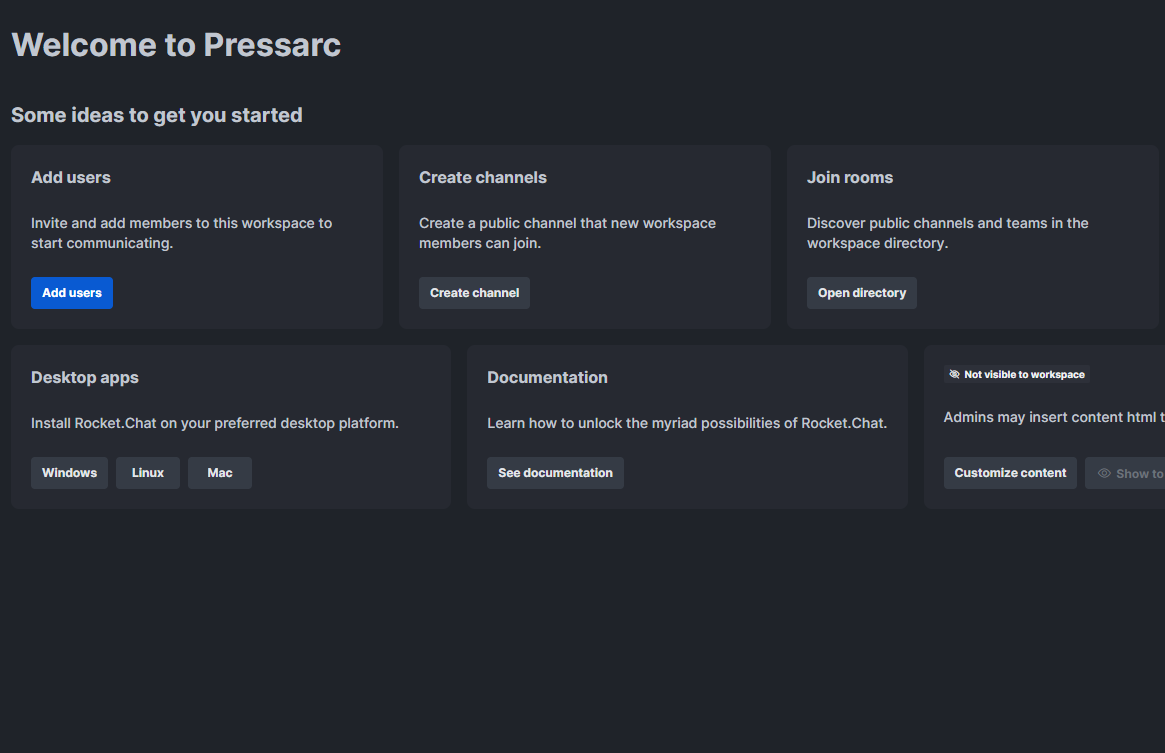
Once you do this, you will be directed to the dashboard of your Rocket.Chat workspace. If you have used software like Slack for internal communications, you won’t find it hard to navigate Rocket.Chat’s user interface.
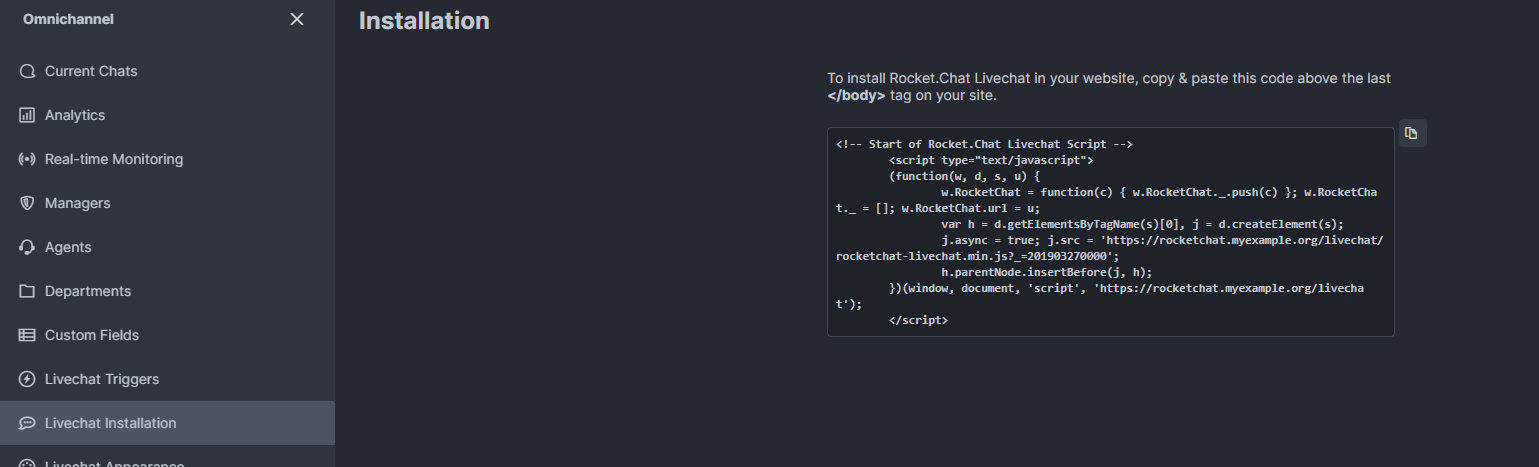
To install a customer-facing live chat widget on your website, go to the Omnichat tab
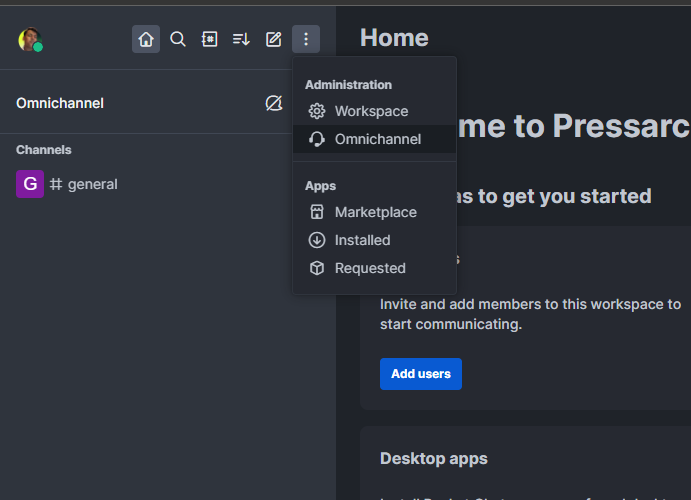
And then to the Live Chat installation tab, get a script to install on your website.
You can invite your team by using the Add Users button on the dashboard.
You can either add them directly or send invite links to their emails. However, before that, you’ll have to set up a Simple Mail Transfer Protocol (SMTP) details to send emails.
As I mentioned, with Webdock, you get free unlimited (fair usage applicable) access to send emails using Postmark, the best SMTP service in the industry, on plans over SSD Bit.
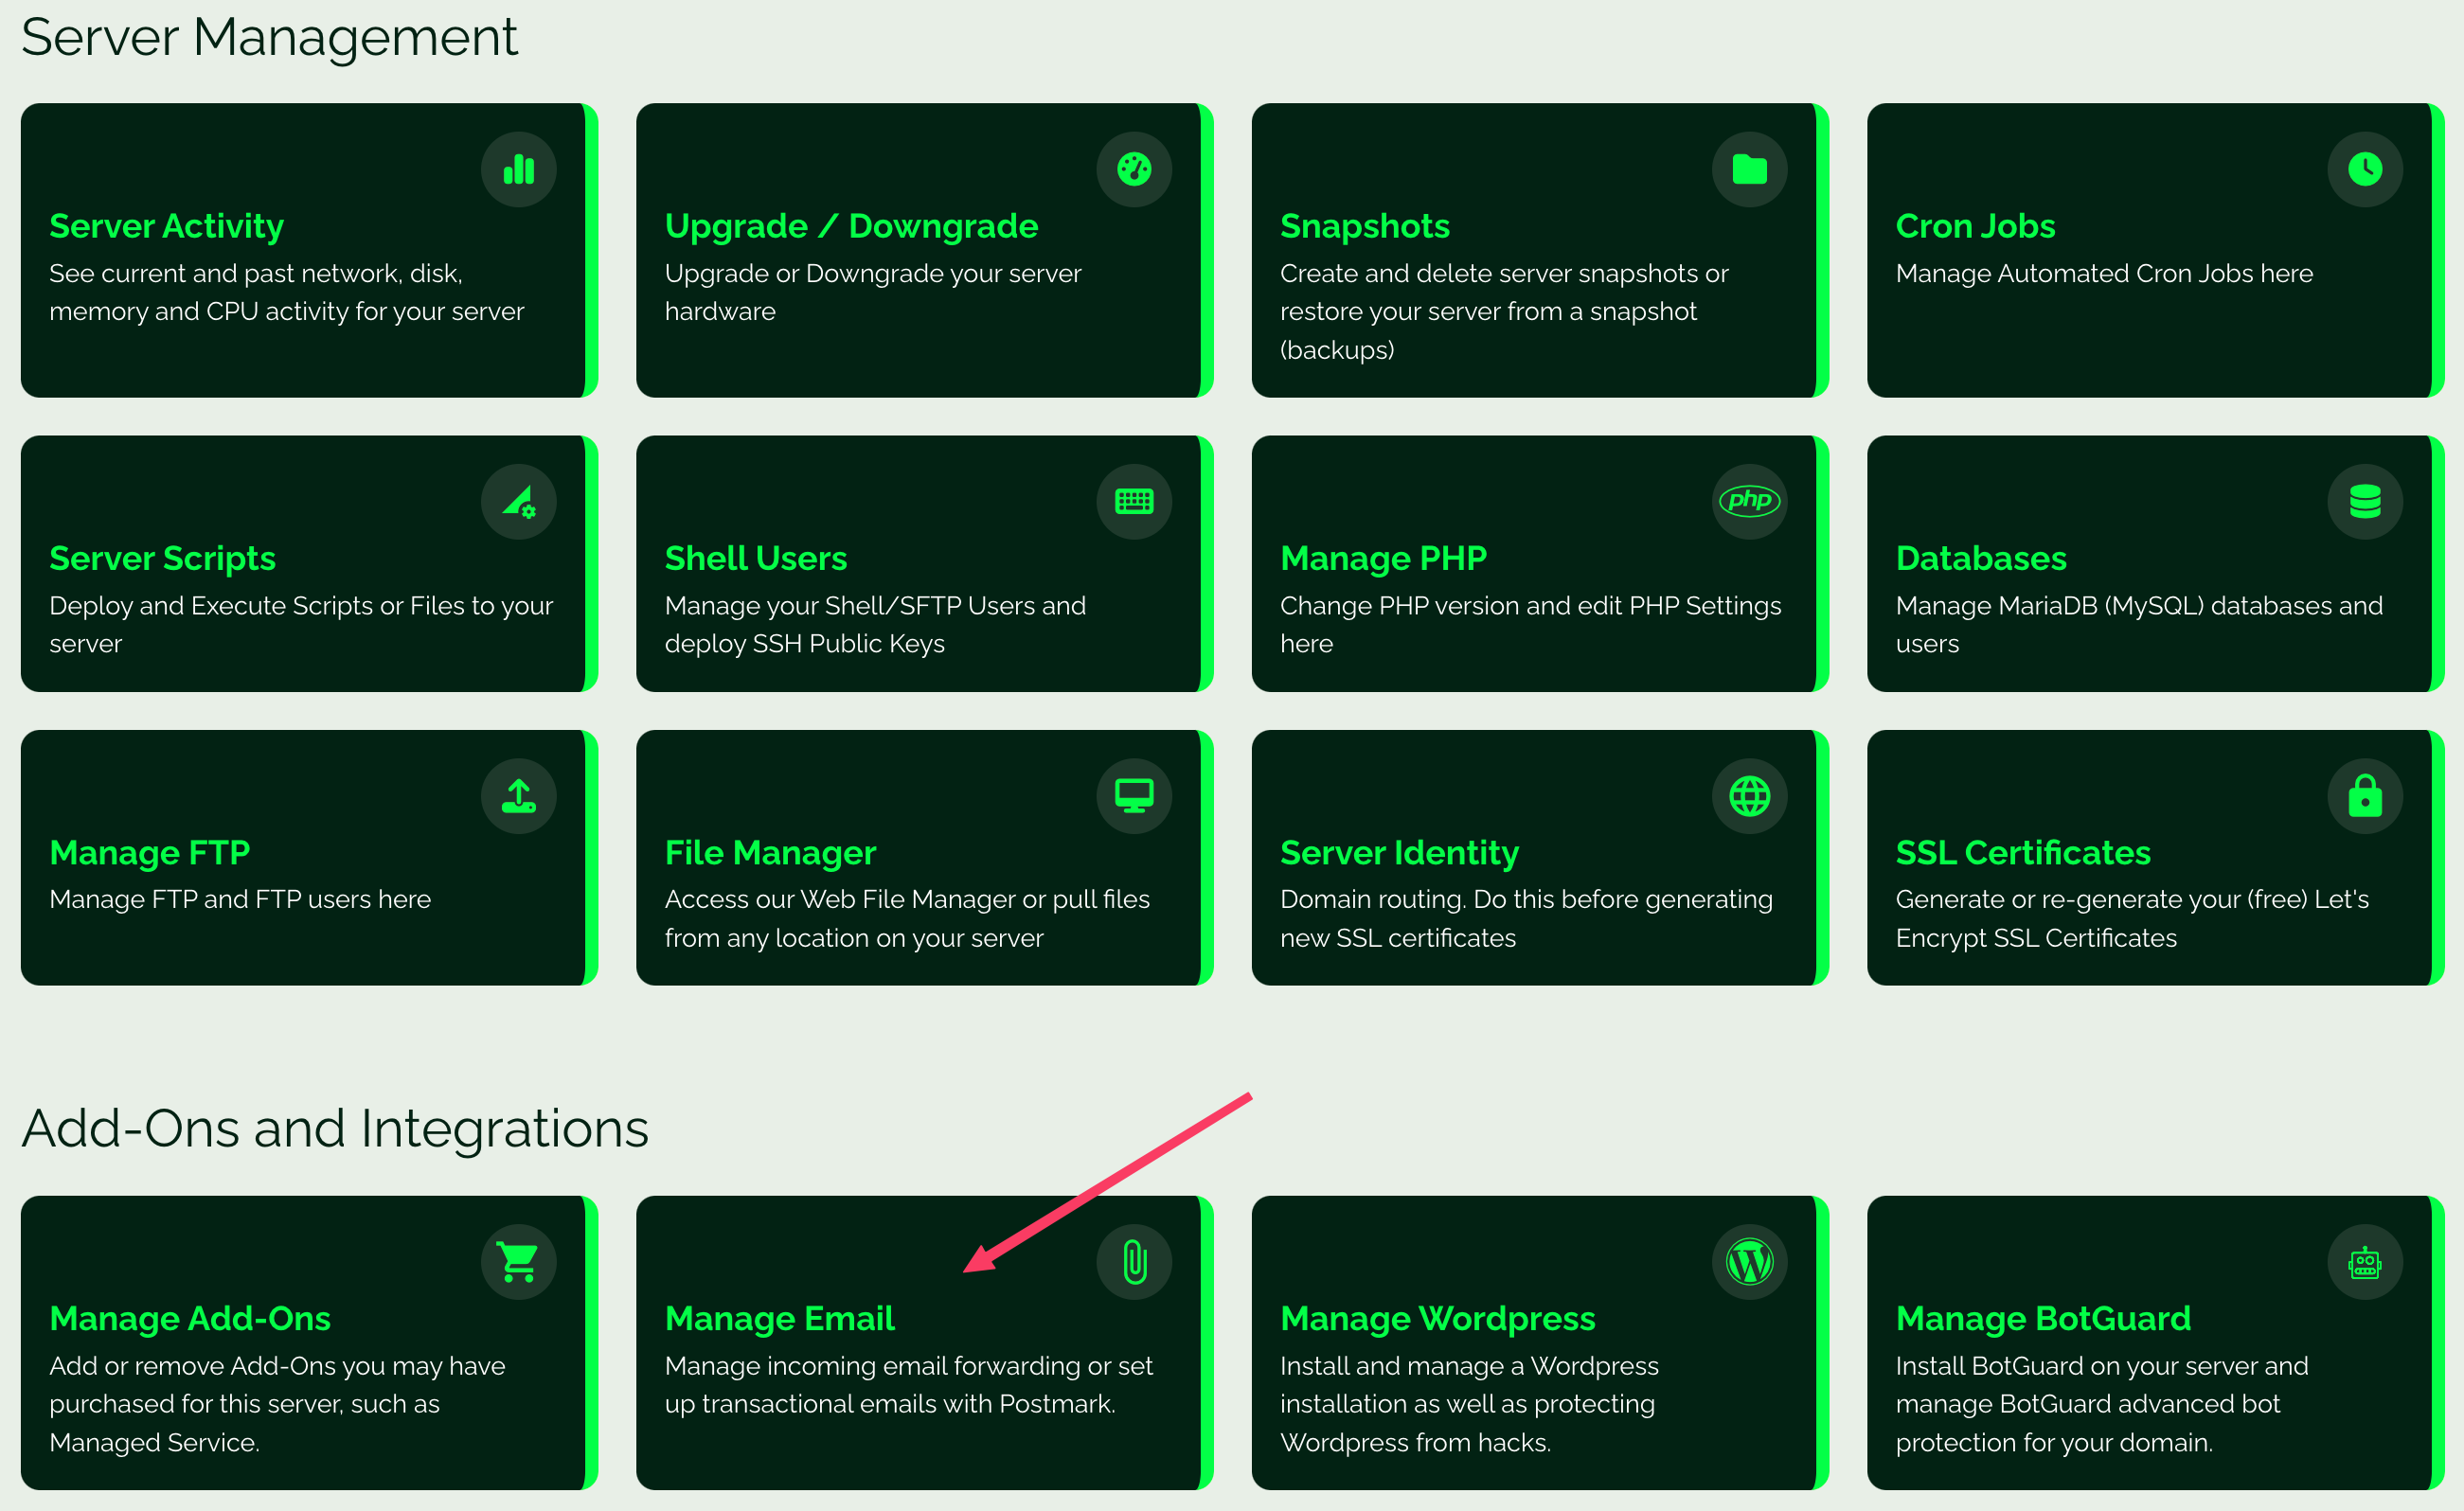
To get started, locate the "Manage emails" section on your server’s Webdock panel and ask for approval to activate this function. Webdock may vet users to avoid misuse of this offer, and by getting approved, you pledge to use it responsibly.
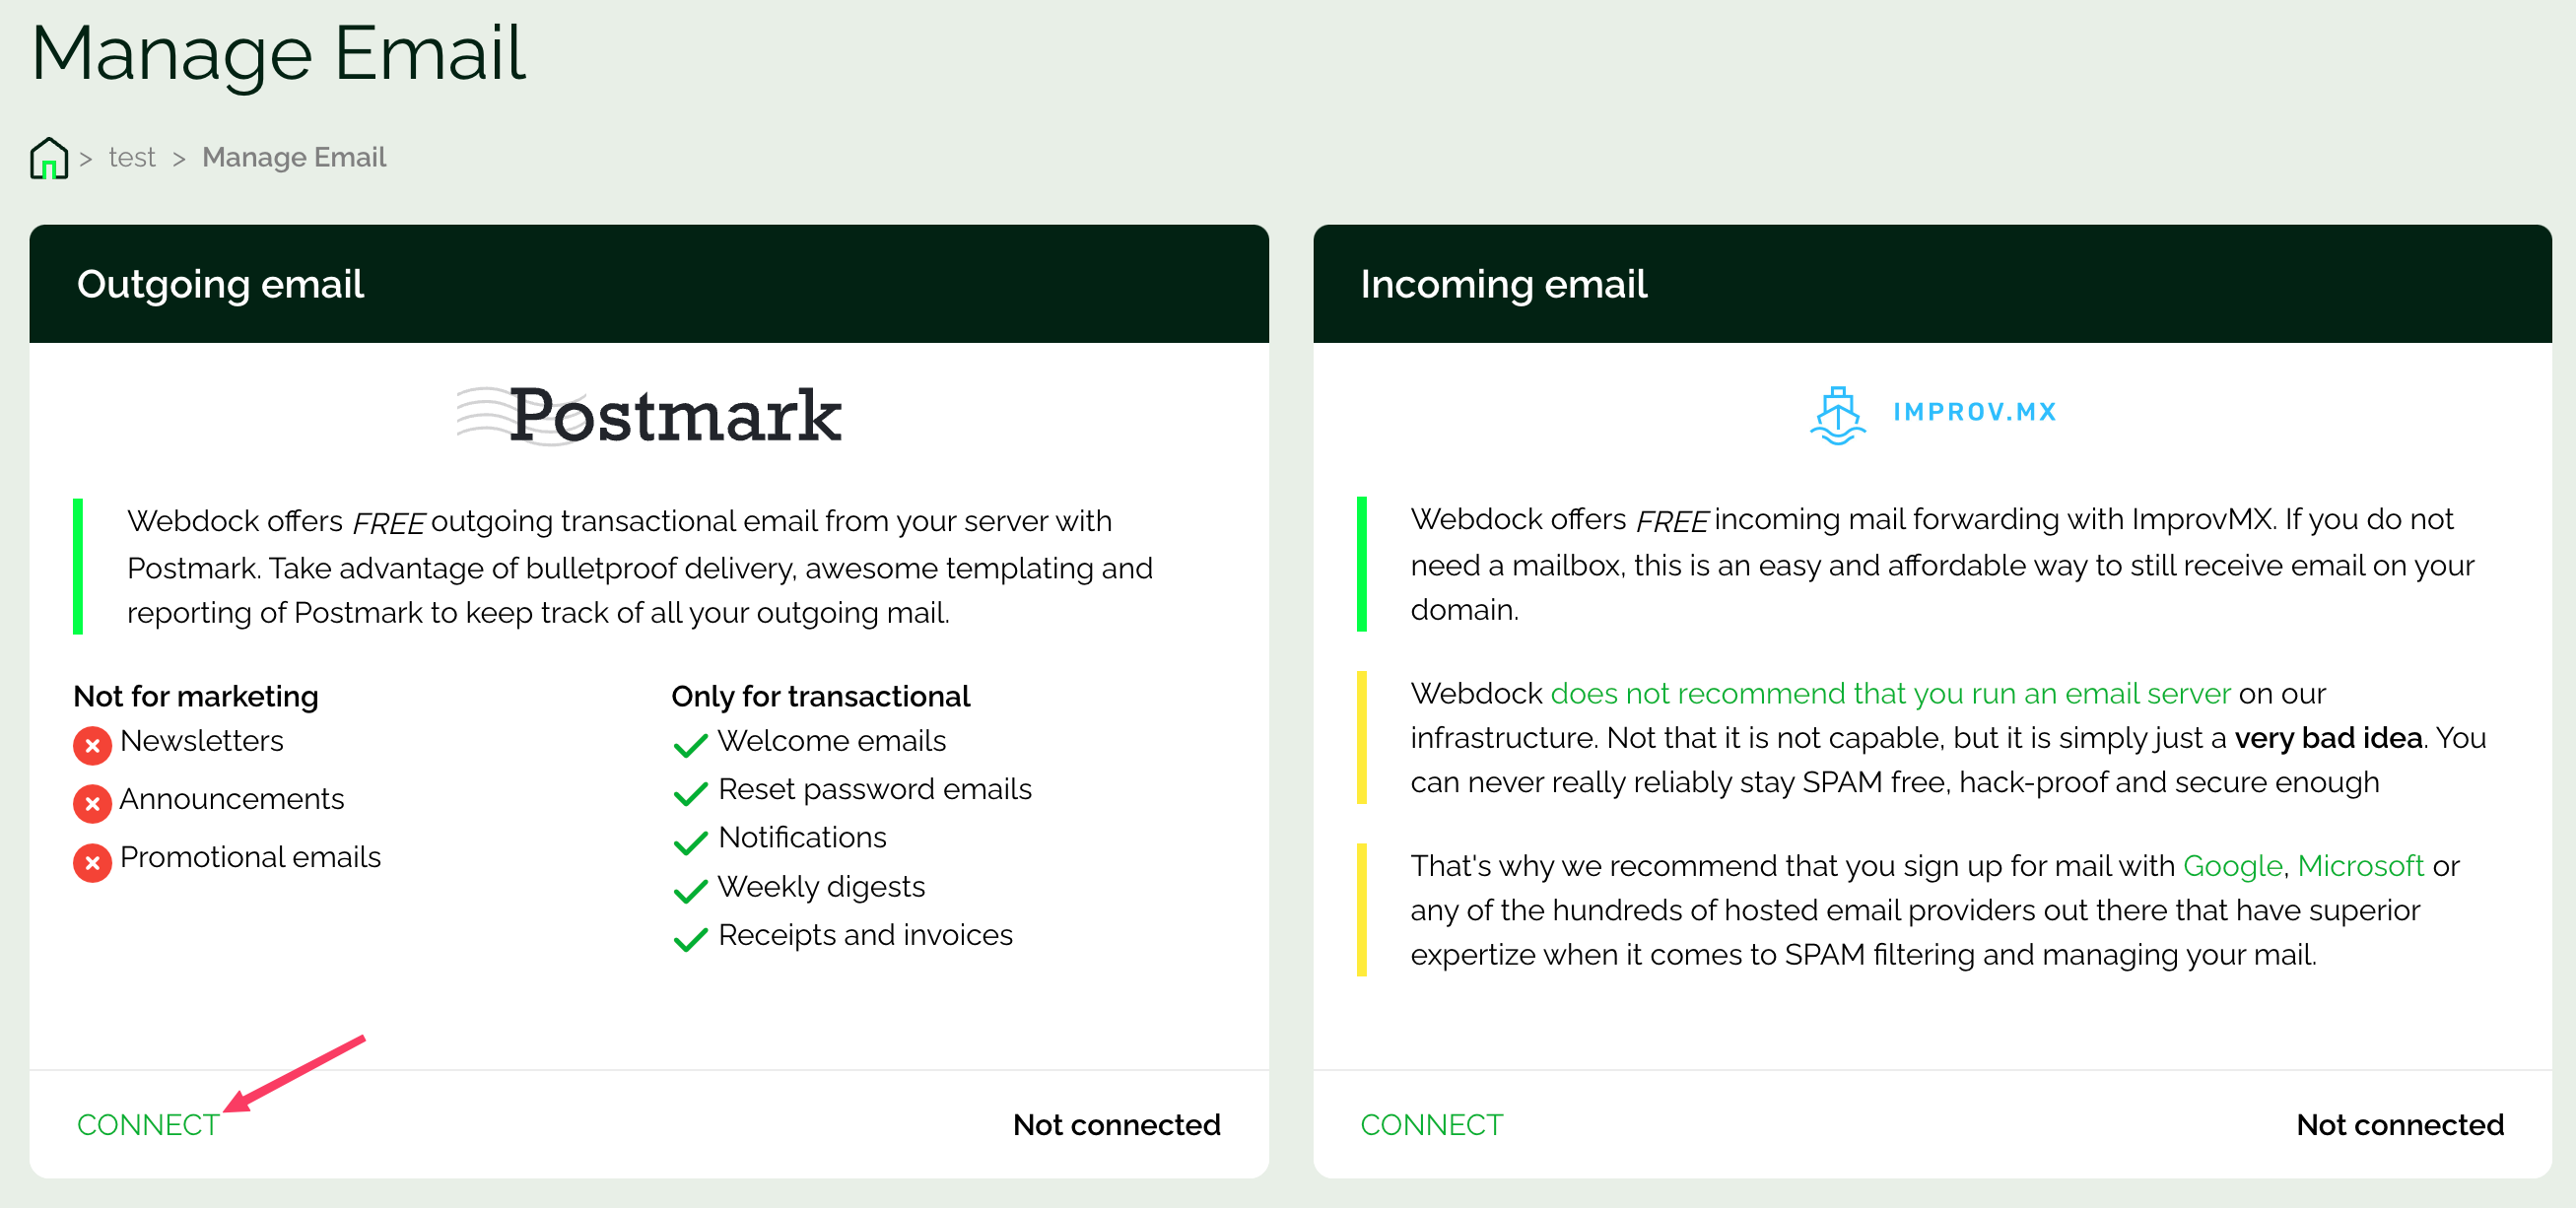
After approval, click Connect:
To begin sending emails with Postmark, you need to add DKIM and return-path records on your DNS provider's site. Once you've made these updates, the verification process can take up to 15 minutes. After that, Postmark will email you to confirm everything is set up correctly.
Got your setup details? Navigate to your Workspace > Settings > Email > SMTP and add the details to the relevant fields.
And send yourself a test email. If it is set up correctly, you’ll receive an email confirming everything has been set up.
Well, that’s it. You now have a brand new Rocket.Chat server setup to enhance your organization’s communication, internal or external.
Conclusion
With the installation of Rocket.Chat complete, you have finished setting up a very robust communication platform. Like any tool, its effectiveness relies on how well it meets your organization's requirements. Take the time to explore Rocket.Chat's features and settings to see how they fit into your workflow because they are so expansive, they won’t fit into this guide! Feel free to explore Rocket.Chat’s documentation for any help needed.
Remember, Webdock’s pricing, hardware, and features give other VPS providers a run for their money and can definitely help you save a lot in the long run. Sign Up today. Armed with all the necessary information, you must now make a thoughtful decision. Good Luck!
Meet Aayush , a WordPress website designer with almost a decade of experience who crafts visually appealing websites and has a knack for writing engaging technology blogs. In his spare time, he enjoys illuminating the minds around him.
