Introduction
Netdata offers performance monitoring that is both accurate and easily understandable through extensible web dashboards. By visualizing the processes and services on your Linux systems, Netdata makes it easy to monitor metrics such as CPU usage, memory, disks, networks, processes, and more.
This tutorial will show you everything you need to know to set up an Ubuntu server running Netdata. By the time you finish, you'll have a server ready to collect and display data about your server activity.
Prerequisites
- A Linux Server (I use Ubuntu for this tutorial)
- SSH access to that server , with a sudo user
Installing Netdata
Installing Netdata using the kickstart.sh script is the most sought-after way. Netdata can be installed in a variety of ways, but this is my preferred because it allows for other arguments to be passed on the same command in order to customize the installation process. Most importantly, this method is known to work well across all distros.
Make sure curl is installed.
$ sudo apt-get update $ sudo apt-get install curl -y
Now start by running the following command as a sudo user:
$ curl https://get.netdata.cloud/kickstart.sh > /tmp/netdata-kickstart.sh && sh /tmp/netdata-kickstart.sh
You may need to press 'Y' to give permission to continue some of the tasks the above command triggers.
The script will automatically detect the Linux Operating system and distribution you are running and install the necessary packages. The script then proceeds to check if you have an existing instance of Netdata – and if there is one, the script will update Netdata rather than installing it from scratch.
All the required files and dependencies will be installed and the package index will be updated.
As it progresses, the script will display the location of Netdata files including configuration files, web files, db files, and log files.
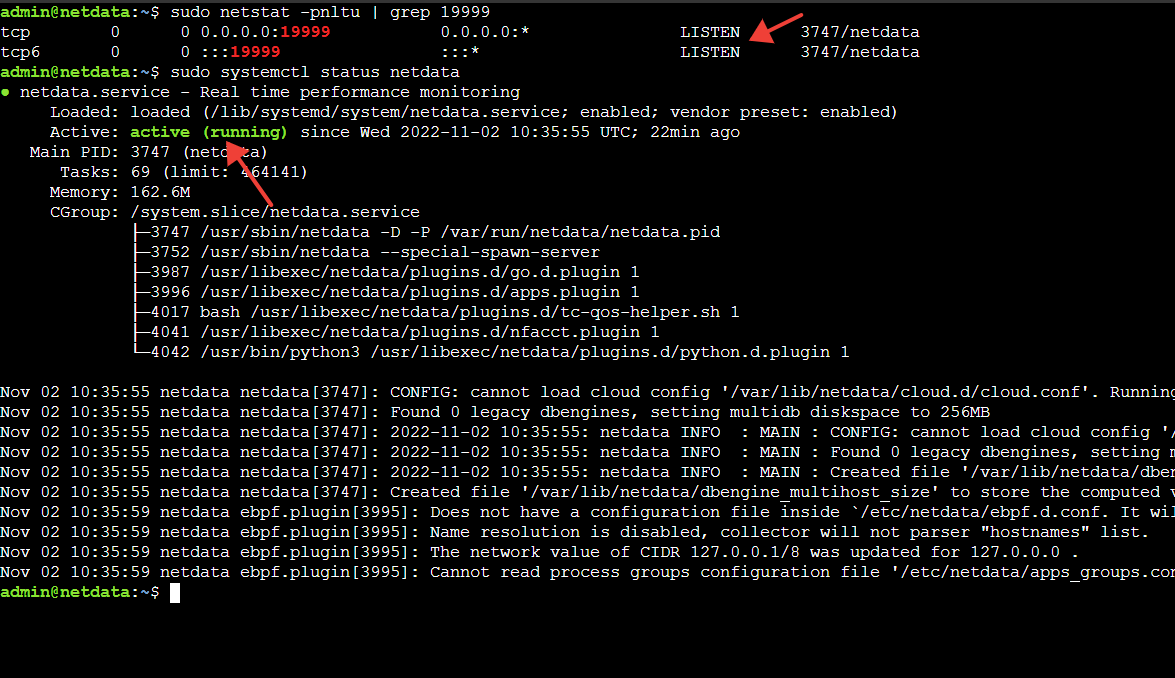
Now that Netdata is installed, it's time to verify that the Netdata service is active and running. By default, Netdata listens on port 19999. To confirm this, run the netstat command below:
$ sudo netstat -pnltu | grep 19999
Also, check if the Netdata systemd service is running by executing:
$ sudo systemctl status netdata
Configuring the Firewall
Netdata can be accessed from the browser on your host system, but if the UFW firewall is enabled, port 19999 needs to be allowed to make this possible. To do so, run:
$ sudo ufw allow 19999/tcp $ sudo ufw reload
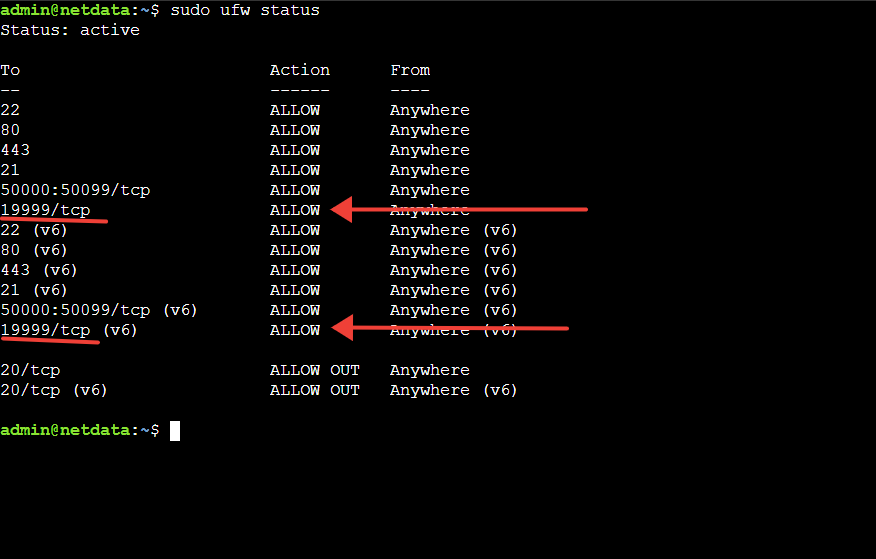
Ensure that port 19999 is open on the firewall:
$ sudo ufw status
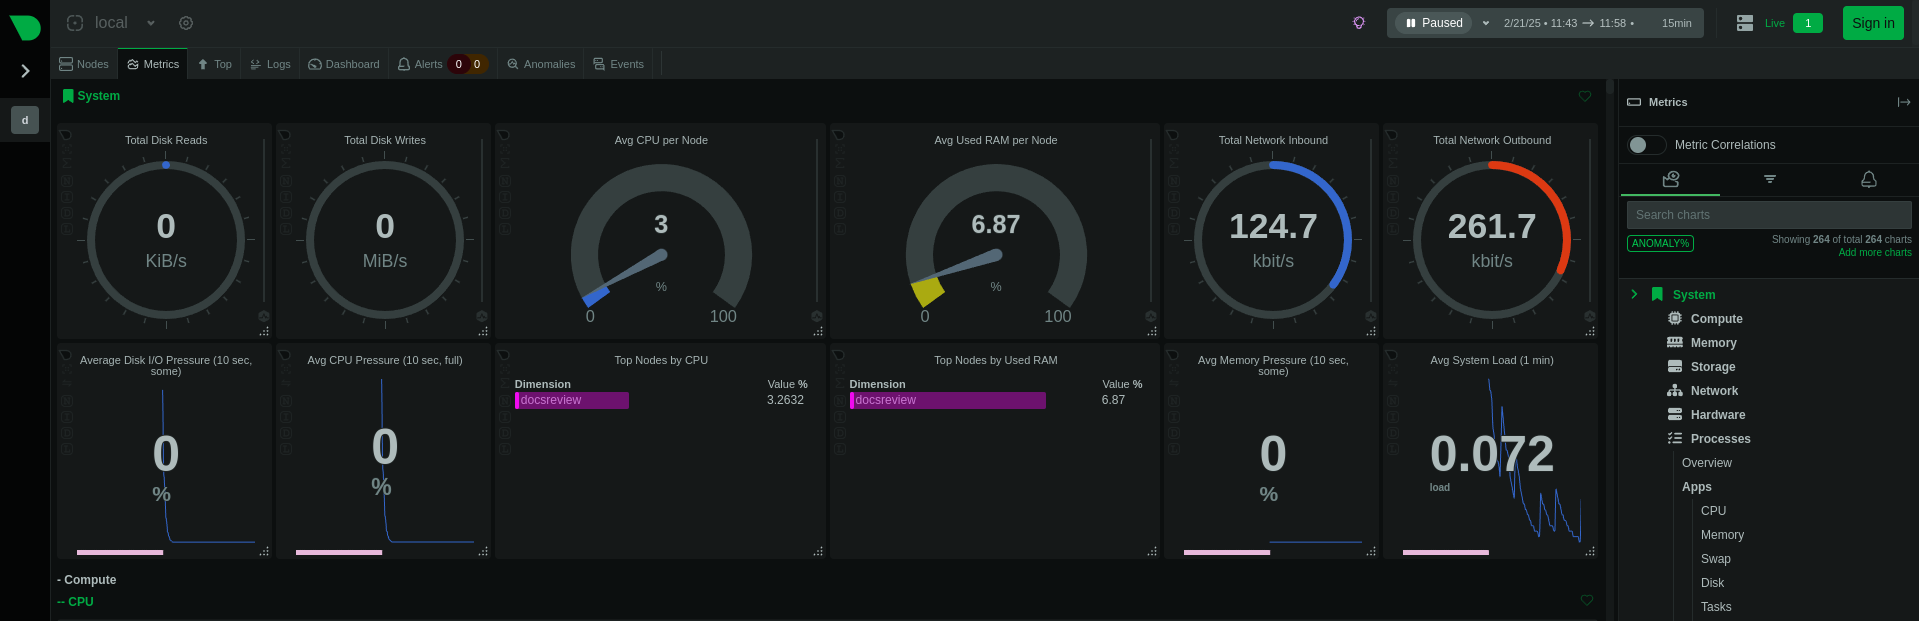
All of the configurations are now complete! To access Netdata, simply browse to your server's IP address followed by :19999 in your web browser.
Setting up notifications (Optional)
It's essential to detect and correct any errors that your server might face as soon as possible. Getting notifications whenever something is wrong really helps you reduce downtime.
Luckily, Netdata allows you to set up notifications through various channels like Email, Microsoft teams, Telegram, Slack, etc. (Check the full list here .)
I am going to use my favorite way of getting notified, Discord. You can check tutorials for other channels on the link given above.
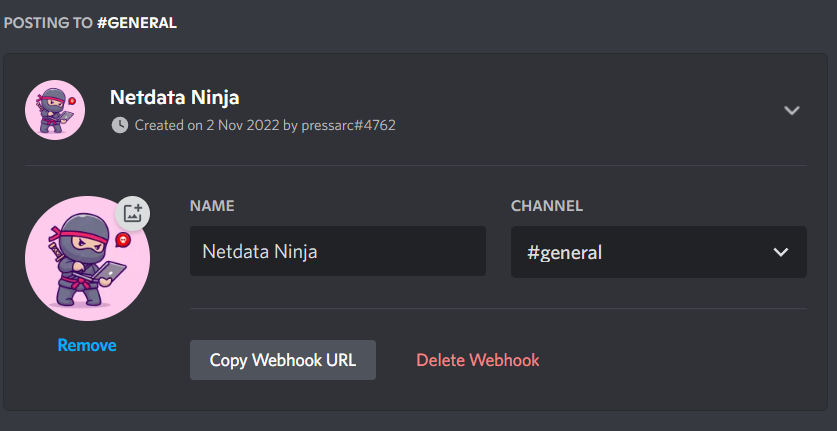
Navigate to a channel in your existing Discord server (or create a new one) and click on settings or the gear icon. Go to integrations and click on the 'Create Webhook' URL. Name it whatever you'd like to and click on copy Webhook URL and then save changes.
Then SSH the following command:
$ sudo /etc/netdata/edit-config health_alarm_notify.conf
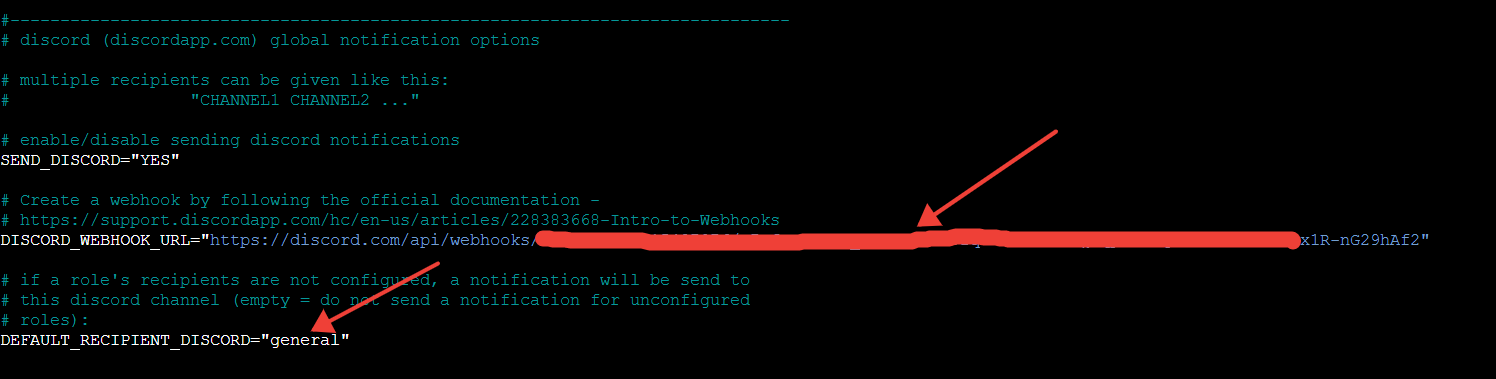
You will see various configurations for various, navigate to the discord configuration and paste your webhook URL in the DISCORD_WEBHOOK_URL line and add your channel's name after the DEFAULT_RECIPIENT_DISCORD
Press CTRL + X or ⌘ + X, to save the file.
Now, to test your notification setup, switch to the Netdata user:
$ sudo su -s /bin/bash netdata
And then run:
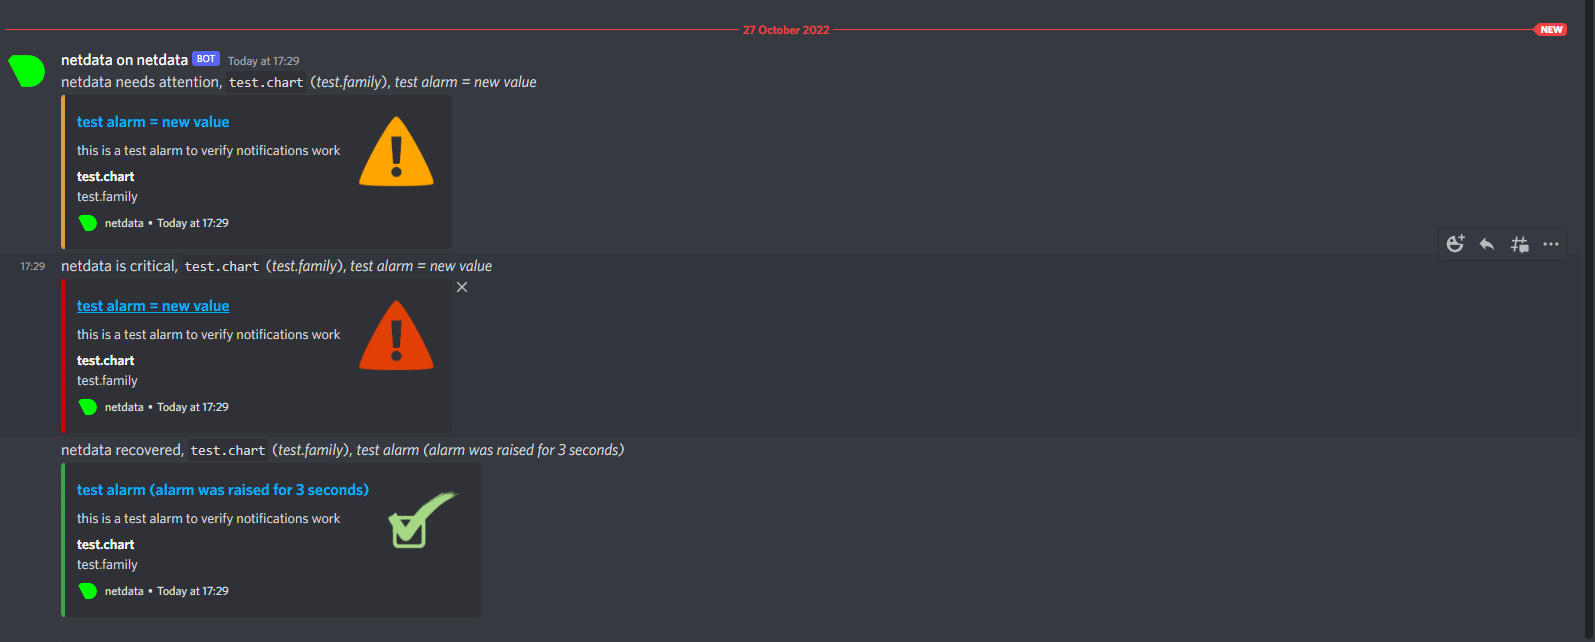
$ /usr/libexec/netdata/plugins.d/alarm-notify.sh test
You will immediately receive notifications on your Discord Channel:
Conclusion
Netdata is the perfect solution for monitoring your single node in real time. You can configure alarms and notifications to be triggered when a certain event or threshold is exceeded. Best of all, Netdata requires no extra configuration once installed but provides significant customization options.
Aayush Nair has been a passionate freelance WordPress designer for the past eight years. He likes to share his knowledge to help and enrich the community in his free time.
