Introduction
Proxmox is an open-source server virtualization software for creating containers and virtual machines on a server or bare-metal machine. It comes with a feature-rich web interface from where you can manage the containers, virtual machines, networking, and such.
In this article, we provide instructions for installing Proxmox VE 8 on your Webdock server.
Let's get started!
Prerequisites
- A KVM machine with Debian 12 (Debian Bookworm) clean OS as the image.
- SSH access to your server
Setting Root User Password
By default, on Webdock servers the root user password is not set. Setting root password is absolutely necessary as we’ll be using that to log into Proxmox web interface.
Switch to root:
$ sudo su
Then set the password using:
# passwd
Now moving on to actual instructions for installing Proxmox.
Updating Hosts Entry
First, update the /etc/hosts file with the hostname and the IP address of your server. This will make sure that hostname resolution works correctly. To edit the hosts file, you can use nano.
$ sudo nano /etc/hosts
Now, replace the contents of the file with the alias/domain you want to use for Proxmox and the IP address in the respective field. Your hosts file should look similar to this:
45.148.31.142   proxmox proxmox.vps.webdock.cloud
127.0.0.1       localhost
::1             localhost ip6-localhost ip6-loopback
ff02::1         ip6-allnodes
ff02::2         ip6-allrouters
Verify if the hostname is applied correctly.
$ hostname --ip-address
45.148.31.142 # should return your server's public IP address here
Setting Up Proxmox Repository
To begin, switch to the root user using sudo.
$ sudo su -
Add Proxmox VE repository.
# echo "deb [arch=amd64] http://download.proxmox.com/debian/pve bookworm pve-no-subscription" > /etc/apt/sources.list.d/pve-install-repo.list
Fetch the repo key:
# wget https://enterprise.proxmox.com/debian/proxmox-release-bookworm.gpg -O /etc/apt/trusted.gpg.d/proxmox-release-bookworm.gpg
Now upgrade the system.
# apt update && apt full-upgrade
Installing Proxmox VE Kernel
Now install the Proxmox kernel as some packages won’t work properly without this.
# apt install proxmox-default-kernel
Now reboot the machine.
# reboot
Installing Proxmox Packages
Now that we have set up the repository and installed the Proxmox kernel, it’s time to install the actual Proxmox virtualization and other required packages.
# apt install proxmox-ve postfix open-iscsi chrony
During the installation, when prompted for mail configuration you can select the option you’d want to go with. For this article, I chose “No configuration”. The installation process will take some time.
Fixing Package Configuration Error
Note: Skip to the next section if you have not seen any errors during Proxmox installation.
If you have seen any errors related to dpkg not being able to configure some packages, like shown in the below image, do the below 3 steps.
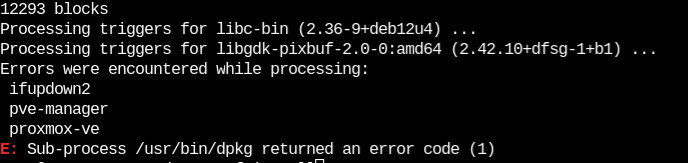
Step 1: If you see that error, reboot your server and then do an apt fix to reconfigure the installed packages.
# reboot
Step 2: After the reboot, run the below command to configure the packages.
# apt -f install
Step 3: Once done, again reboot the server
# reboot
Removing the Debian Kernel
Proxmox installs its own kernel, so we need to remove the default kernel that comes with Debian to avoid any issues with upgrades in the future. This replaces the current kernel with the PVE kernel.
# apt remove linux-image-amd64 'linux-image-6.1*'
Finally, update the grub by running:
# update-grub
Final Step: Removing the os-prober package
Proxmox documentation recommends removing the os-prober package as well as it scans for grub entries for the existence of other operating systems and adds them to the grub entries, and this will include the guest VMs you create within Proxmox. To prevent this we remove the os-prober package, and this is completely safe to do and nothing breaks 🙂
# apt remove os-prober
Accessing Proxmox Web Interface
Proxmox provides a web interface on port 8006. To access it visit https://<server alias or IP address>:8006. Ignore any SSL warnings you see.
If everything is good, you will see this login page.
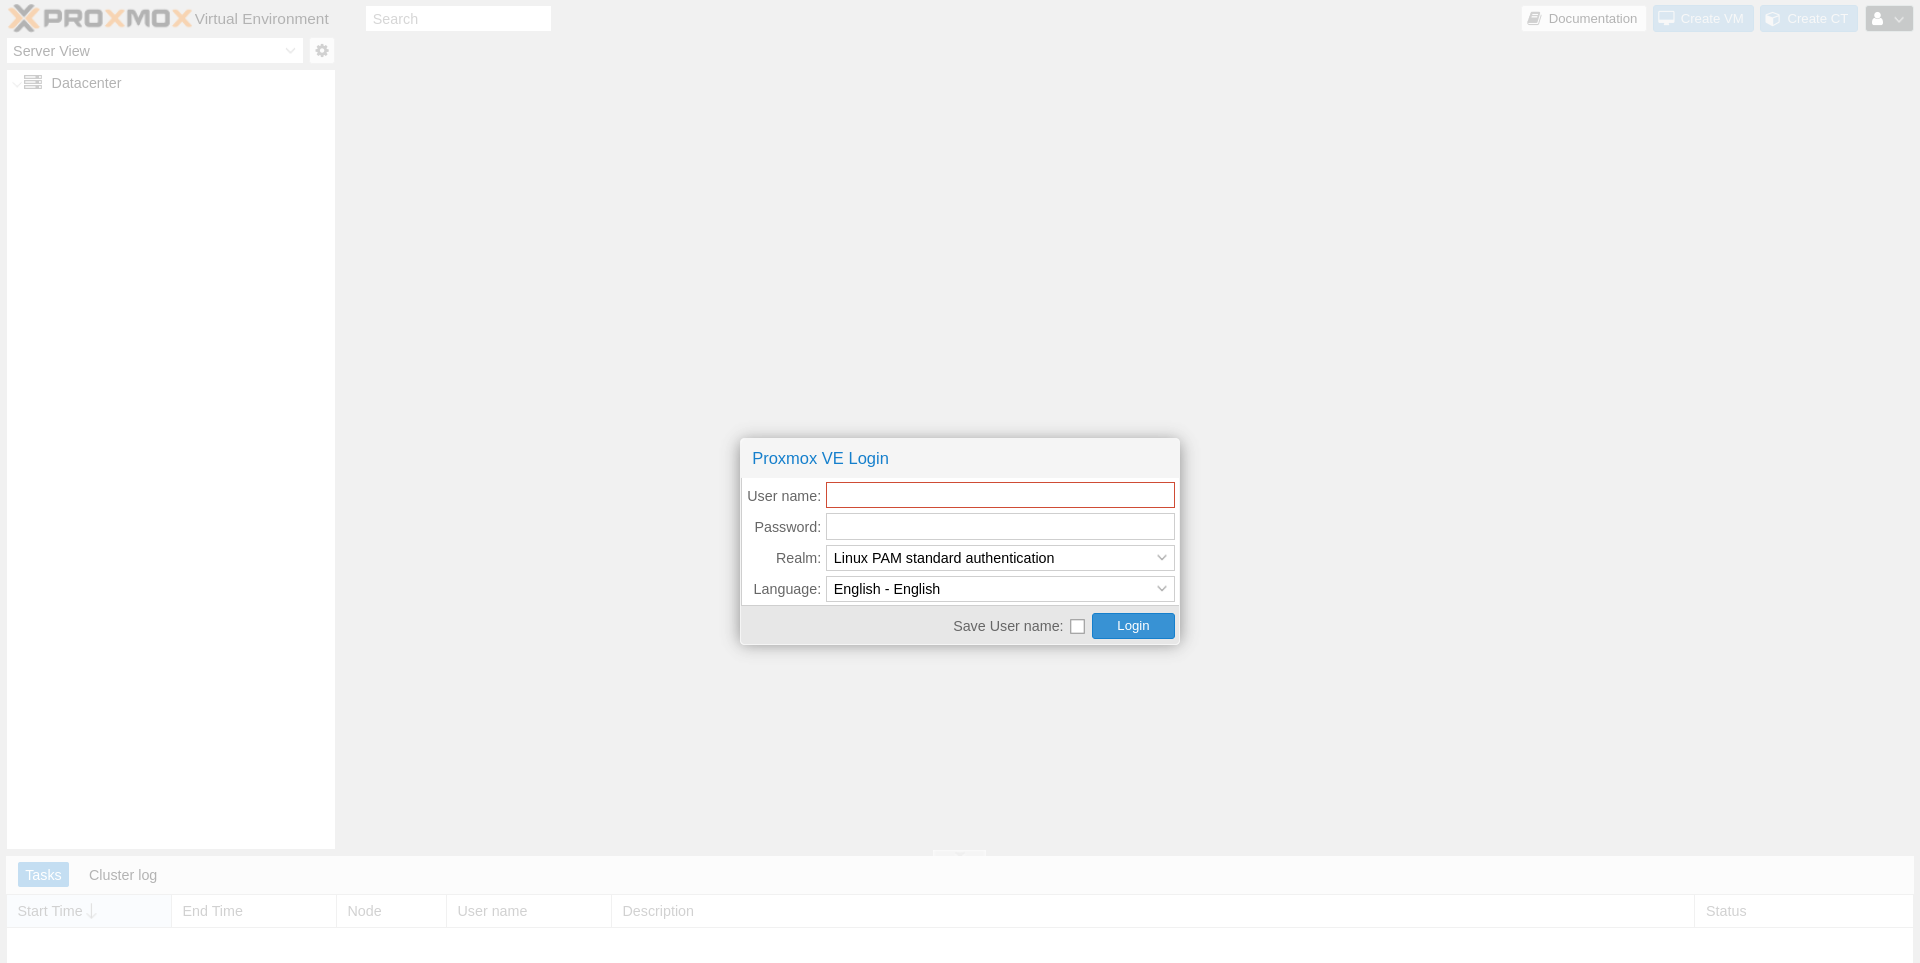
To log in, enter ‘root’ for the username and the password you set earlier. Leave the other fields as is.
Conclusion
This article provided instructions on how you can install Proxmox on Webdock KVM servers.
