Are you a Java programmer? If so, you’re part of a vast community working with one of the most influential programming languages ever created. Java’s enduring popularity stems from its platform independence, robust nature, and wide range of applications. From enterprise-level systems and Android apps to web servers and scientific computing, Java’s versatility continues to make it a valuable skill in the tech industry. Whether you’re a seasoned veteran or just starting your Java journey, the language’s rich ecosystem and constant evolution offer ample opportunities for growth and innovation.
In this guide, I’ll be going to show you how to install Java on your Ubuntu Webdock server.
Prerequisites
- A Webdock Ubuntu Server (Ubuntu 24.04 in my case)
- SSH access to your Webdock server
Installation Steps
First, we need to update and upgrade our server.
$ sudo apt update
$ sudo apt upgrade
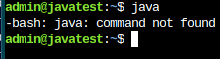
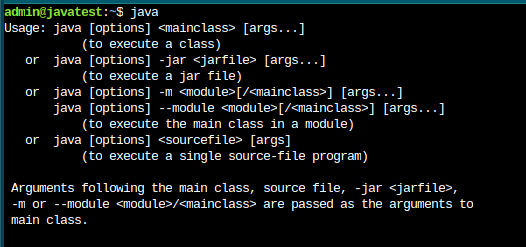
Now we need to check if we have Java installed on our server. To do so, we run the command “java” if the server responds with the “command not found” it means that it is not installed and we need to install it.
If you’re a Java developer you will also need to install the Java compiler which is part of the Java development kit. We can check with the command:
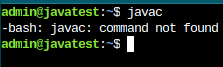
In this case, we see that neither java nor javac is installed, so here are the steps to install them.
Depending on which app you want to install, you may need a certain version of Java to be installed.
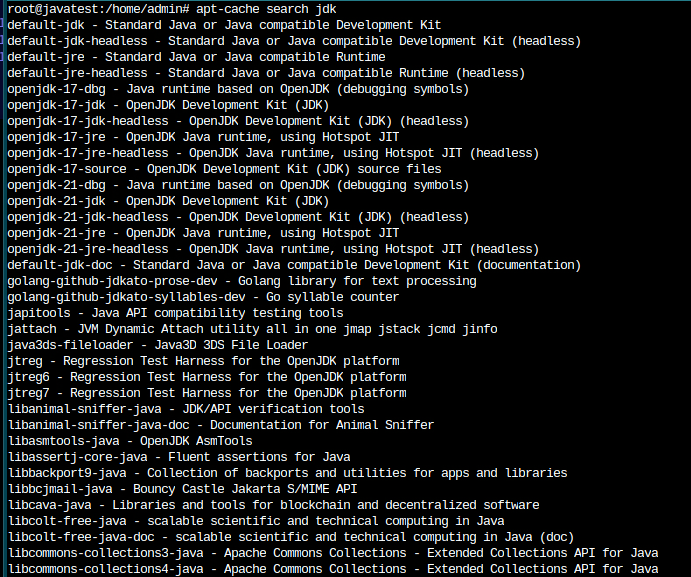
To see which Java versions are offered in your Ubuntu distribution, run:
$ sudo apt-cache jdk
This command will search and output the different Java development kit versions available.
For example, to install Java 21, you have to install the below package.
$ sudo apt install openjdk-21-jdk
In this guide, we’ll install the default package which will install the latest version. Since we’re using Ubuntu Noble, the command we will use to install java will be:
$ sudo apt install default-jdk
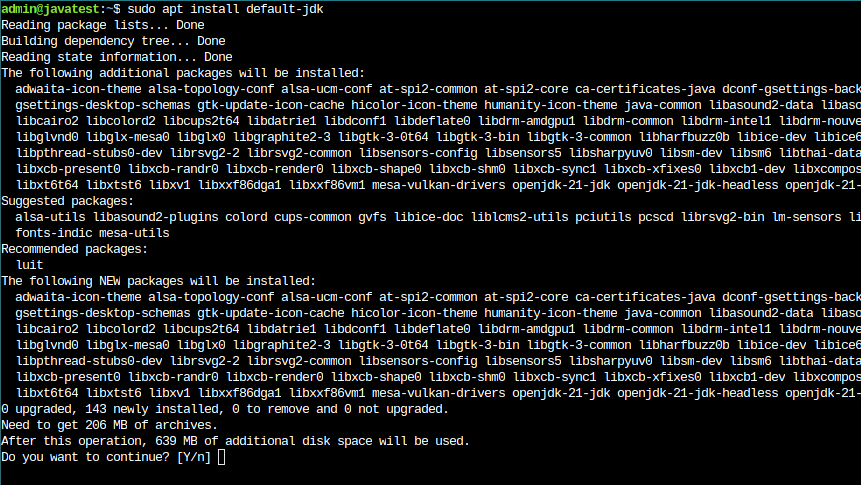
Input ‘y’ to install the package.
Once installed, we can check if the server is ready by running the commands java and javac again.
Run “java” on the command line to verify if Java is installed.
Run “javac” on the command line to verify if the Java compiler is installed.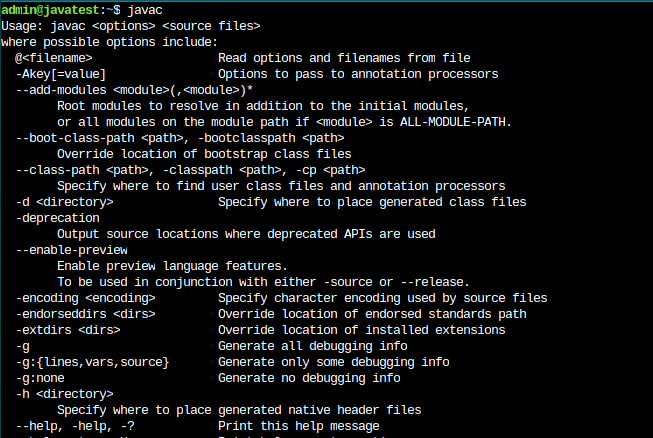
Once we have java and javac installed you’re ready to go. We can test a program like “Hello World” to make sure everything is working properly.
First, we make a class called Hello.java and paste the following code snippet.
$ vim Hello.java
Copy and paste the below code snippet.
public class Hello{
public static void main(String[] args){
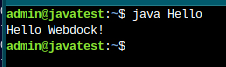
System.out.println("Hello Webdock!");
}
}
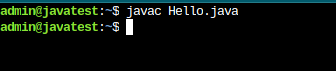
Then, we compile the code with javac. If the terminal doesn’t return anything, it has compiled successfully.
$ javac Hello.java
Finally, we can test that Java is working by running our program with the command java.
$ java Hello
Conclusion
That’s it! This guide provided instructions to install the latest or specific version of Java on your server. I hope you find this guide useful. If you have any issues, don’t hesitate to contact our support team.
This article was written by Webdock Support Specialist Jose Porras . Jose is passionate about Cloud Hosting and helping Webdock Customers succeed wherever he can.
