Introduction
OpenLiteSpeed is an open-source version of LiteSpeed Enterprise Web Server. Compared to Apache and Nginx, OpenLiteSpeed is a lightweight, fast and high-performance web server. OpenLiteSpeed has its own LSPHP (PHP + LSAPI) implementation to load the PHP file and it performs better than PHP-FPM. It has a web-based interface to configure and manage the server. It combines speed, security, scalability and optimization in one package.
Features
- Supports HTTP/3 and HTTP/2
- Event-Driven Architecture
- Supports Apache Rewrite rules
- Supports multiple PHP versions
- WAF, Anti-DDoS and Bandwidth throttling support
- ModSecurity Integration
In this post, we will show you how to Install and Configure OpenLiteSpeed on Webdock.
Prerequisites
- A Webdock cloud Ubuntu 22.04 server (clean OS Ubuntu Jammy).
- You have shell (SSH) access to your VPS.
Install OpenLiteSpeed
Note: All the commands in this guide should be run as the root user.
By default, OpenLiteSpeed package is not included in the Ubuntu 22.04 default repository. So you will need to add the OpenLiteSpeed repository using APT.
Switch to root using:
$ sudo su
Add the OpenLiteSpeed repository to APT using the following command:
# wget -O - http://rpms.litespeedtech.com/debian/enable_lst_debian_repo.sh | sudo bash
Next, update the repository and install the OpenLiteSpeed server using the following command:
# apt-get update -y
# apt-get install openlitespeed -y
Once the OpenLiteSpeed server has been installed, check the status of the OpenLiteSpeed with the following command:
# /usr/local/lsws/bin/lswsctrl status
Output:
litespeed is running with PID 10719.
If it is not running, you can start it using the following command:
# /usr/local/lsws/bin/lswsctrl start
Configure UFW Firewall
Note: Skip this section if you have no UFW installed on your server.
By default, OpenLiteSpeed listen on port 8088 and 7080. So you will need to allow both port through the UFW firewall. You can allow them with the following command:
# ufw allow 8088
# ufw allow 7080
You will also need to allow port 443 for secure HTTPS connections:
# ufw allow 443
Next, reload the firewall using the following command:
# ufw reload
Once you've completed this guide you will be able to server your website with https normally – if you want to be able to access your site using plain http on port 80 you should go to the Listeners section of the OpenLiteSpeed dashboard and change port 8088 to 80. Port 80 is already allowed in UFW on our stacks so there is no need to do anything further with regards to UFW. Information on how to access the OpenLiteSpeed dashboard is shown later in this guide.
Set the Admin Password
Next, you will need to set an admin password to access the OpenLiteSpeed admin panel. You can set it using the following command:
# /usr/local/lsws/admin/misc/admpass.sh
You will be asked to set an admin username and password as shown below:
Please specify the user name of administrator.
This is the user name required to login the administration Web interface.

User name [admin]: admin

Please specify the administrator's password.
This is the password required to login the administration Web interface.

Password:
Retype password:
Administrator's username/password is updated successfully!
Access the OpenLiteSpeed Web UI
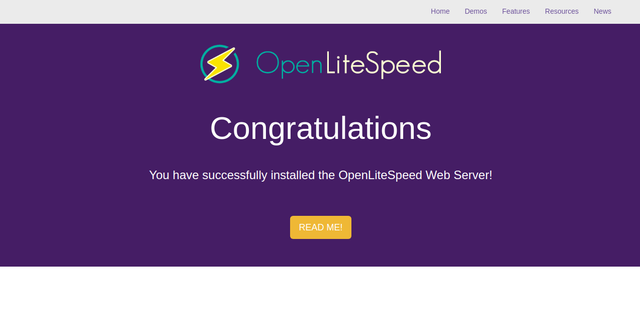
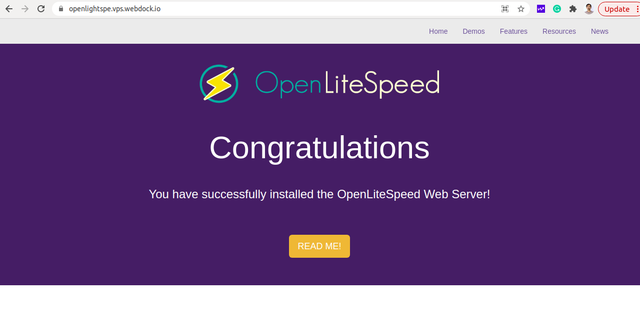
You can now access the OpenLiteSpeed frontend using the URL http://your-server-ip:8088. You should see the following page:
To access the OpenLiteSpeed admin panel type the URL https://your-server-ip:7080. You should see the OpenLiteSpeed login page:
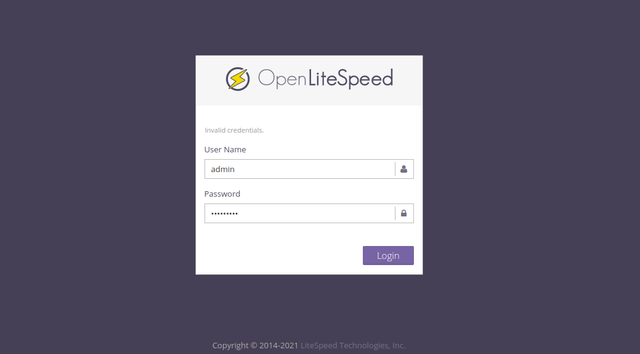
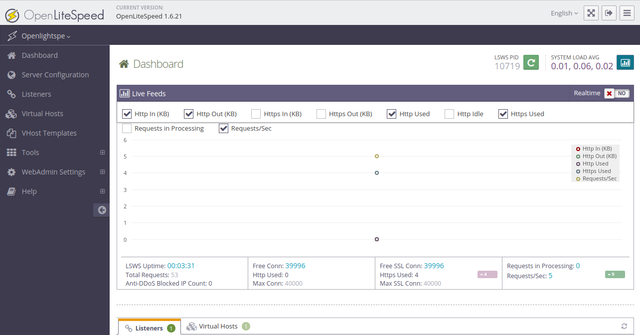
Provide your admin username, password and click on the Login button. You should see the OpenLiteSpeed admin panel:
Configure a Domain Name
By default, OpenLiteSpeed is configured to serves the site for any domain. Here, we will configure the default domain that Webdock provides you with, in this example openlightspe.vps.webdock.io to serve the site. You can do this for any domain you have control over and where you have set your DNS records to point to your Webdock server IP addresses.
To do so, click on the Listeners in the left pane. You should see the following page:
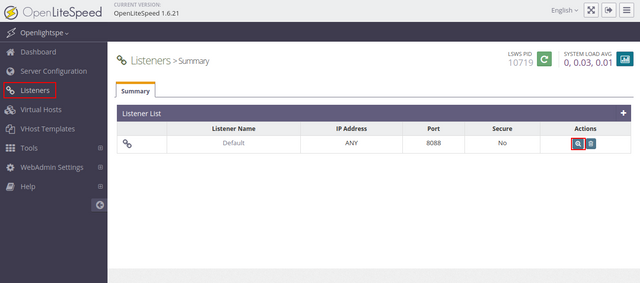
Click on the View icon. You should see the following page:
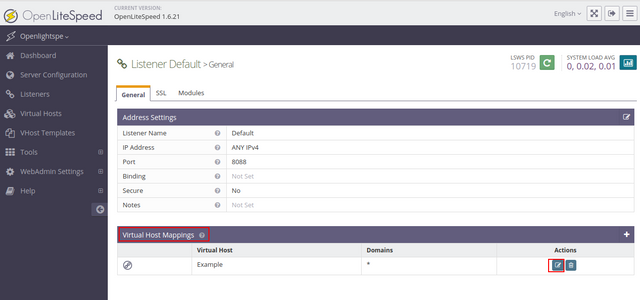
In the Virtual Host Mapping settings, click on the edit icon. You should see the following page:
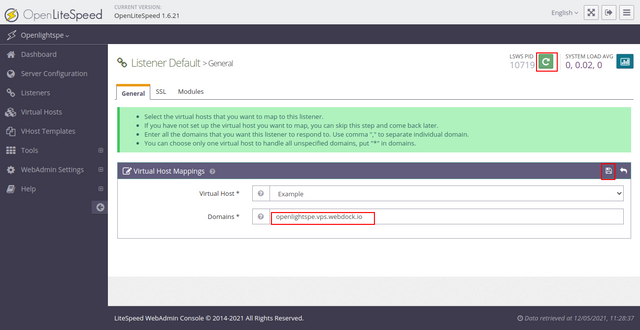
Provide your domain name in the Domain field and click on the Save button.
Now, click on the green icon to gracefully restart your server to apply the changes.
You can now access your OpenLiteSpeed frontend and backend on the default ports using your domain http://openlightspe.vps.webdock.io.
Install Certbot
Make sure snap is installed.
# sudo apt install snapd -y
Installing the latest certbot snap package.
# sudo snap install --classic certbot
And finally, link in the Certbot binary so it can be run from anywhere
# sudo ln -s /snap/bin/certbot /usr/bin/certbot
Generate Let's Encrypt SSL certificates
Let’s Encrypt is an open-source certificate authority that provides free certificates via Certbot client. Certbot is already installed with Snap on our LAMP/LEMP stacks.
Generate the Let's Encrypt certificates using the following command, replacing your own domain with the example below:
# certbot certonly --standalone -d openlightspe.vps.webdock.io
After generating the certificates, you should get the following output:
Saving debug log to /var/log/letsencrypt/letsencrypt.log
Plugins selected: Authenticator standalone, Installer None
Attempting to parse the version 1.15.0 renewal configuration file found at /etc/letsencrypt/renewal/openlightspe.vps.webdock.io.conf with version 0.40.0 of Certbot. This might not work.
Cert not yet due for renewal

You have an existing certificate that has exactly the same domains or certificate name you requested and isn't close to expiry.
(ref: /etc/letsencrypt/renewal/openlightspe.vps.webdock.io.conf)

What would you like to do?
- - - - - - - - - - - - - - - - - - - - - - - - - - - - - - - - - - - - - - - -
1: Keep the existing certificate for now
2: Renew & replace the cert (limit ~5 per 7 days)
- - - - - - - - - - - - - - - - - - - - - - - - - - - - - - - - - - - - - - - -
Select the appropriate number [1-2] then [enter] (press 'c' to cancel): 2
Renewing an existing certificate

IMPORTANT NOTES:
 - Congratulations! Your certificate and chain have been saved at:
   /etc/letsencrypt/live/openlightspe.vps.webdock.io/fullchain.pem
   Your key file has been saved at:
   /etc/letsencrypt/live/openlightspe.vps.webdock.io/privkey.pem
   Your cert will expire on 2021-08-10. To obtain a new or tweaked
   version of this certificate in the future, simply run certbot
   again. To non-interactively renew *all* of your certificates, run
   "certbot renew"
 - If you like Certbot, please consider supporting our work by:

   Donating to ISRG / Let's Encrypt:   https://letsencrypt.org/donate
   Donating to EFF:                    https://eff.org/donate-le
The above command will download all certificates to /etc/letsencrypt/live/openlightspe.vps.webdock.io
Configure Admin Panel to Use Let's Encrypt SSL
At this point, Let's Encrypt certificates are downloaded for your domain. Now, you will need to configure OpenLiteSpeed to use the Let's Encrypt SSL certificate.
On the OpenLiteSpeed admin panel, click on the WebAdmin Settings => Listeners. You should see the following page:
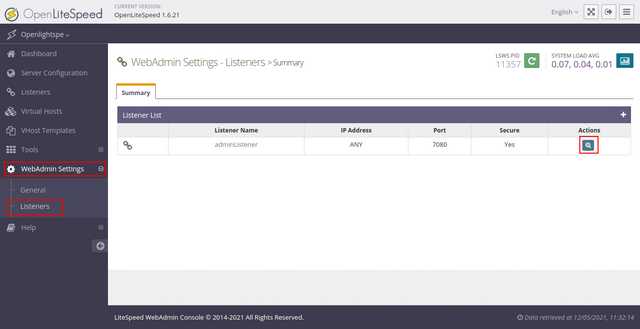
Click on the View icon and go to the SSL tab. You should see the following page:
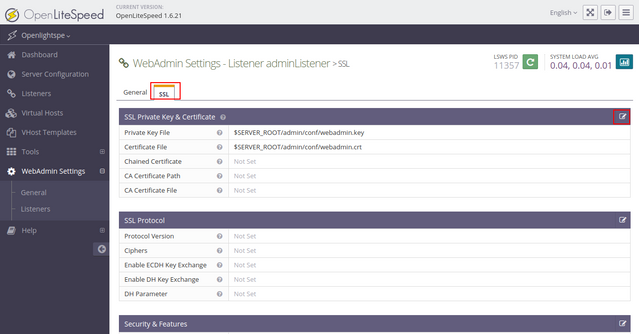
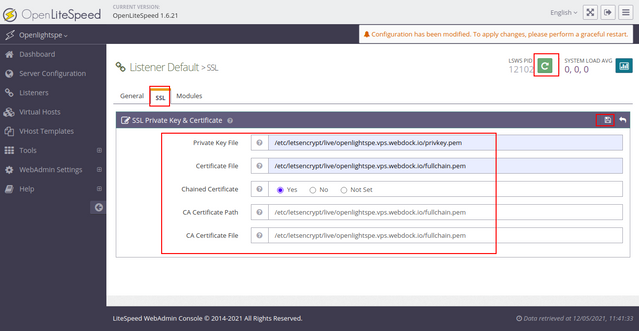
Click on the edit icon to edit the SSL settings. You should see the following page:
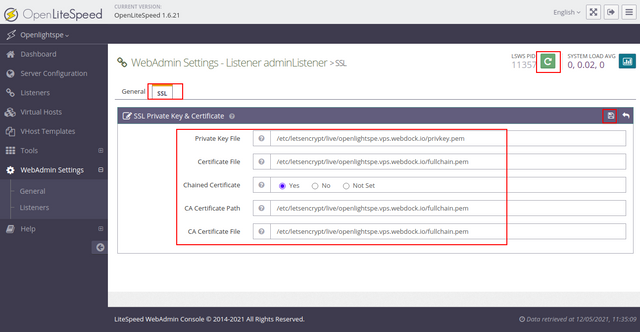
Provide the path of your Let's Encrypt SSL cert then click on the Save button to save the changes.
- Private Key File: /etc/letsencrypt/live/openlightspe.vps.webdock.io/privkey.pem
- Certificate File: /etc/letsencrypt/live/openlightspe.vps.webdock.io/fullchain.pem
- Chained Certificate: Yes
- CA Certificate Path: /etc/letsencrypt/live/openlightspe.vps.webdock.io/fullchain.pem
- CA Certificate File: /etc/letsencrypt/live/openlightspe.vps.webdock.io/fullchain.pem
Now, click on the green icon to perform the Graceful Restart to apply the changes.
You can now access the OpenLiteSpeed Admin panel securely using the URL https://openlightspe.vps.webdock.io:7080:
Configure Front-End to Use Let's Encrypt SSL
Next, you will need to configure OpenLiteSpeed frontend to use the Let's Encrypt SSL so you can server your website normally on port 443 (https).
To do so, click on the Listeners in the left pane. You should see the following page:
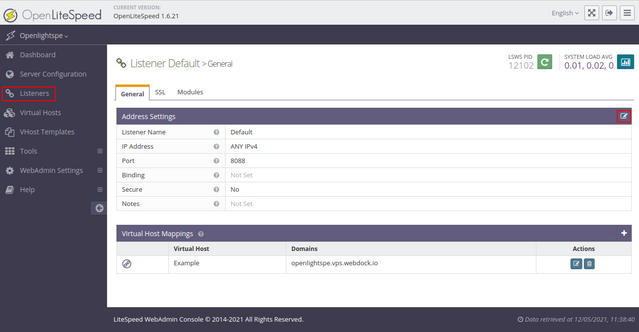
Click on the edit icon. You should see the following page:
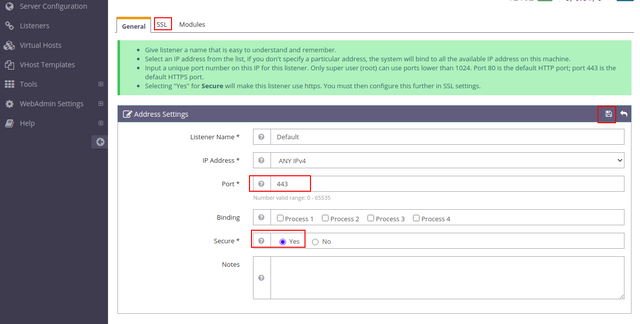
Replace the port 8088 with 443, Select Secure: Yes then click on the Save button to save the changes. Next, click on the SSL tab. You should see the following page:
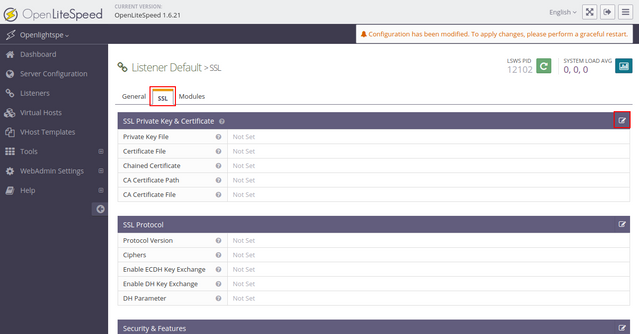
Click on the Edit icon. You should see the following page:
Provide the path of your Let's Encrypt SSL and click on the Save button. Next, click on the green icon to perform the Graceful Restart.
Now, you can access the OpenLiteSpeed frontend securely using the URL https://openlightspe.vps.webdock.io/.
Configure PHP
By default, OpenLiteSpeed ships with PHP version 7.4. If this fits you use case, you can use PHP 7.4. Else, you can follow the below instructions to use PHP 8.0
In this section, we will install the PHP version 8.0 and configure OpenLiteSpeed to use PHP 8.0. These general instructions should work for almost any other php version you may want to switch to.
First, install the PHP 8.0 with other required extensions using the following command:
# apt-get install lsphp80 lsphp80-common lsphp80-mysql lsphp80-curl -y
Once PHP 8.0 is installed, create a symlink to PHP 8.0 with the following command:
# ln -sf /usr/local/lsws/lsphp80/bin/lsphp /usr/local/lsws/fcgi-bin/lsphp5
Next, start the OpenLiteSpeed service using the following command:
# /usr/local/lsws/bin/lswsctrl start
Now, you will need to configure OpenLiteSpeed to use the newly installed PHP version 8.0.
On the OpenLiteSpeed admin panel, click on the Server Configuration => External App. You should see the following page:
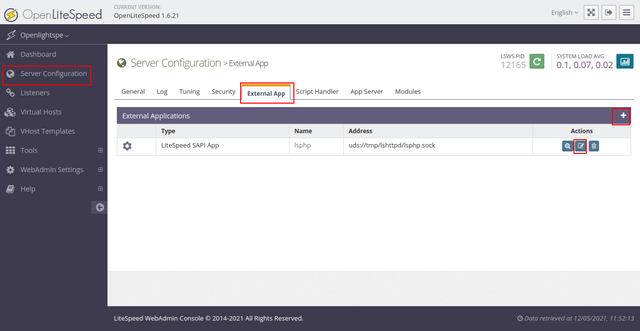
Click on the + icon to create a new app. You should see the following page:
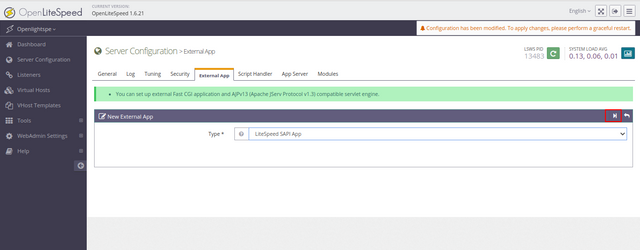
Click on the Next button. You should see the following page:

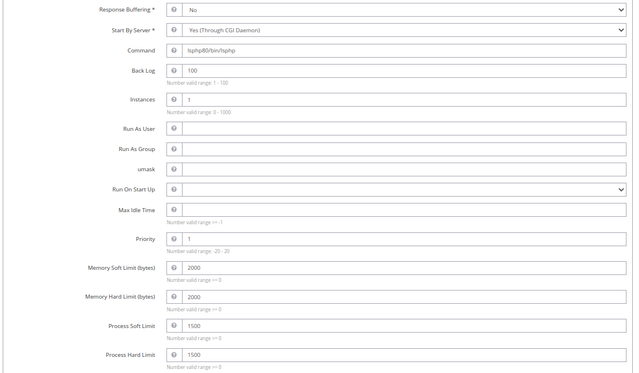
Add the settings you want for your new PHP 8.0 version and click on the Save button.
Next, click on the Script Handler tab and edit the default setting. You should see the following page:

Next, switch the Handle name to lsphp80 from the drop-down menu then click on the Save button to save the changes. Next, click on the green icon to perform the Graceful restart.
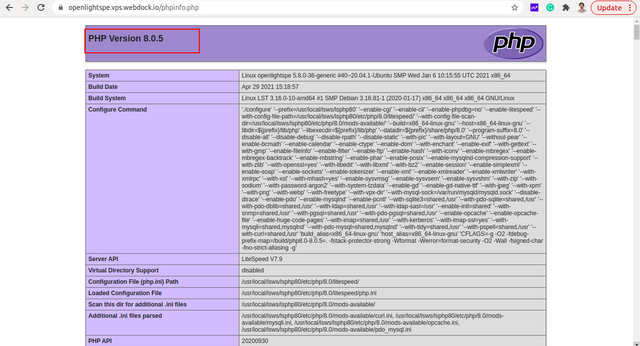
Now, verify whether your PHP version has been updated or not using the URL https://openlightspe.vps.webdock.io/phpinfo.php. You should see the updated version of PHP in the following page:
Conclusion
In the above guide, you learned how to install OpenLiteSpeed on Webdock. You also learned how to secure OpenLiteSpeed with Let's Encrypt SSL. You can now create and host your website using the high-performance OpenLiteSpeed web server. We hope you found this guide useful.
